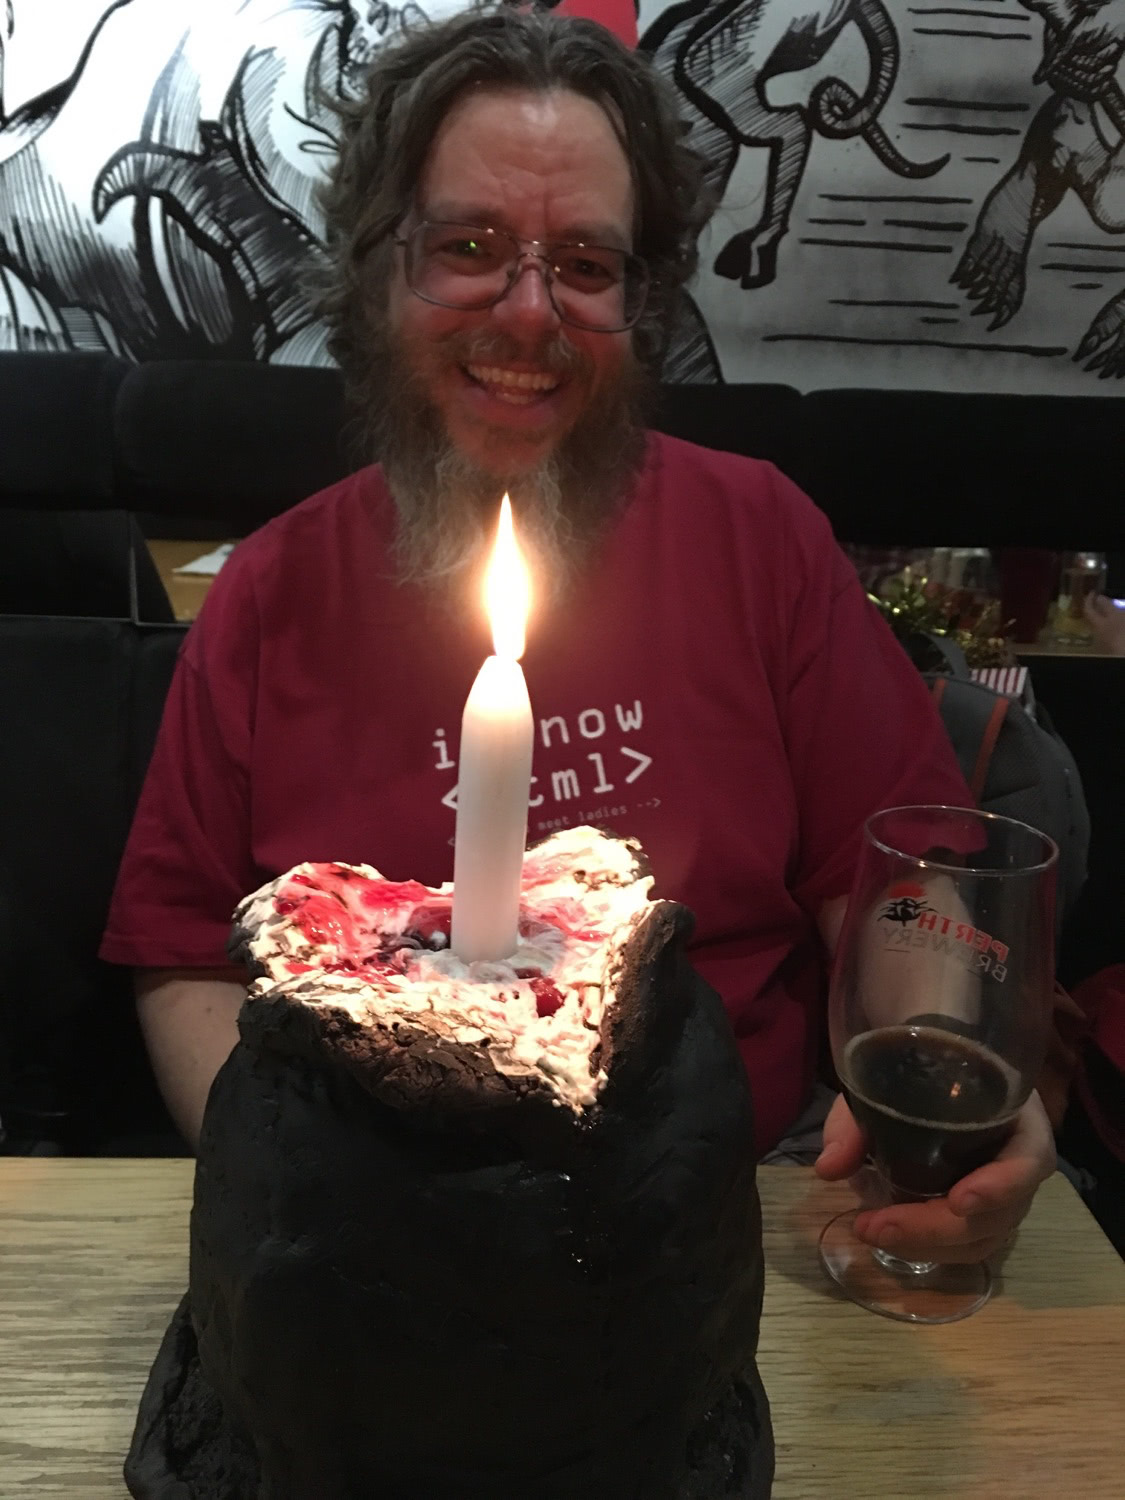
My hubby had a birthday this week. It’s a prime number- he takes note of those kinds of things.
He is a super fan of the Alien movies.
I’m a fan of using different mediums to create art pieces- and baking is one of my favourite indulgences when I can share the results with awesome friends.
Today’s post is part 1, as I will have made 3 different elements of the Alien movie by the end of the weekend… two celebrations, 1 has already happened.
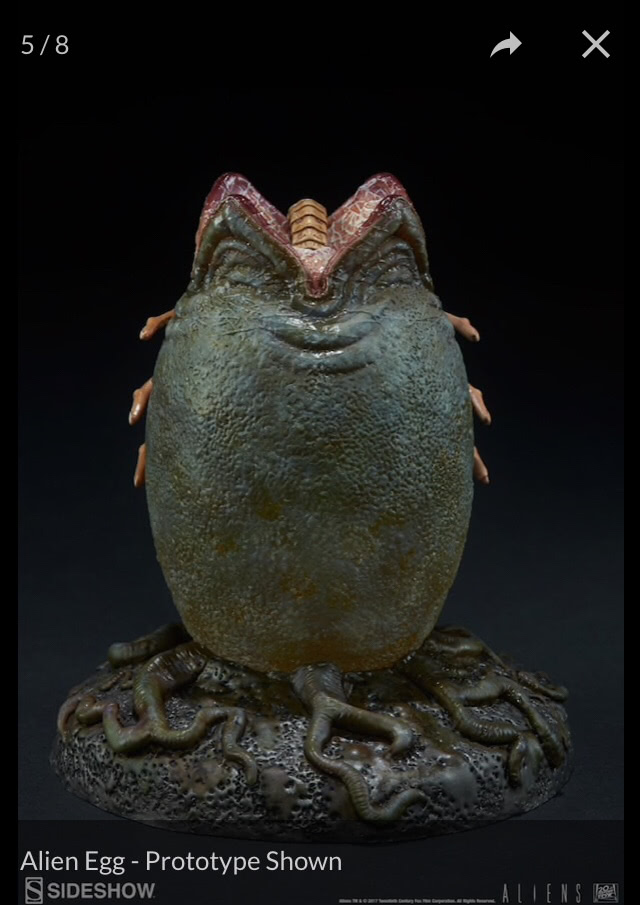
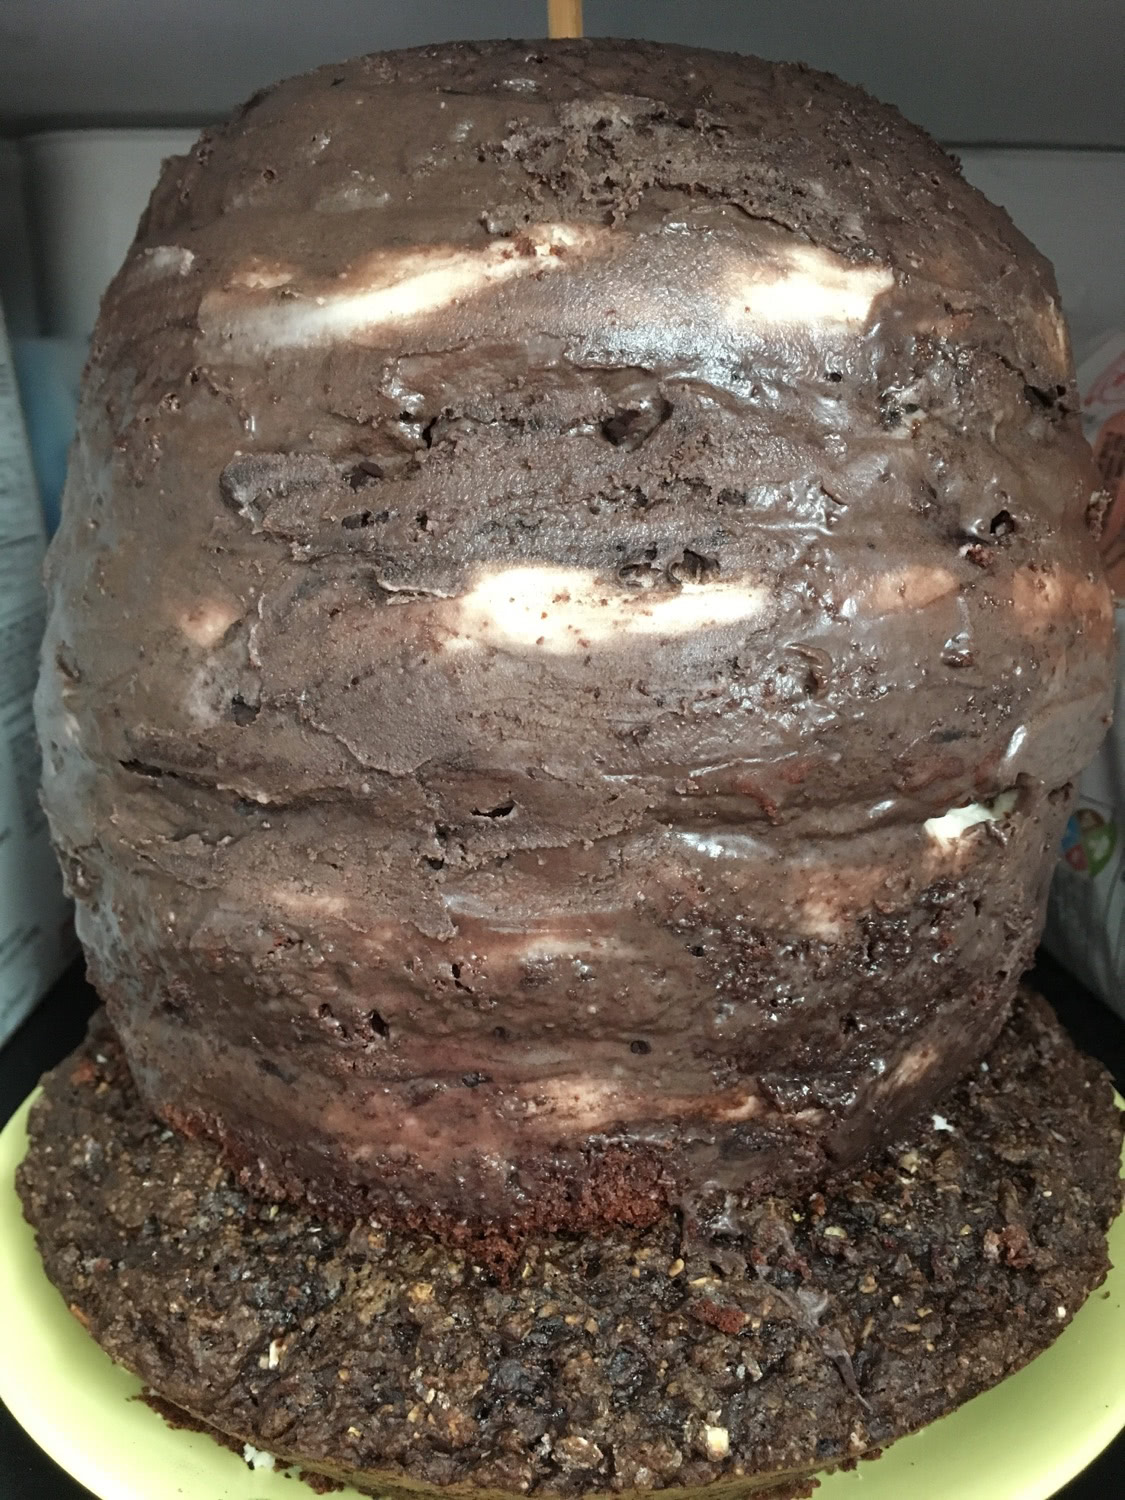
What came first- the egg…the Alien Egg:
This sculpture along with an entire Pinterest cluster of pics were my inspiration for the birthday desserts I decided I would attempt. I decided this about 2 weeks before his birthday. Two weeks where I had full time work in my design studio and busy weekends… but inspiration is a great place to start… and I cannot help myself, once I get an idea, I have to try to get it done!!
I laid out my plan – I’ve made many Black forest inspired birthday desserts for my husband already in our 21 years together, and I always resort to keeping the cake, pie filling, and whipping cream parts simple so that I can be more creative with the deployment of the piece.
A quick trip to the Bulk Barn < this post was not sponsored by them, but it’s a great Canadian place to find stuff in bulk and fun to check out!> turned into 45 minutes of wandering around inside looking at all of my options, but I found some fun stuff to play with and use to create the Alien Egg Cake!
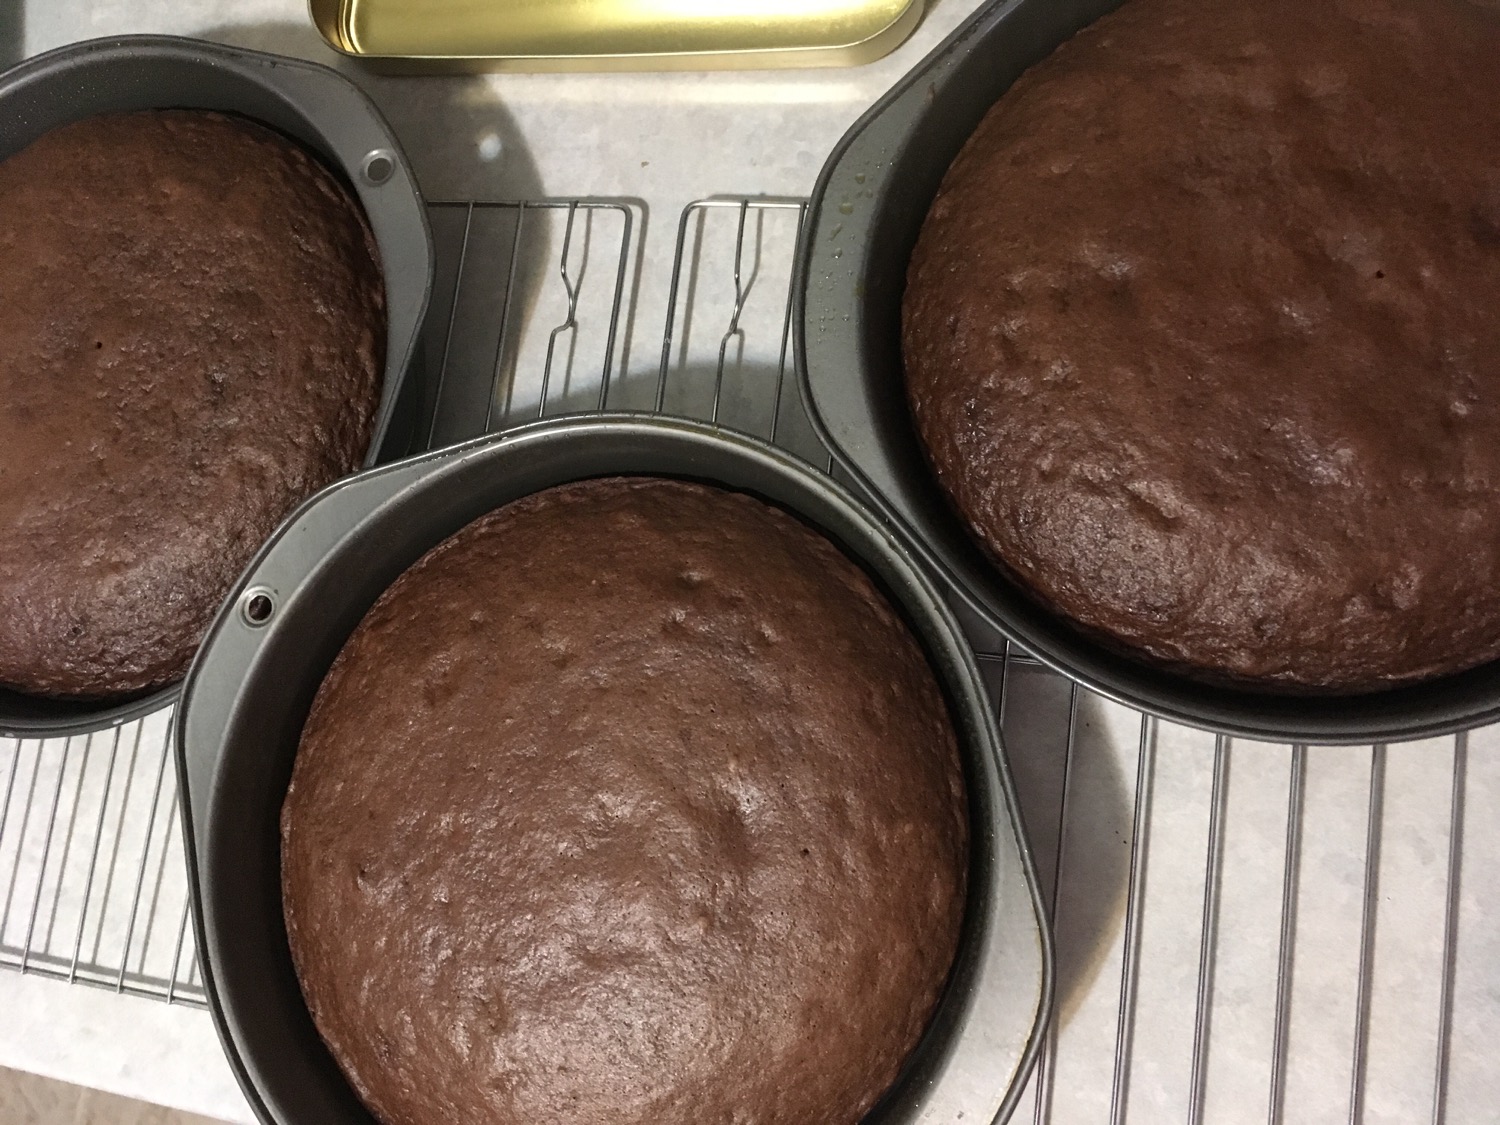
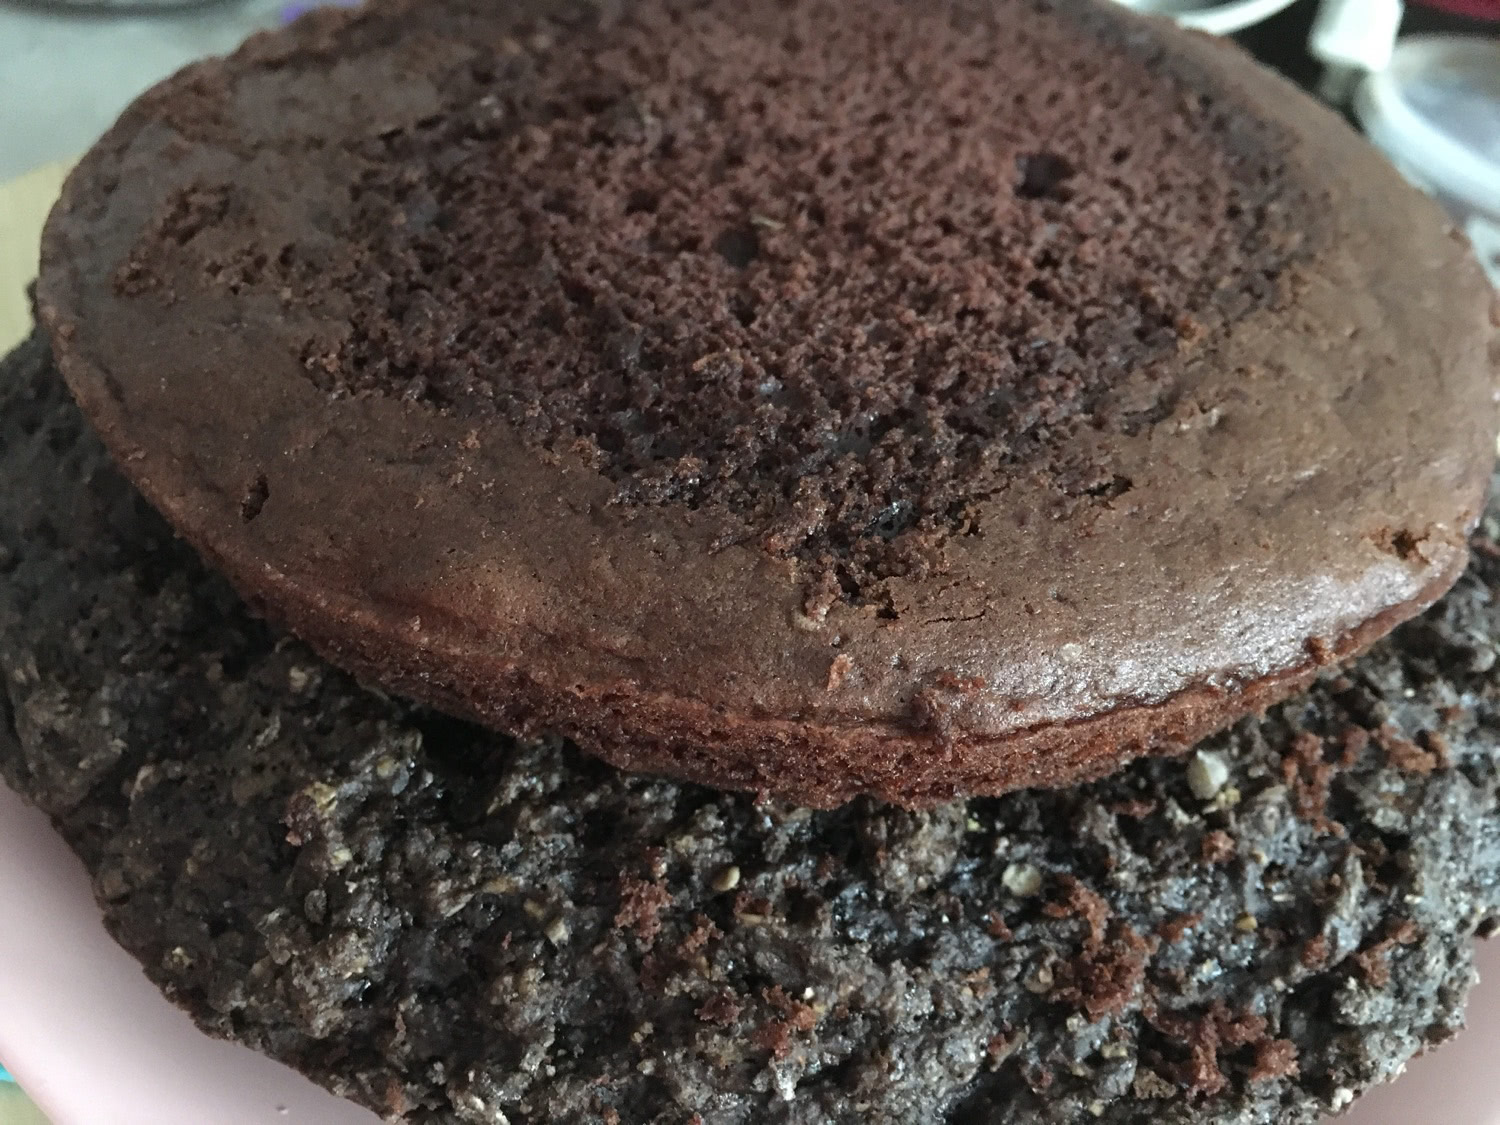
I made 2 Devil’s Food cake mixes up, dividing them between 3 – 8 inch/ 23 cm layers and 2- 8 inch/ 23 cm pie plates – hoping the curved edges would save me some time in the carving to come.
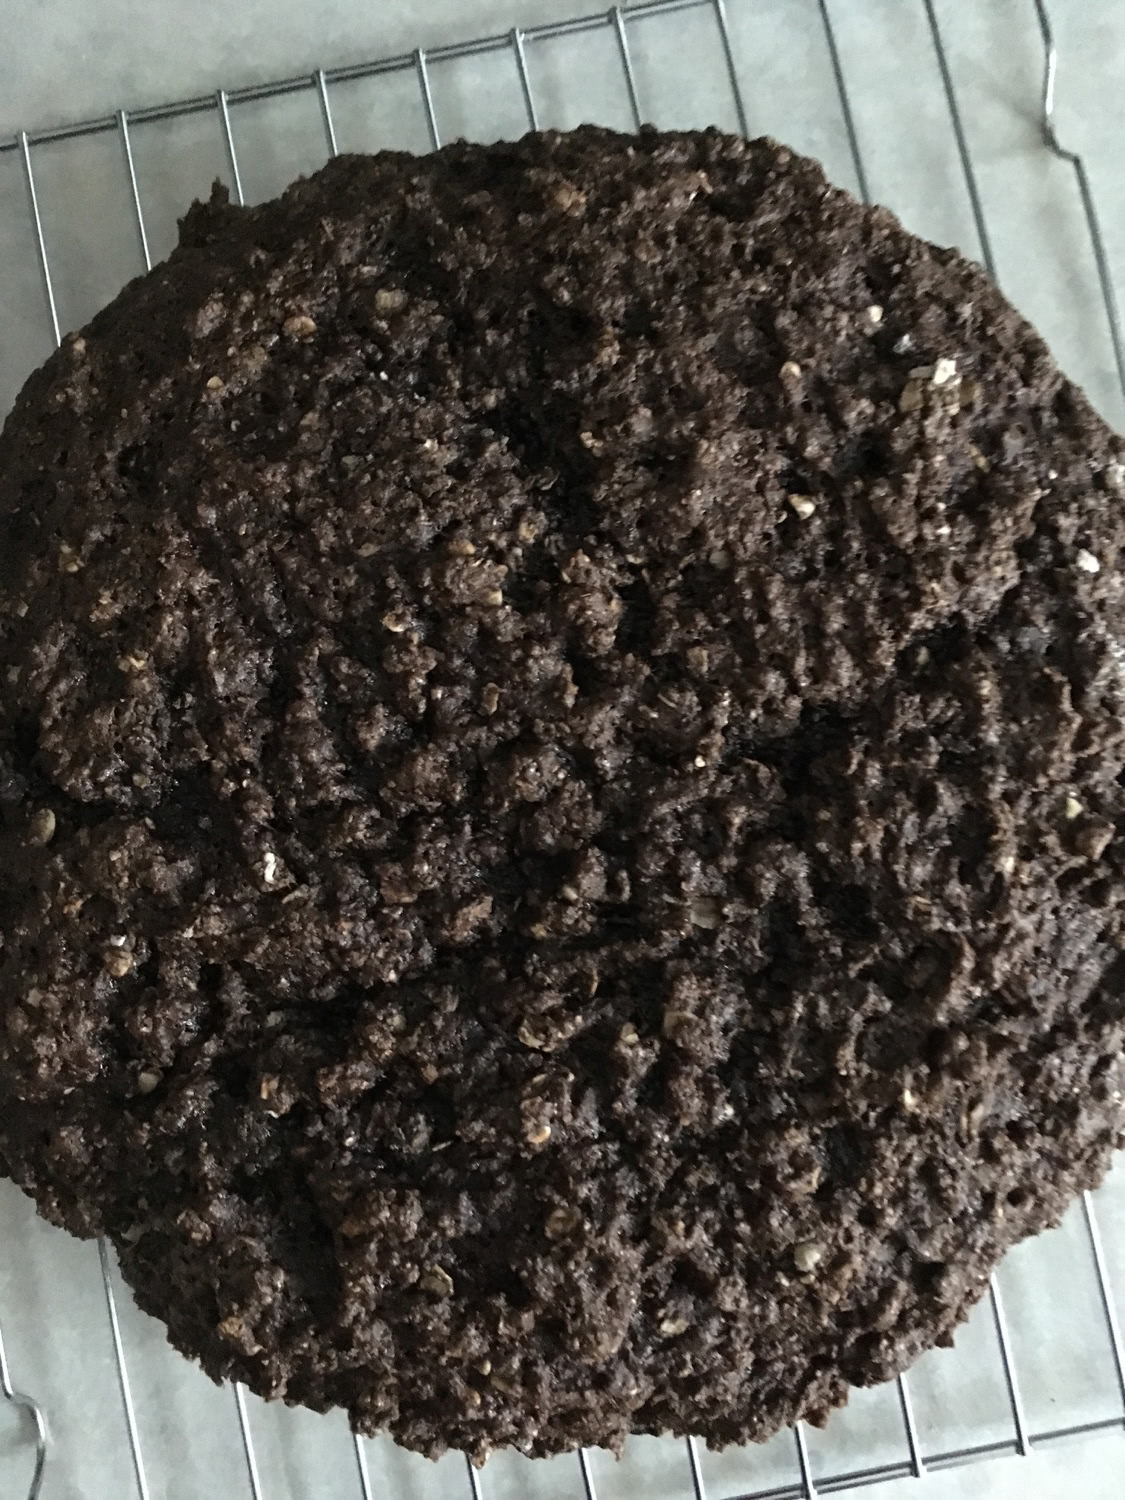
Then I realized that the fluffy, scrumptious devil’s food cake was going to be very light, and with 5 layers, I wanted a base layer that had some solidness to it.
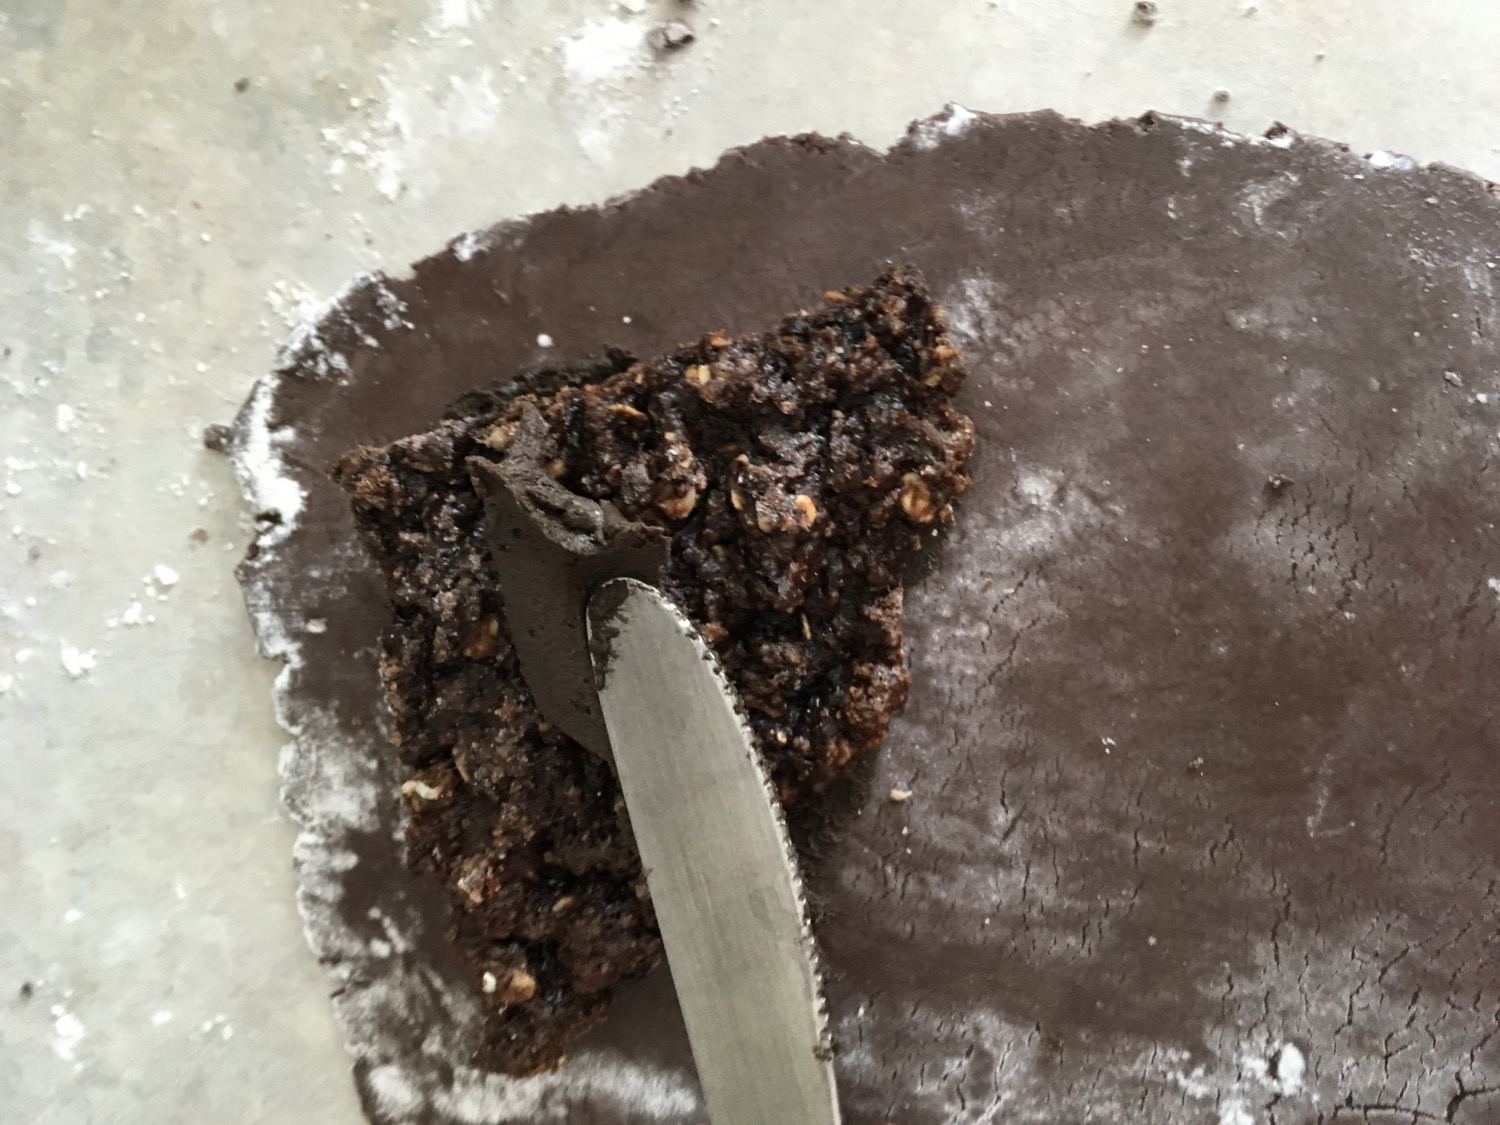
I pulled out my Betty Crocker cookbook from the 70s and found the Chocolate-Cherry Recipe on page 233, with its variations that include an Oatmeal-Molasses cake – and I added the black cocoa I had picked up to that version and created the most awesome base that already looked like rocky ground surface! Bonus!
As mentioned, the cake layers were made up in advance, and I wrapped them in wax paper and froze them. I took them all out an hour before I was going to start the build to defrost them – and so then the stacking began.
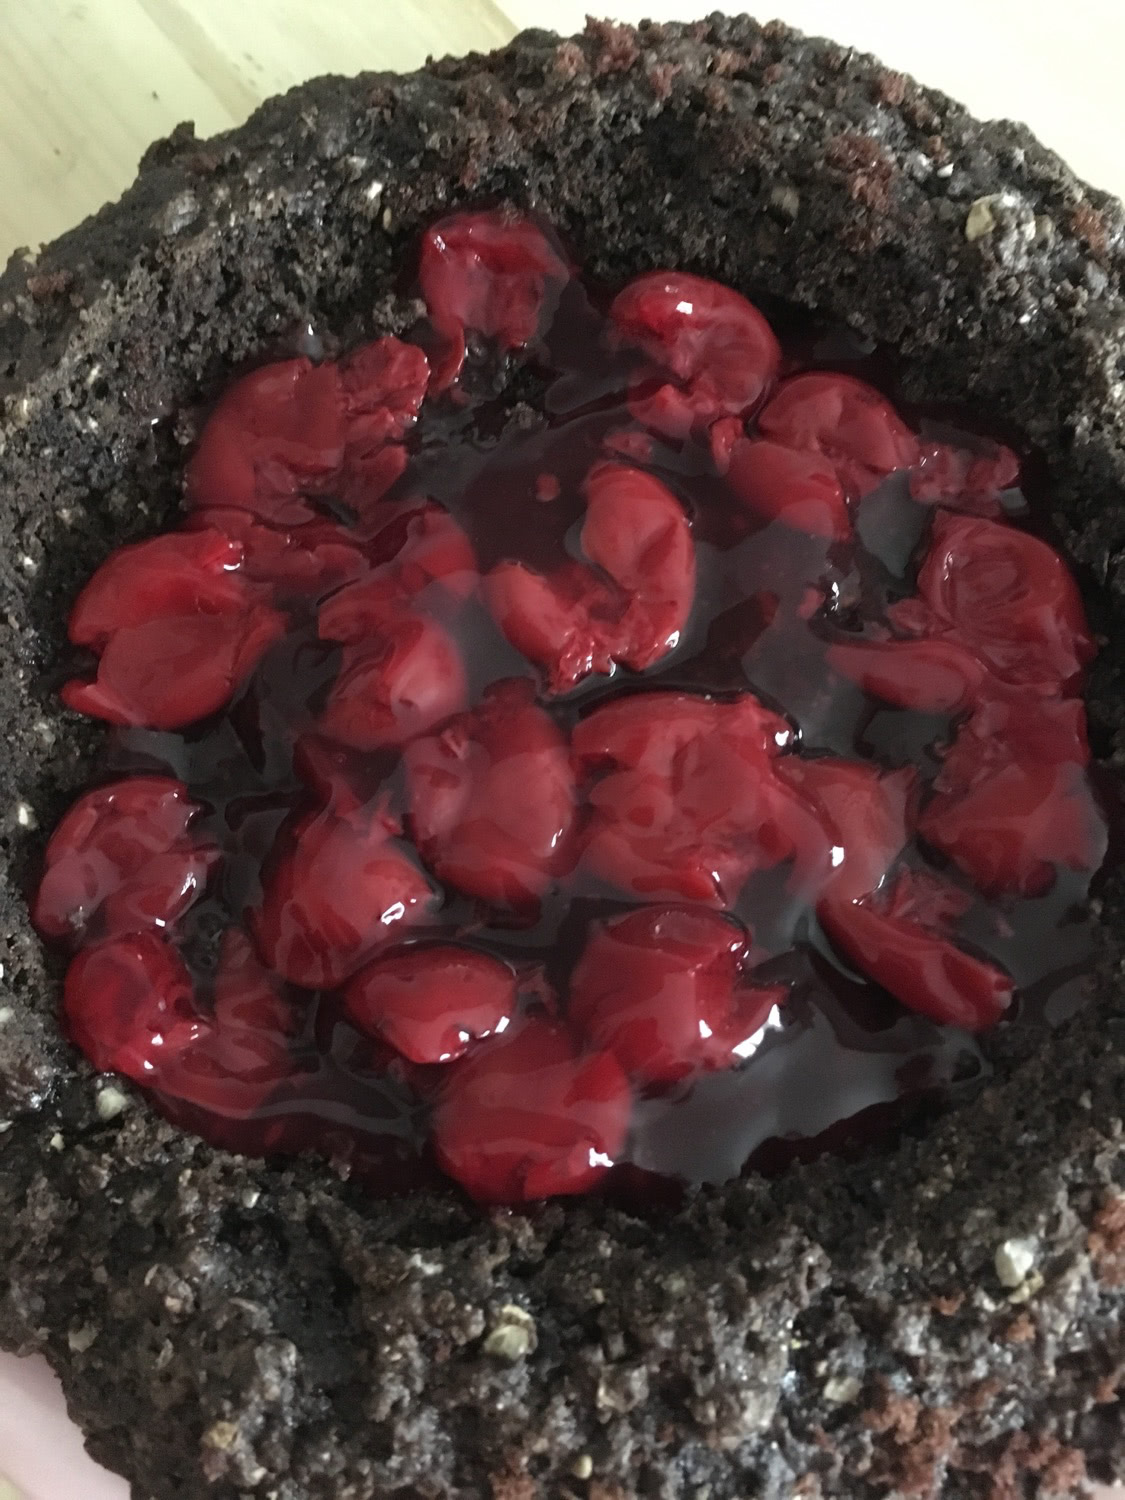
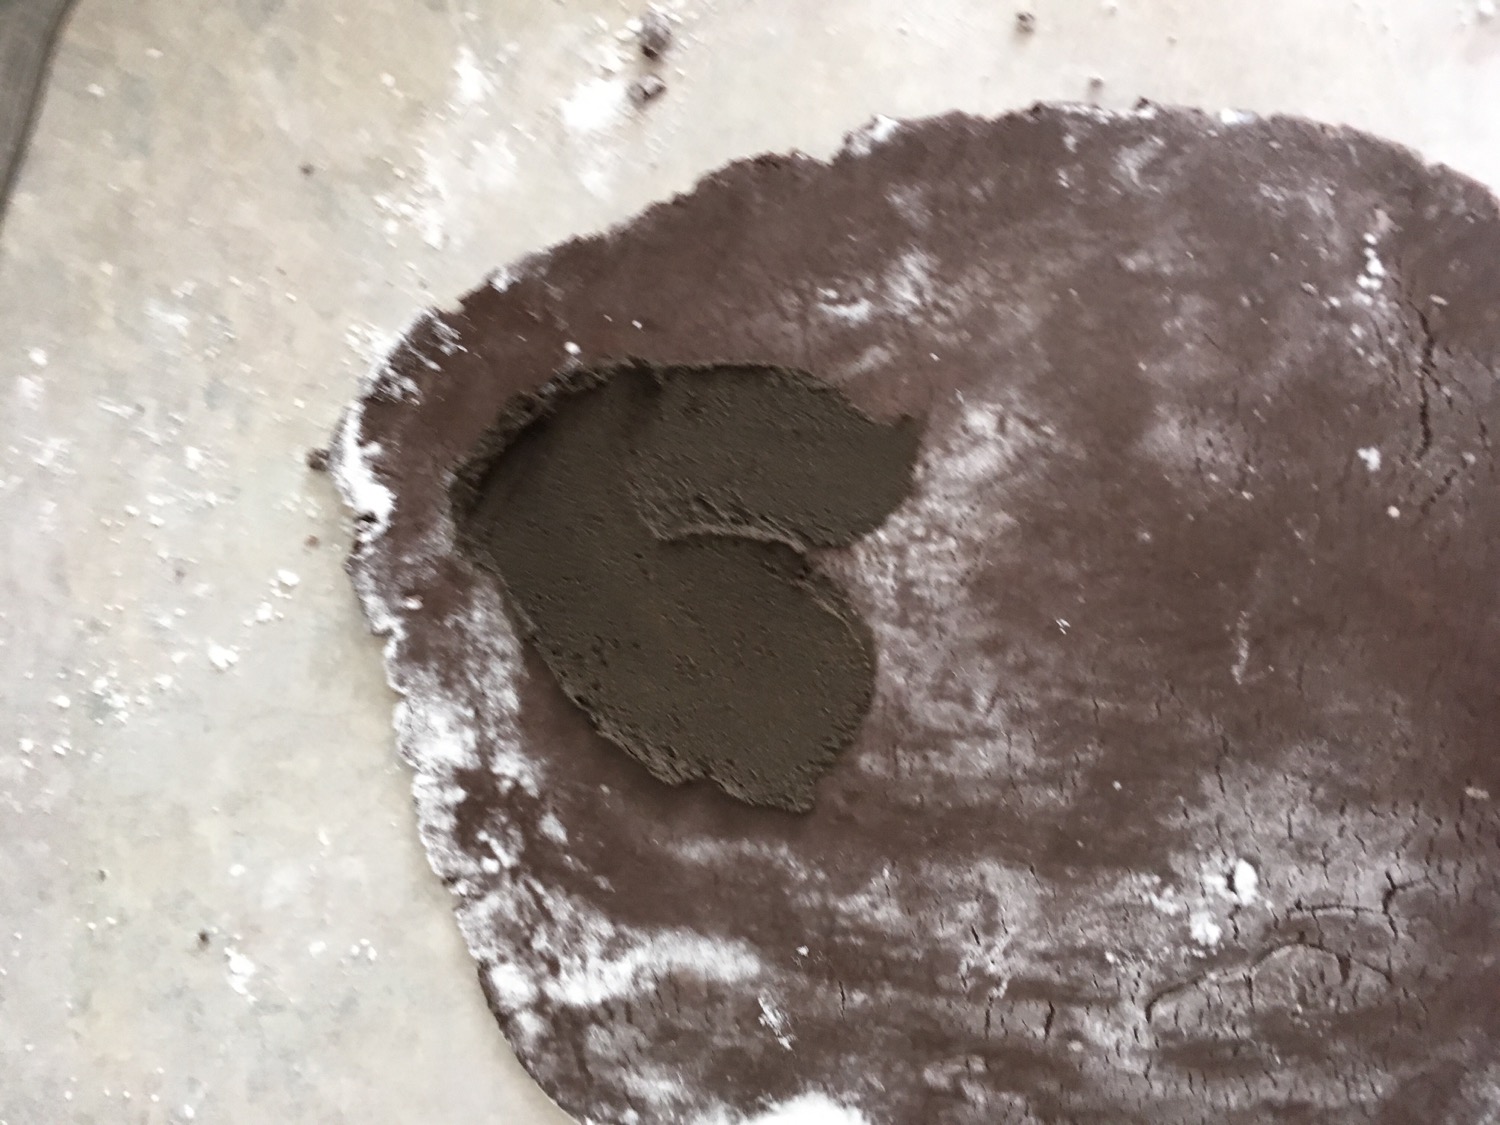
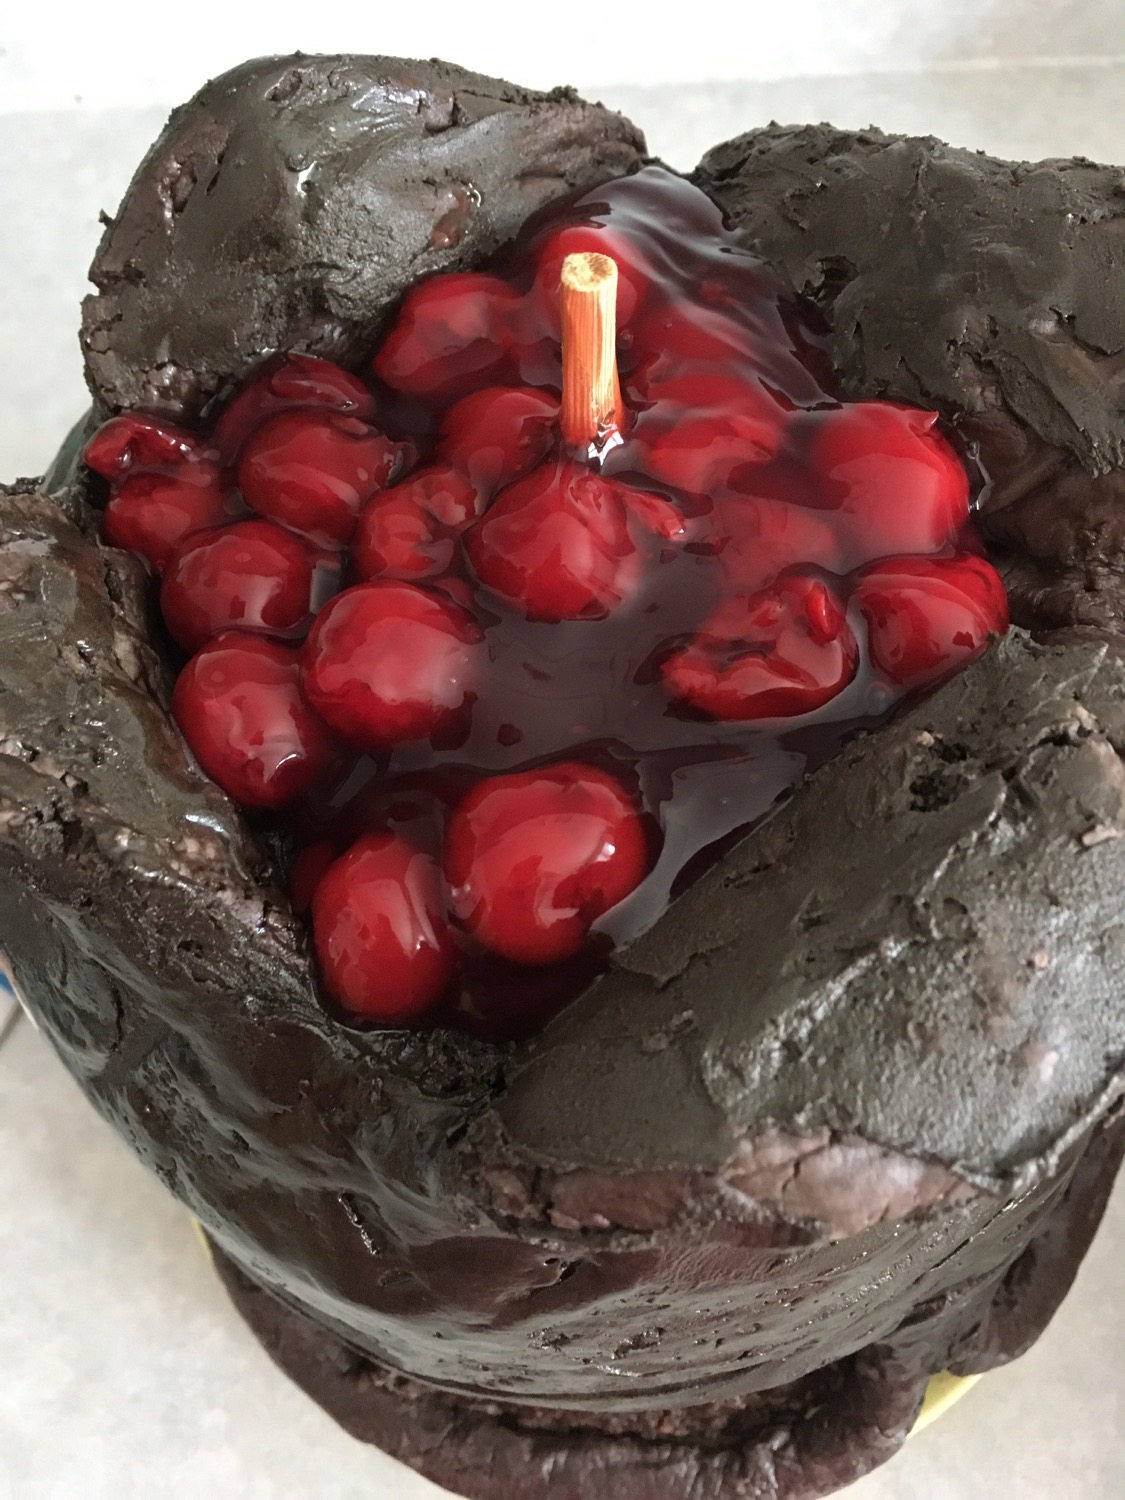
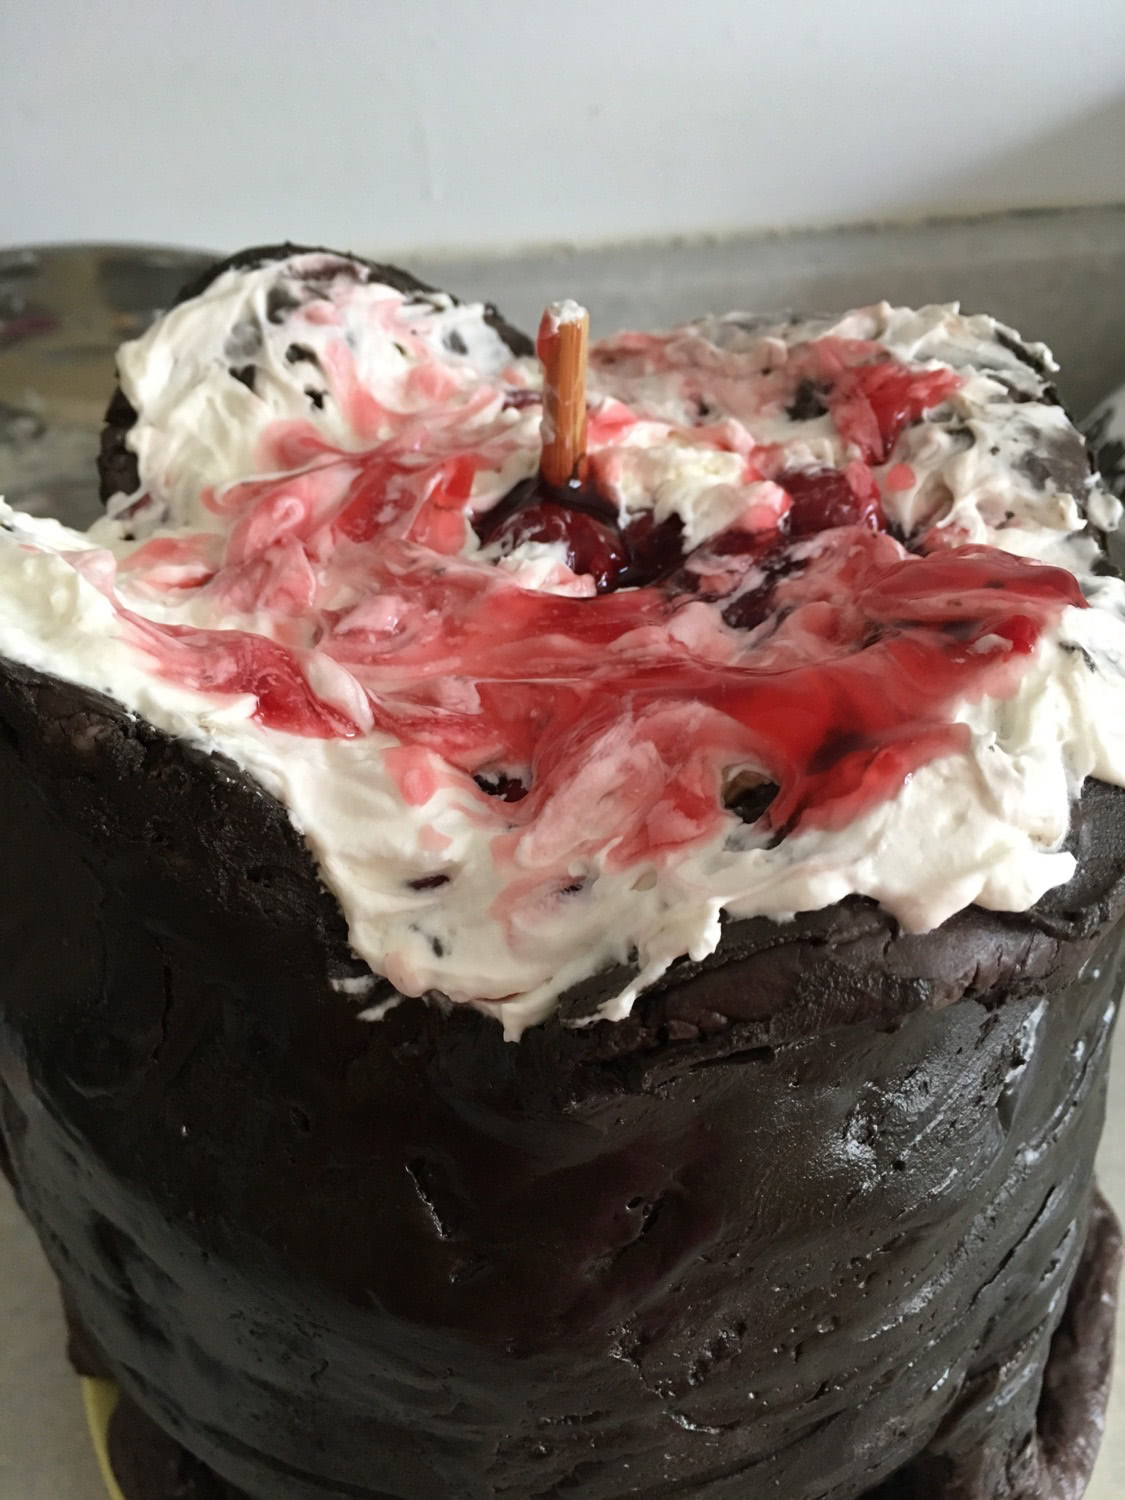
I carved out the centre of the ground layer and saved the circle carefully for later, and filled the nest with some of the cherry pie filing – canned, low sugar, but nothing fancy! As you can see, I smushed the cherries a bit as well…
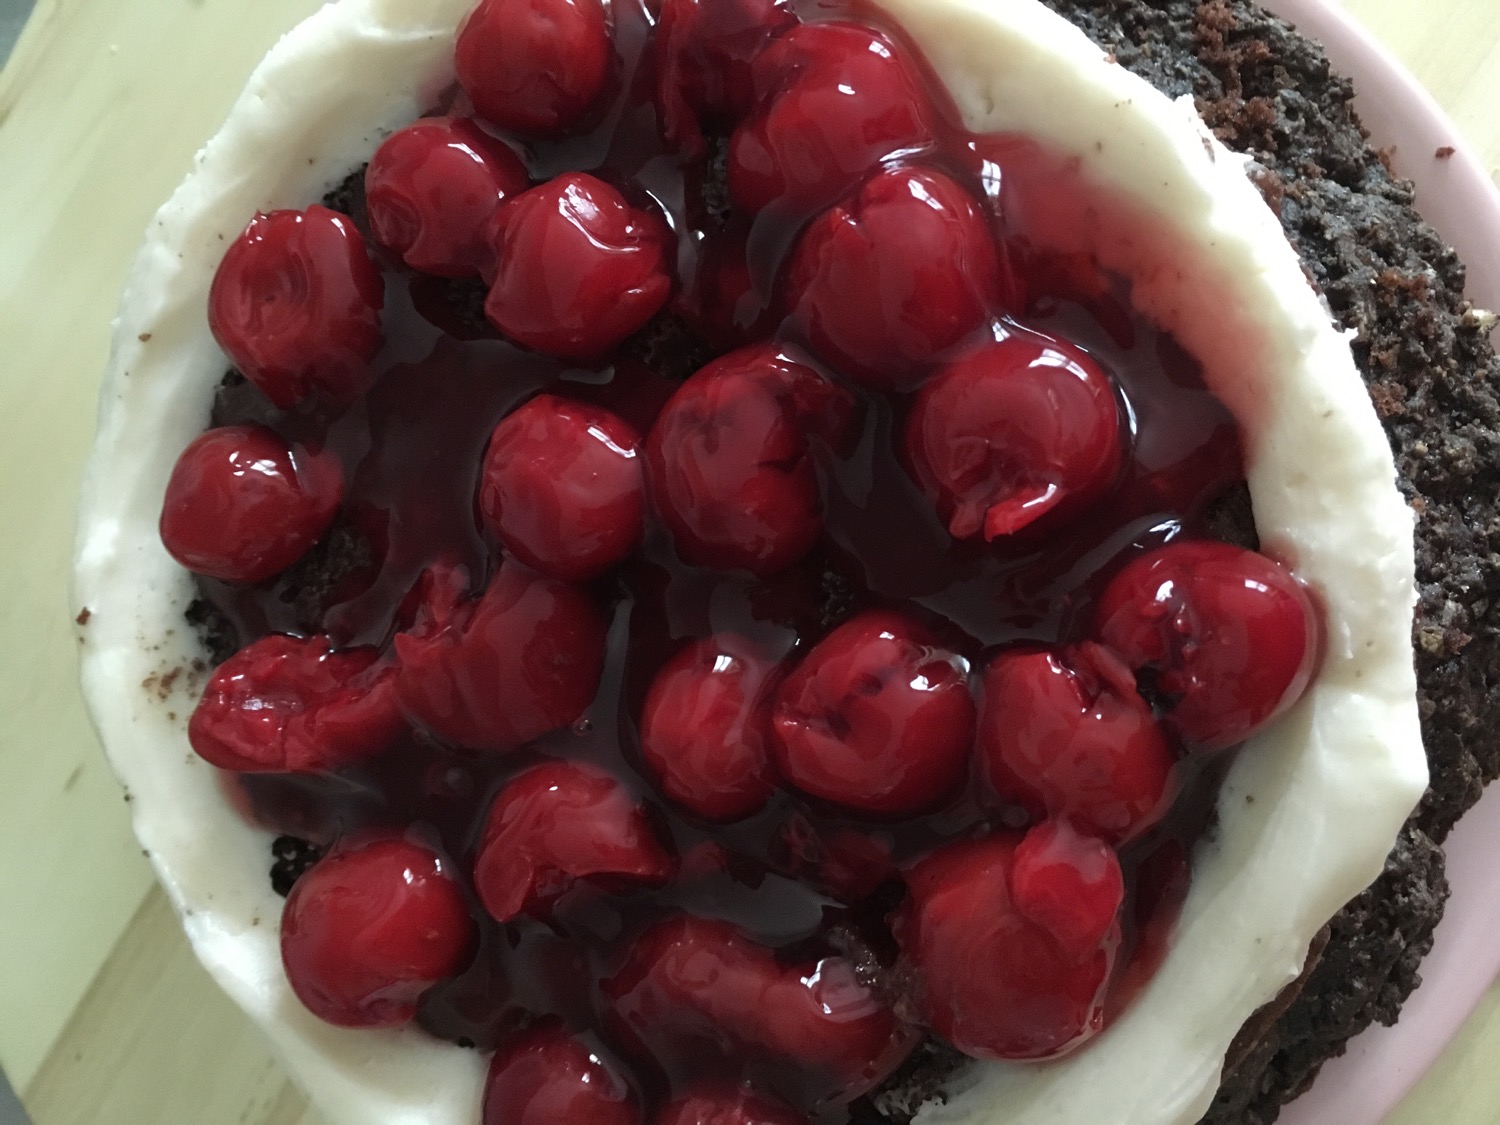

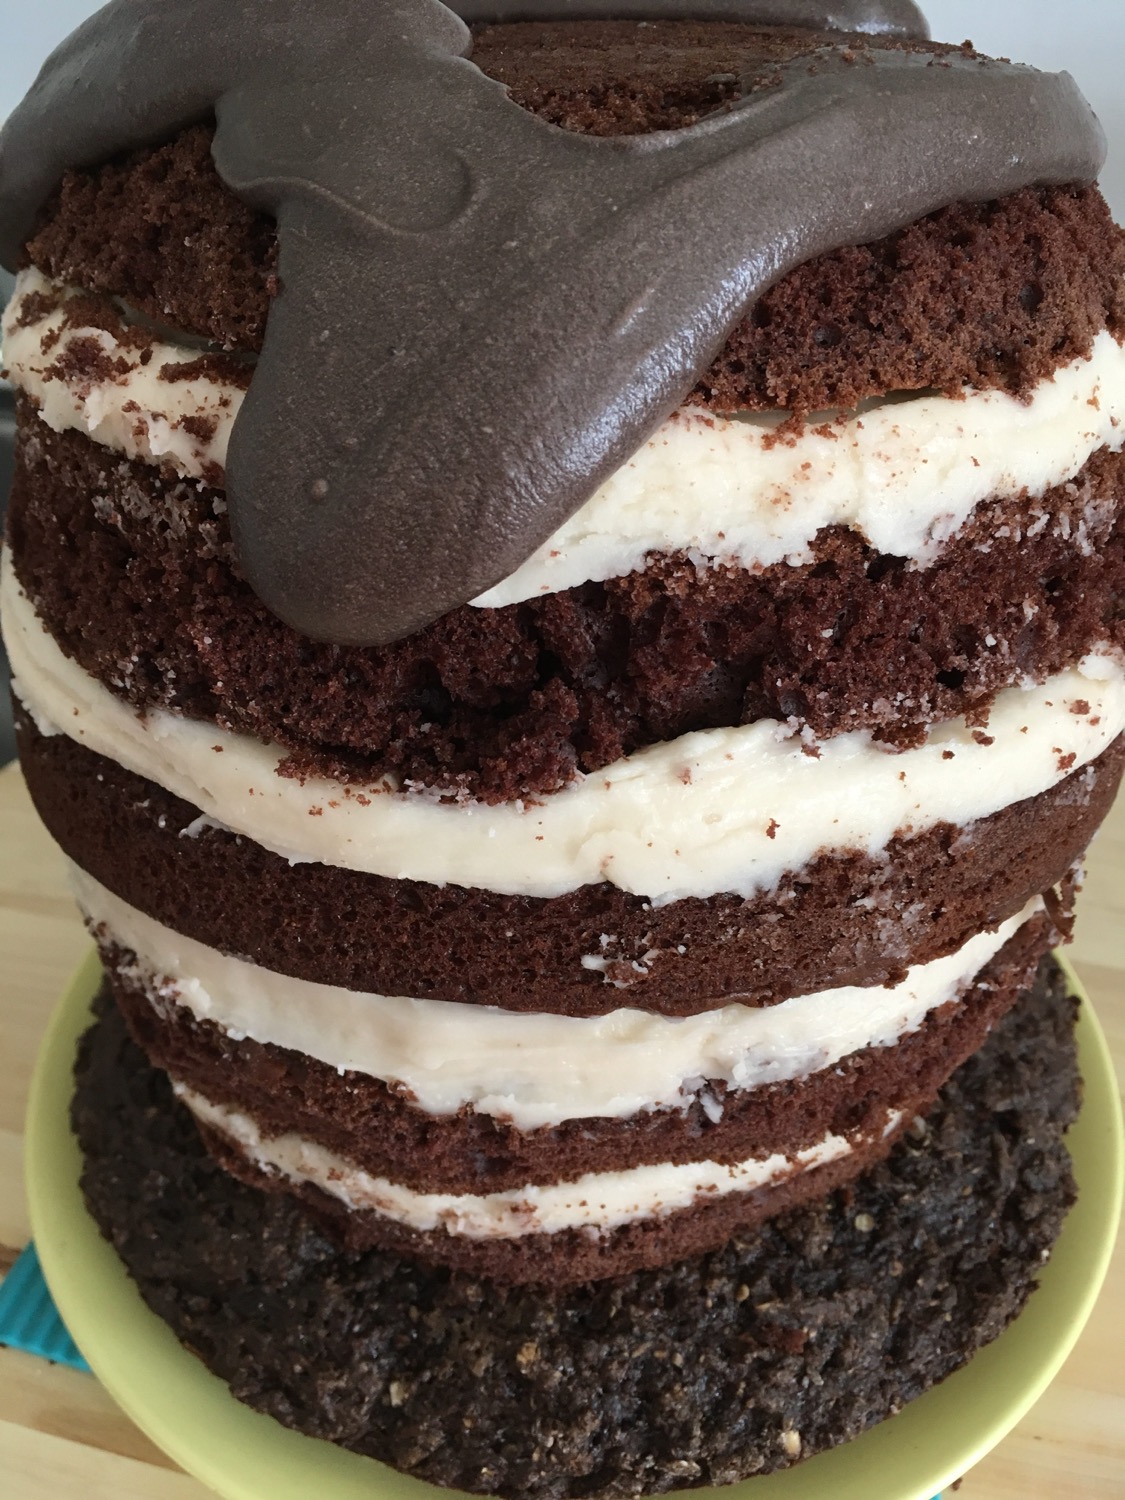
I did not get pics of every single step, including not getting shots of the carving, but the idea is straight forward – stack the layers, alternating the filling between the pie filing and whiping cream, and be sure to create a butter cream wall on each layer to keep the filling contained.
The butter cream recipe I used was again from the Betty Crocker cookbook, and I divided it in 2, adding black cocoa and a tiny bit of spiced rum, along with some green food colouring to half.
After it was all stacked and a bit of extra mortar < buttercream > was applied to fill in any spaces, the cake chilled in the fridge for at least an hour, during which time I worked on the fondant – which comes later in this tale…
To finish the cake part itself – after it was chilled, I carved the egg shape as best I could, saving the chocolate cake bits for Part 1.5 – which I did not know how I would use the cake bits, but never throw food out if it’s still good!
I learned back in my teen years, when I would voraciously read the Wilton cake decorating cookbooks we had < thanks Mom> that you want to apply a “crumb coat” or base coat of thin icing to hold all of the loose crumbs in place. You let it dry out a bit before applying your outer layer of icing and it keeps the outer icing clean. This is now common knowledge, of course, with all of the baking shows we can watch !
And then the cake went back into the fridge for more chillin’ time.
Next up – New adventures – Making fondant!
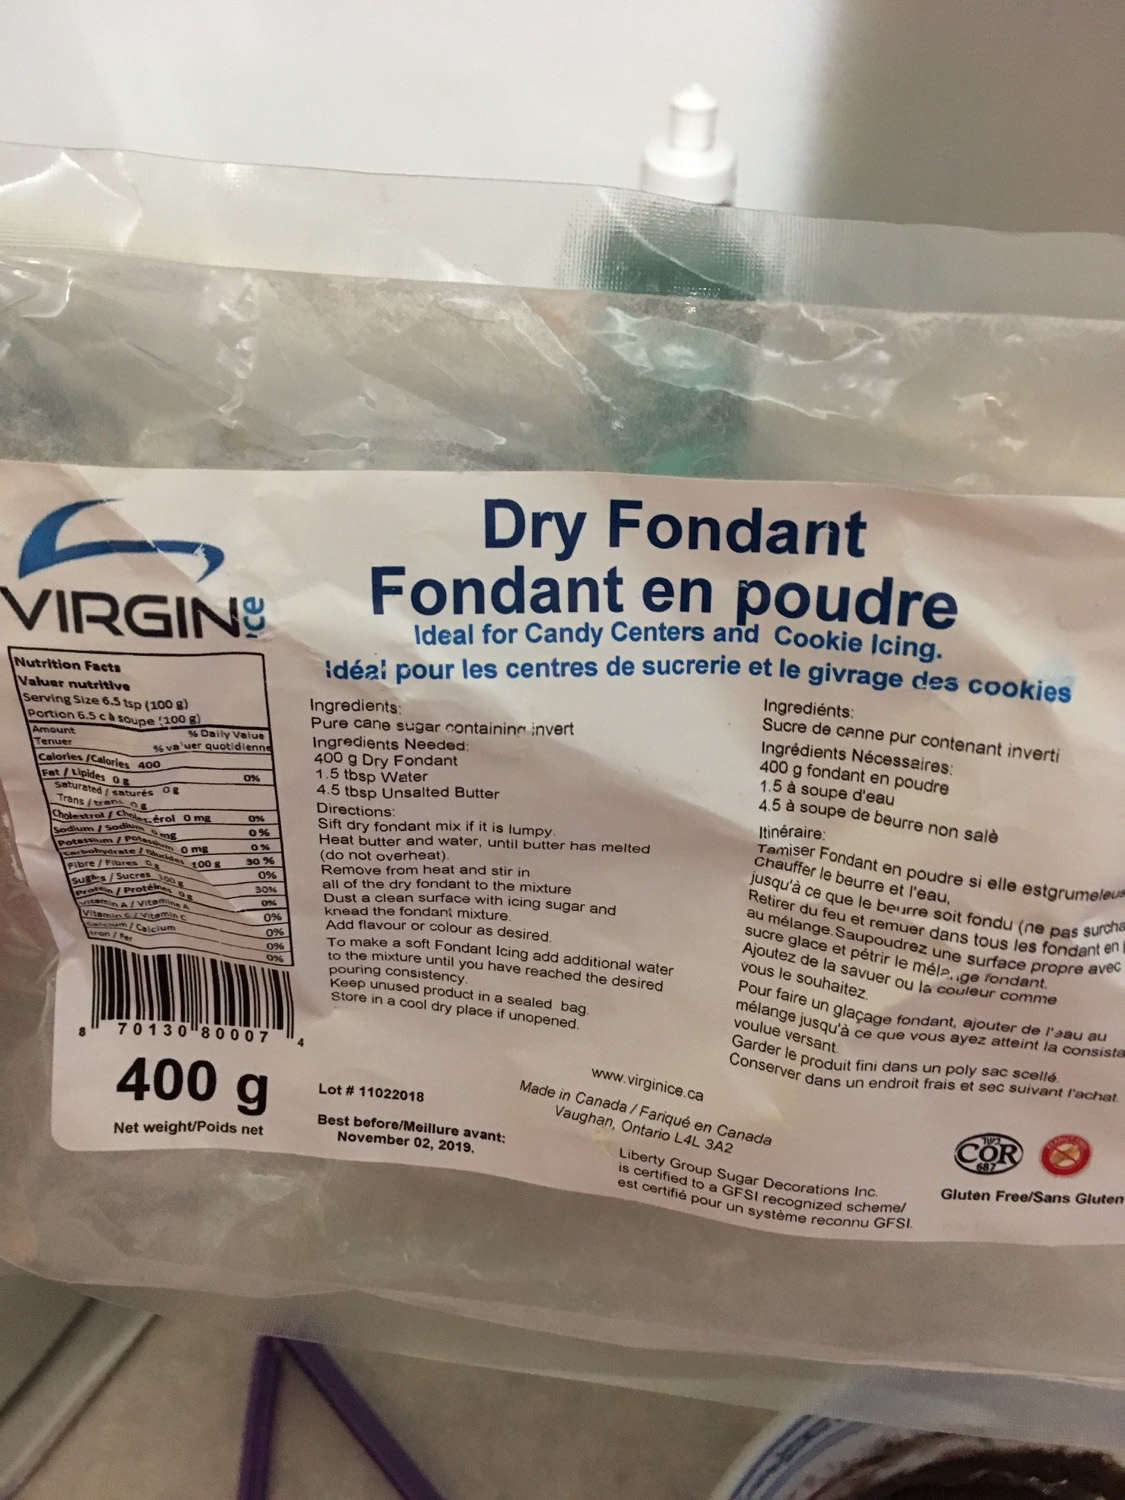
Again, a purchase from the Bulk Barn – after perusing ALL of the fondant options, I decided to try the dry. I used olive oil< I know it sounds weird – but it worked> instead of the butter called for. To get the colour I wanted, I just added some black cocoa to it and it worked wonderfully!!!!
I had heard that many people don’t like the taste of fondant, so I figured with it now having a cocoa flavour and the olive oil cutting the sugary taste, it might be ok – it seemed to go over well !
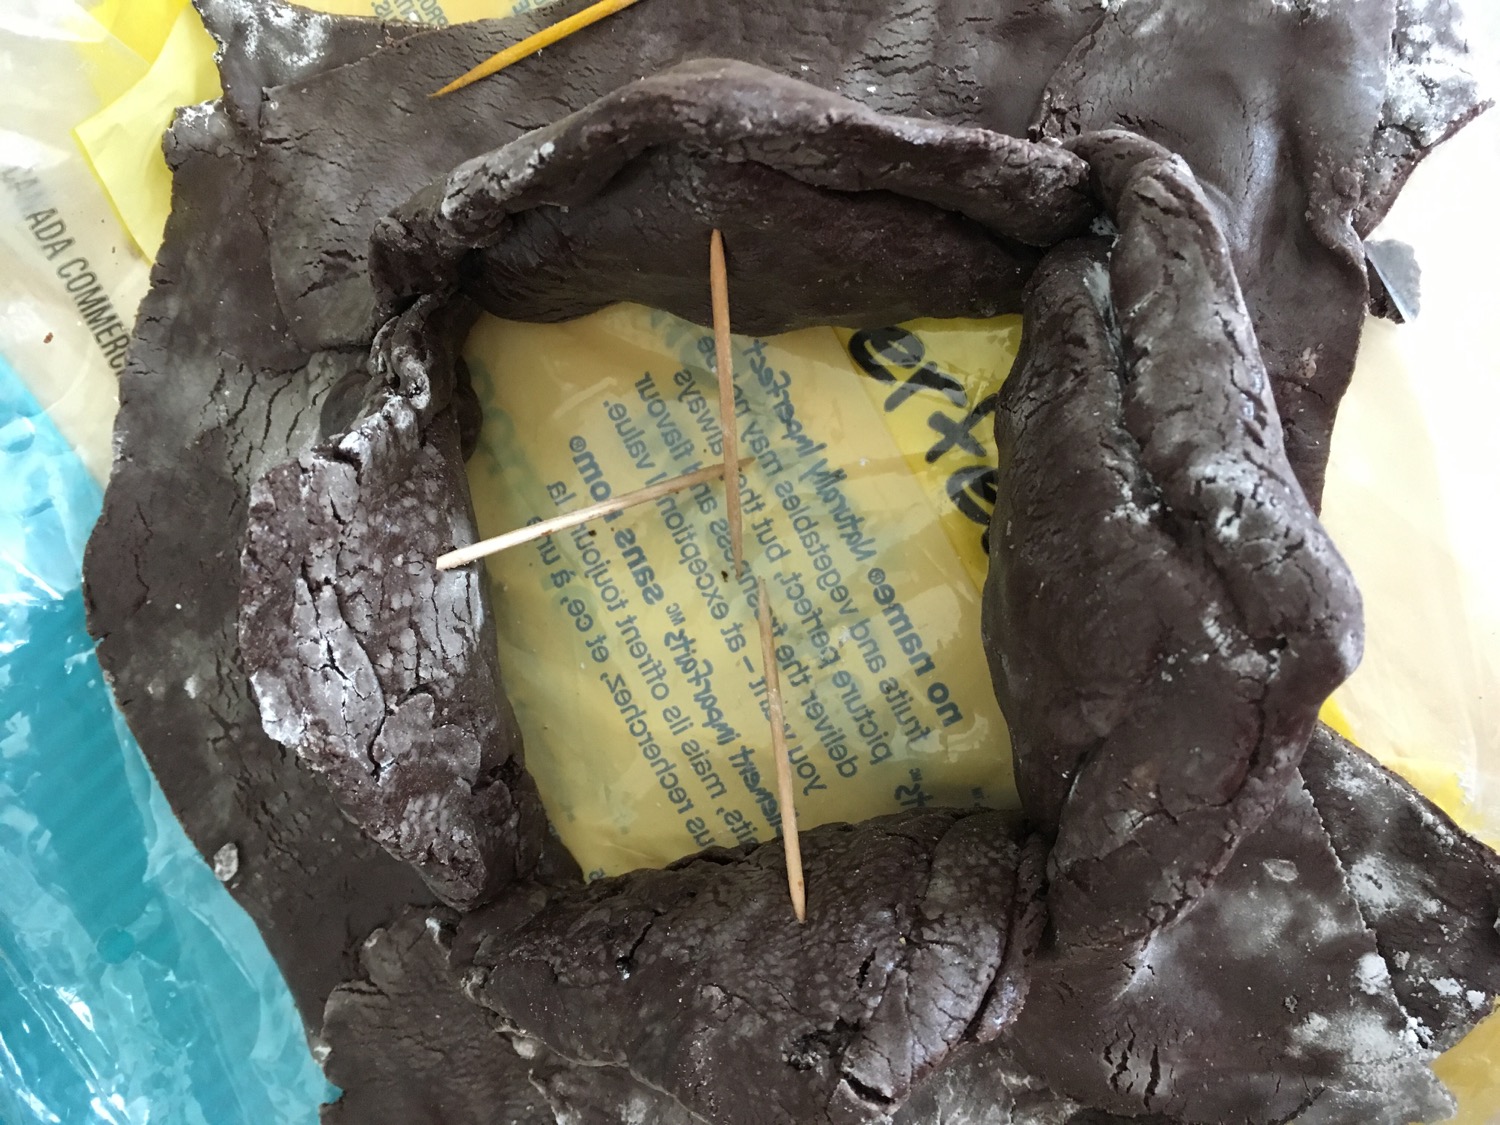
I did not want to cover the entire cake in fondant, but use it to create the opening flaps at the top of the egg and to cover the root system at the base.
I had made the fondant the day before, put it back into it’s original bag as it fit nicely and would keep it moist and let it chill overnight.
When I took it out, I let it warm to room temperature and it had a great playdough-like consistency. Using icing sugar on the counter, to keep it from sticking, I easily rolled it out. The first use was to wrap the four quarters of the circle from the base cake I had cut out earlier.
Buttercream is used as glue. Necessary and makes the fondant stick well and stay in place.

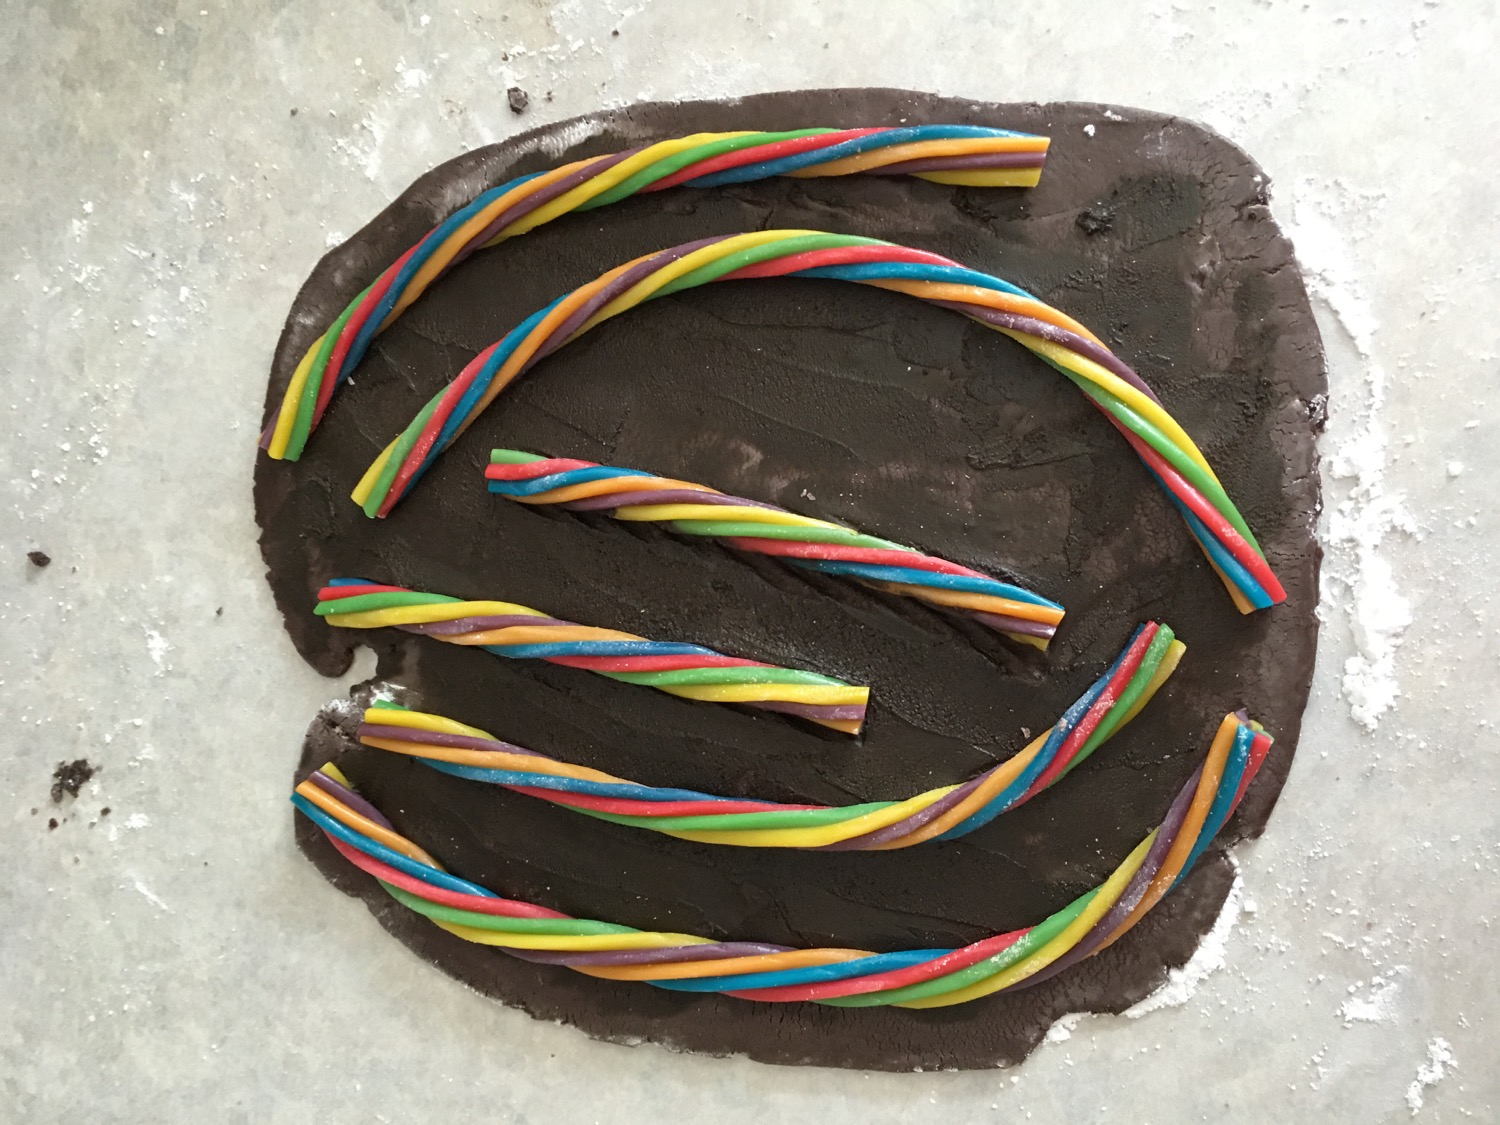
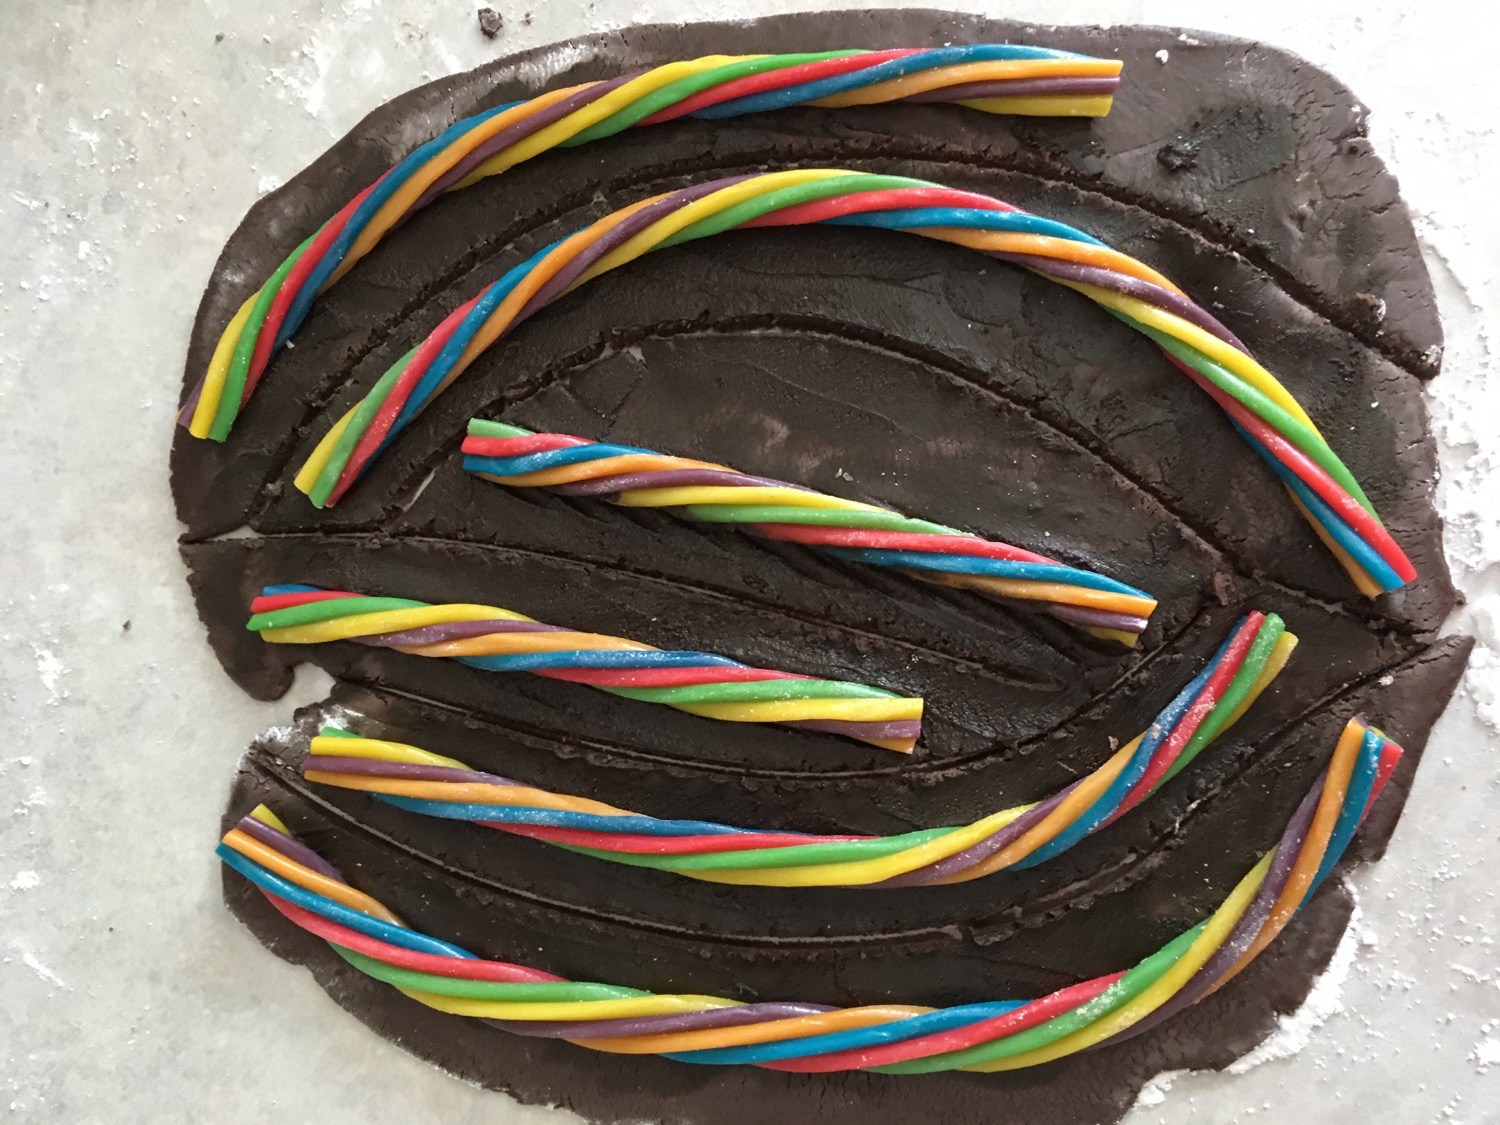
I covered the topper with plastic to keep it moist while I worked on the root system. I had hoped to find black licorice ropees at the Bulk Barn, but instead found these ropes – and they worked great.
I rolled out the last of my fondant, again gave it a coat of buttercream for glue, laid out the licorice ropes that I had pre cut into lengths that I wanted to work with.
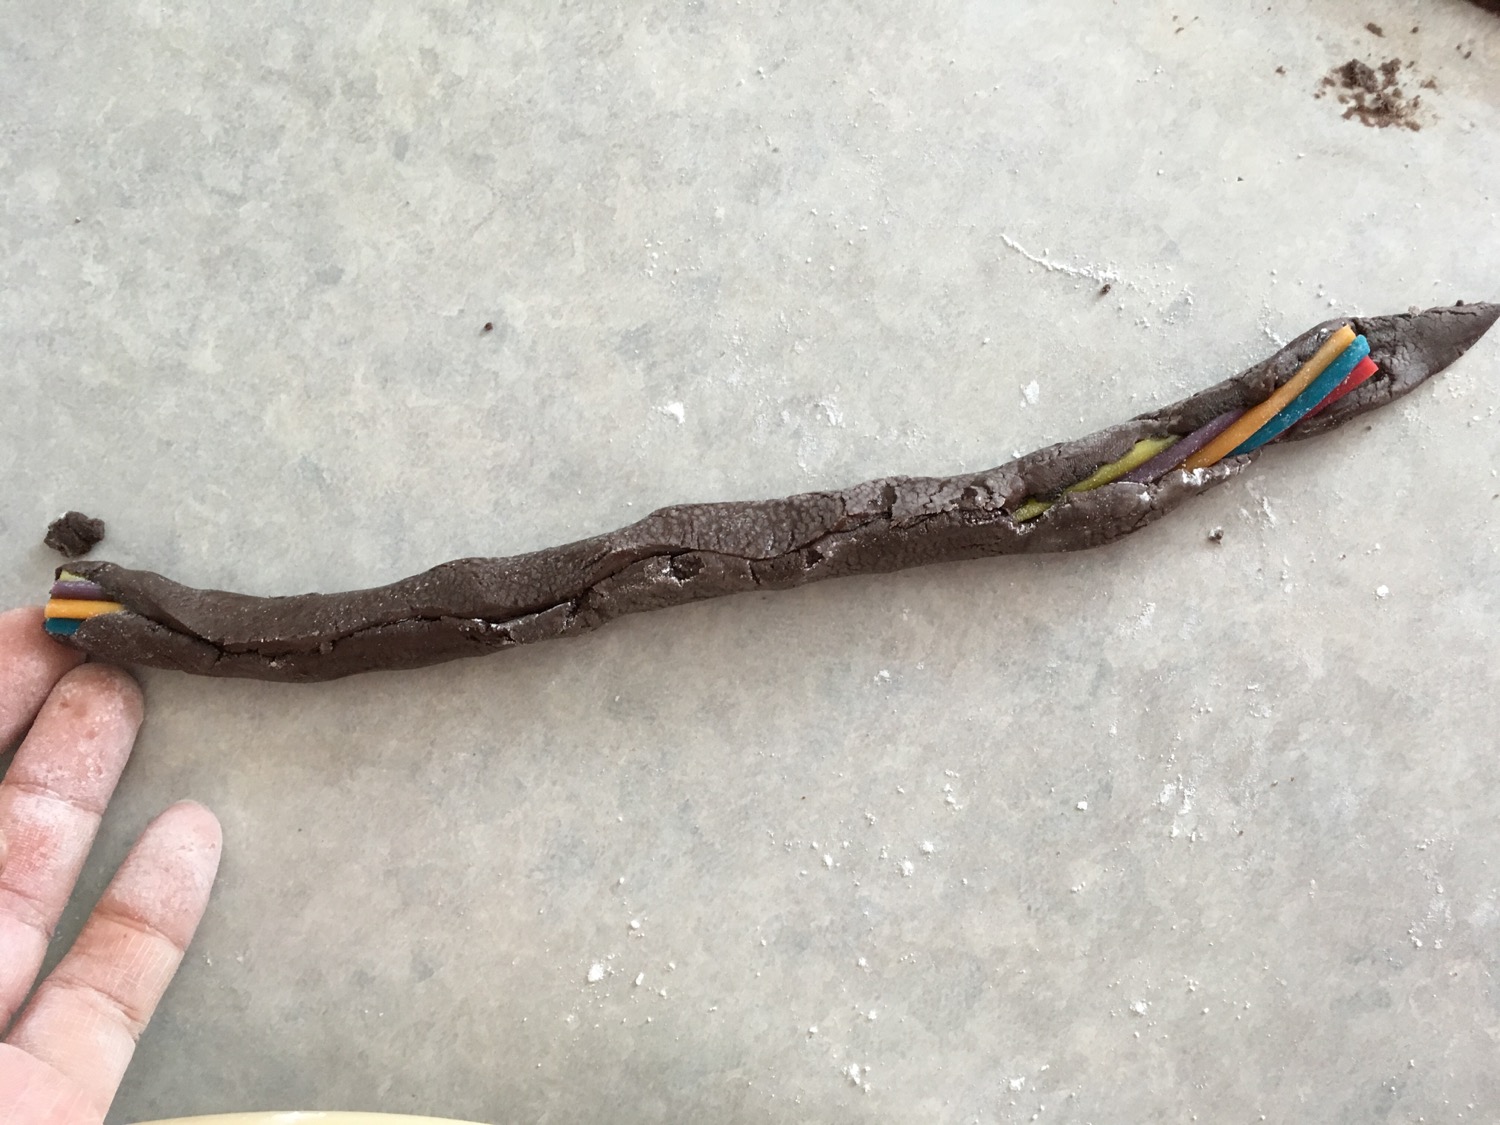
I again coverd the fondant roots with plastic to keep them moist and brought out the cake to start final installation!
Placing the topper on was an easy, flip it off the plastic onto my hand, then flip it onto the egg, where I had spread a bit more buttercream glue. I did use toothpicks to help hold it in place, esepcially with the curving open of the flaps.

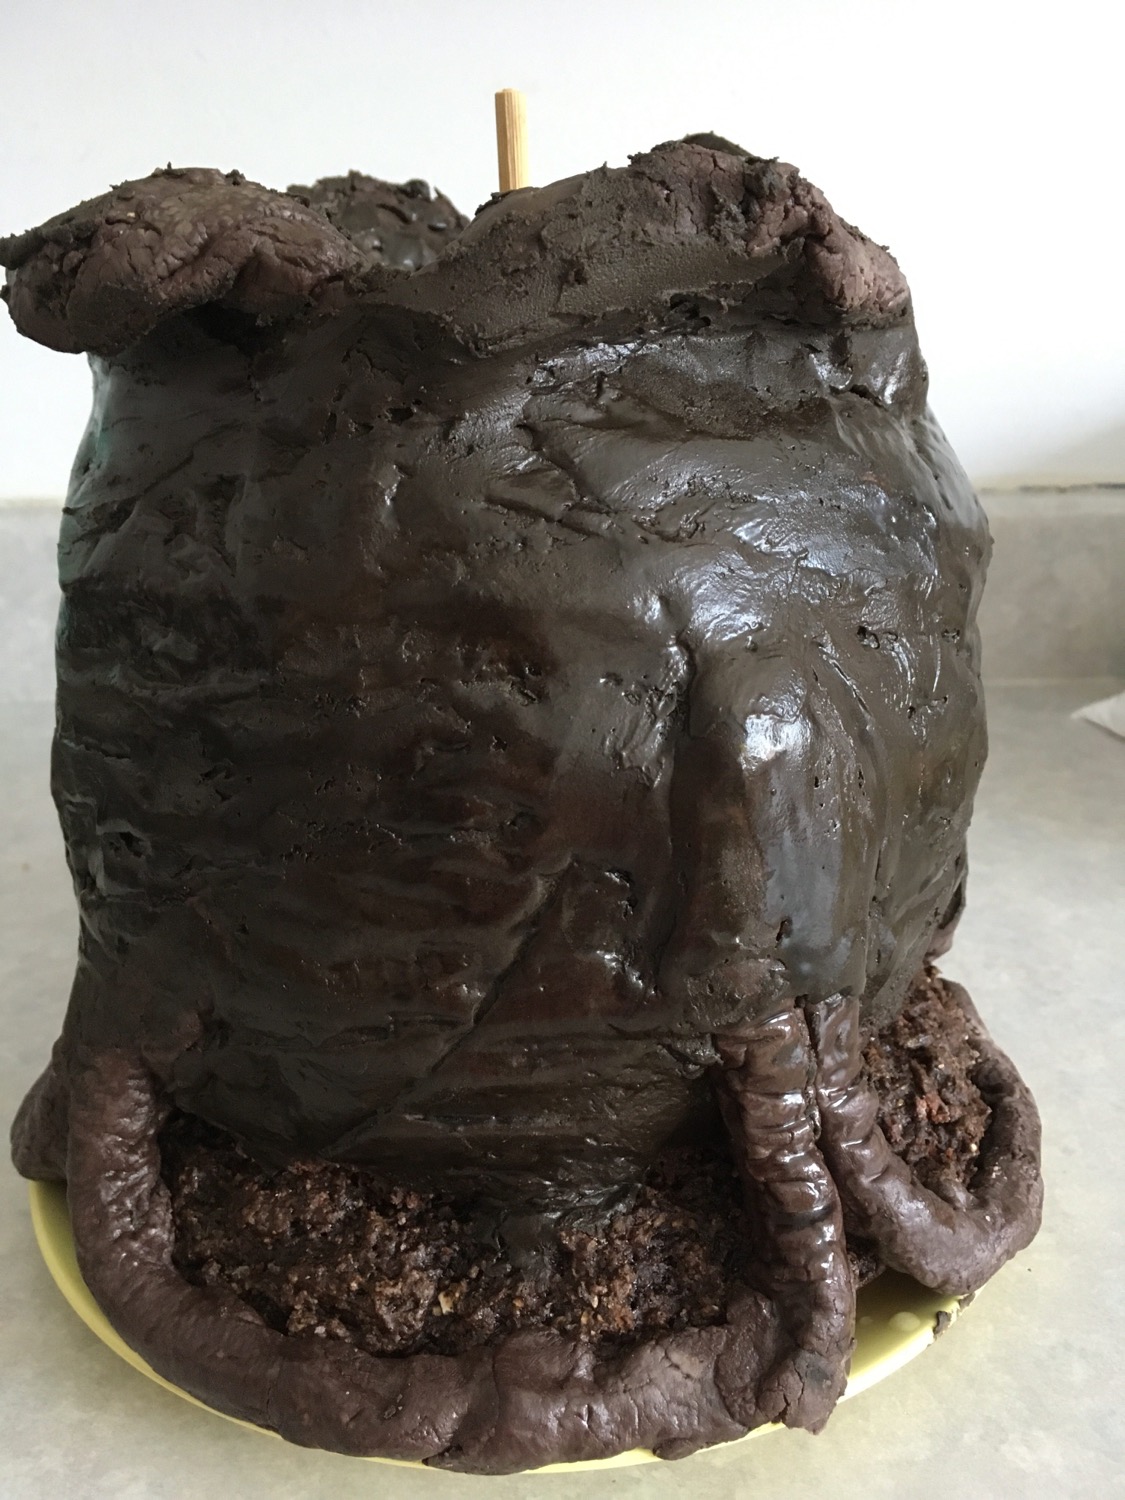
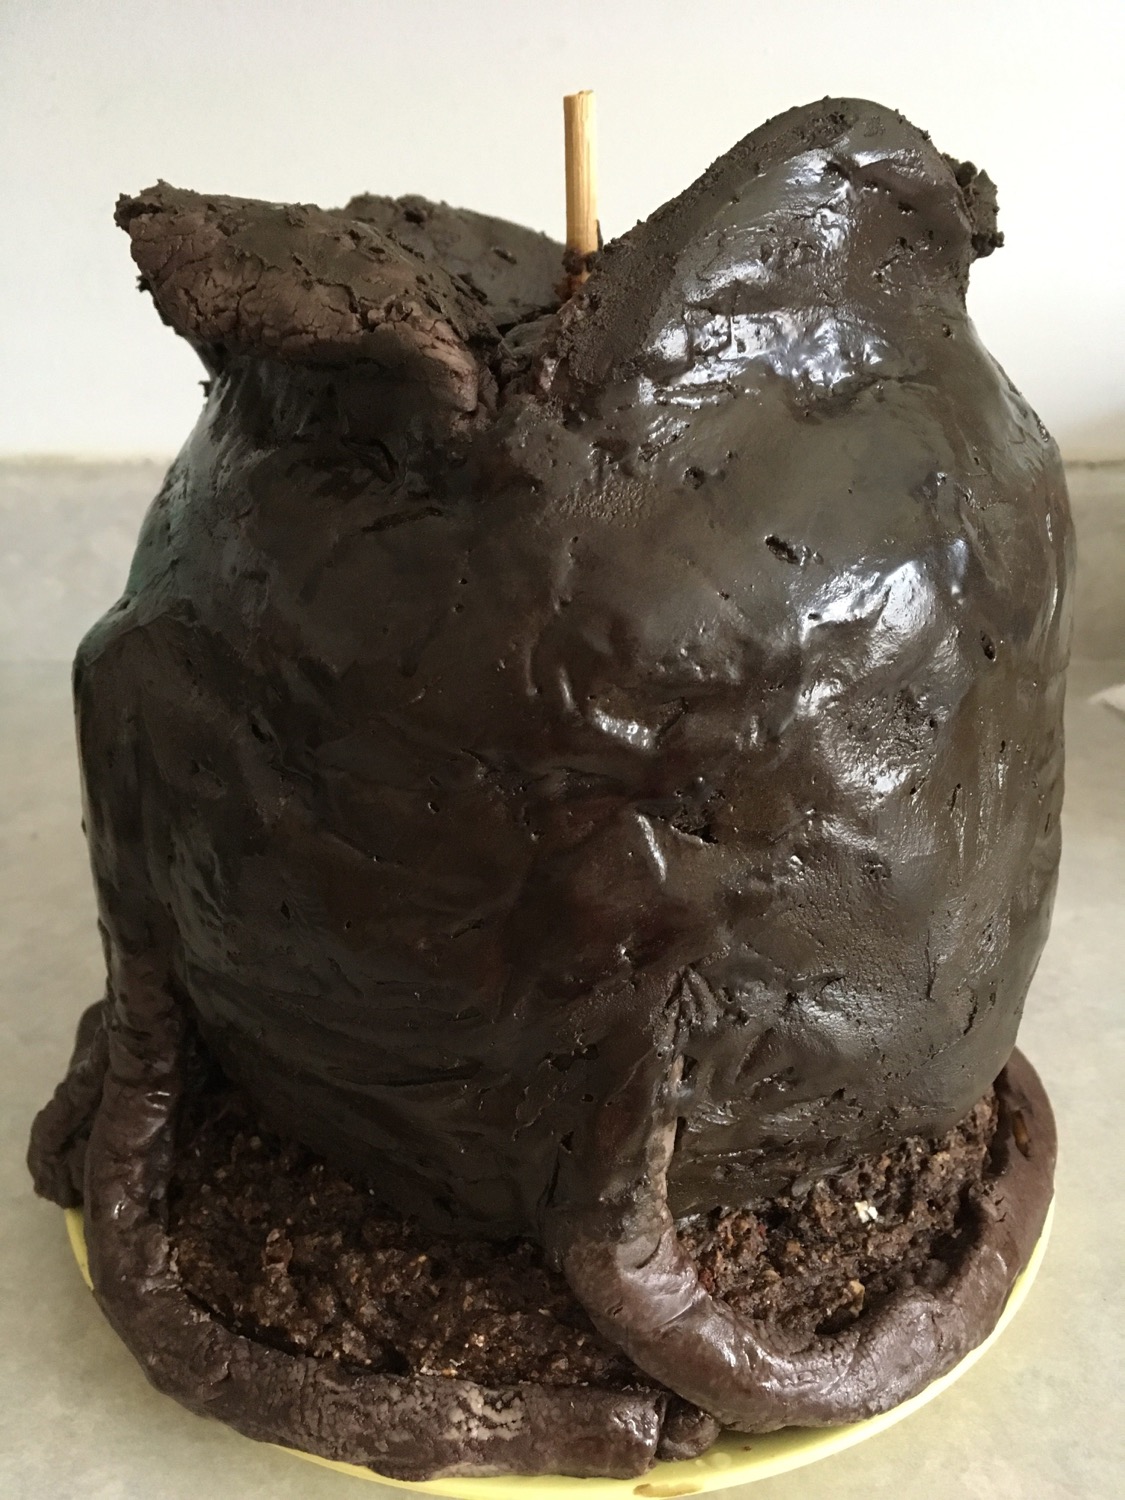
After applying the final coat of buttercream, I was smoothing out the finish by hand, wetting my finger tips and gently polishing the icing , and the cake did start to crack a bit.
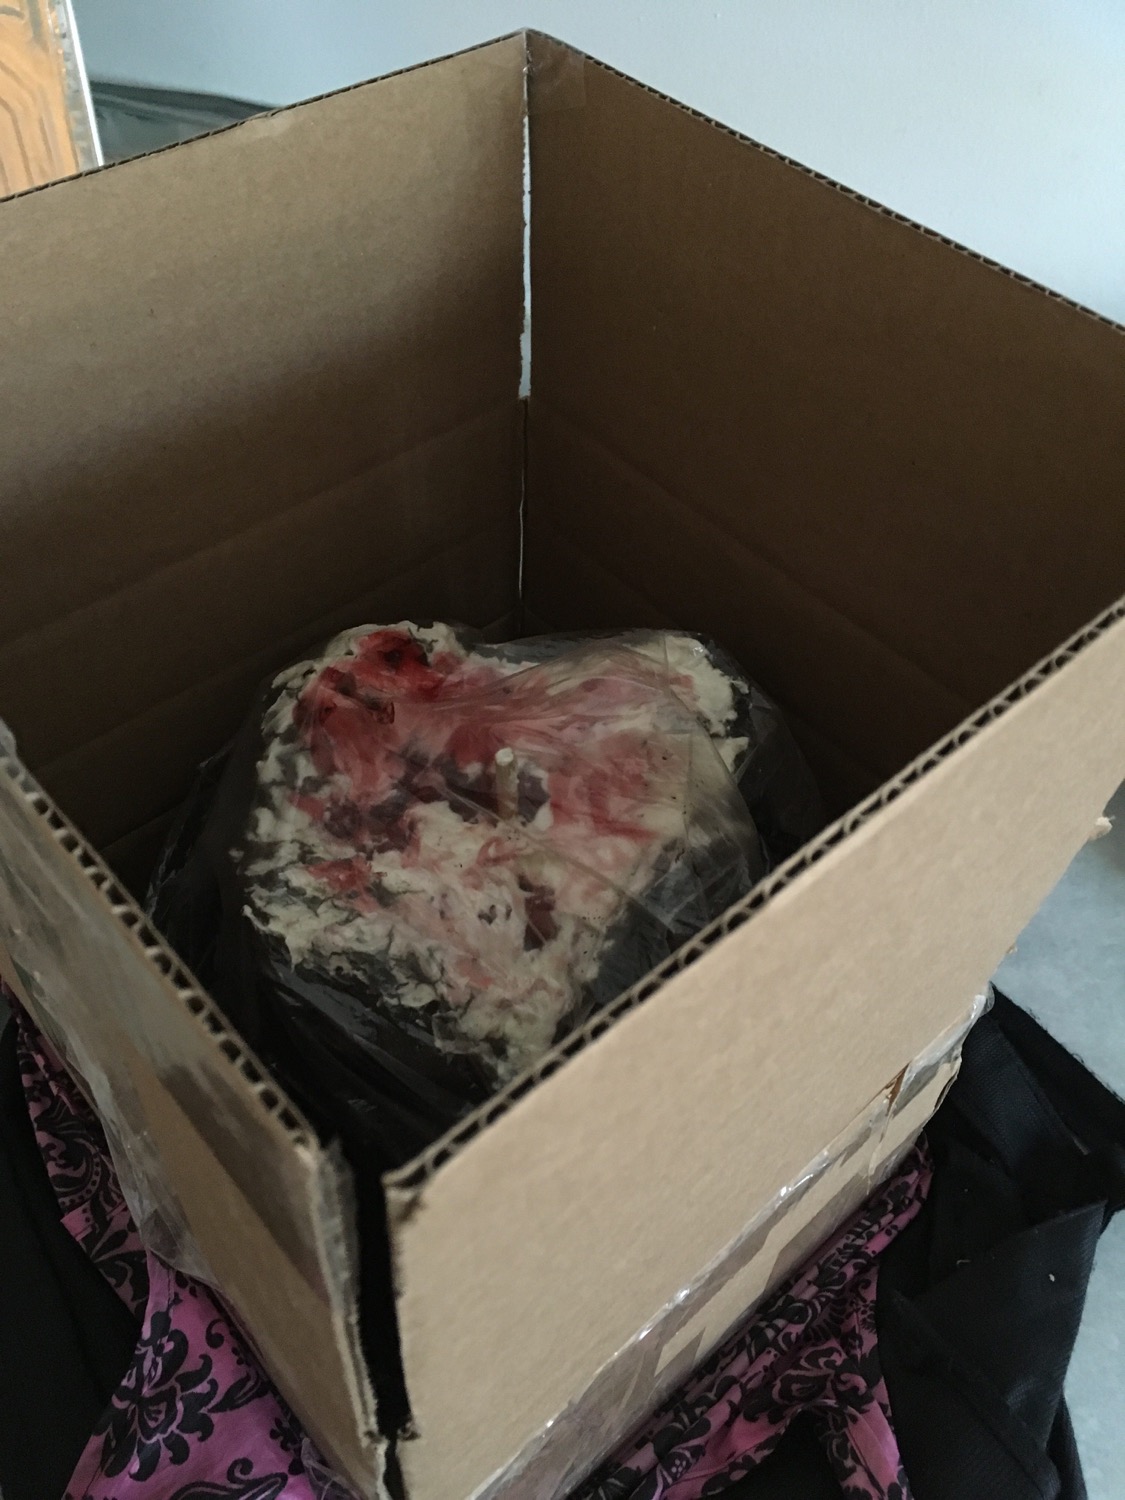
I inserted a chopstick in to anchor the layers a bit, but more importantly, I wrapped it with a plastic bag that I cut lengthwise so that I would be able to compress the cake together – sorry no pics, and I used a second bag to compress and hold the flaps in positioning as well, and then put the cake back in the fridge for a solid 2 hours! It worked!
Finishing!
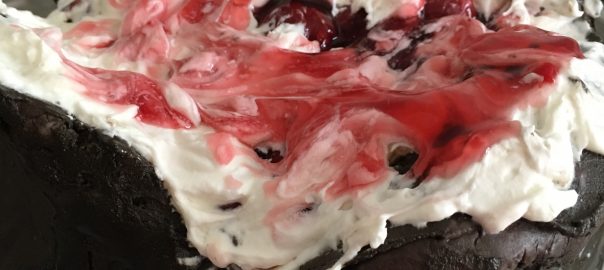
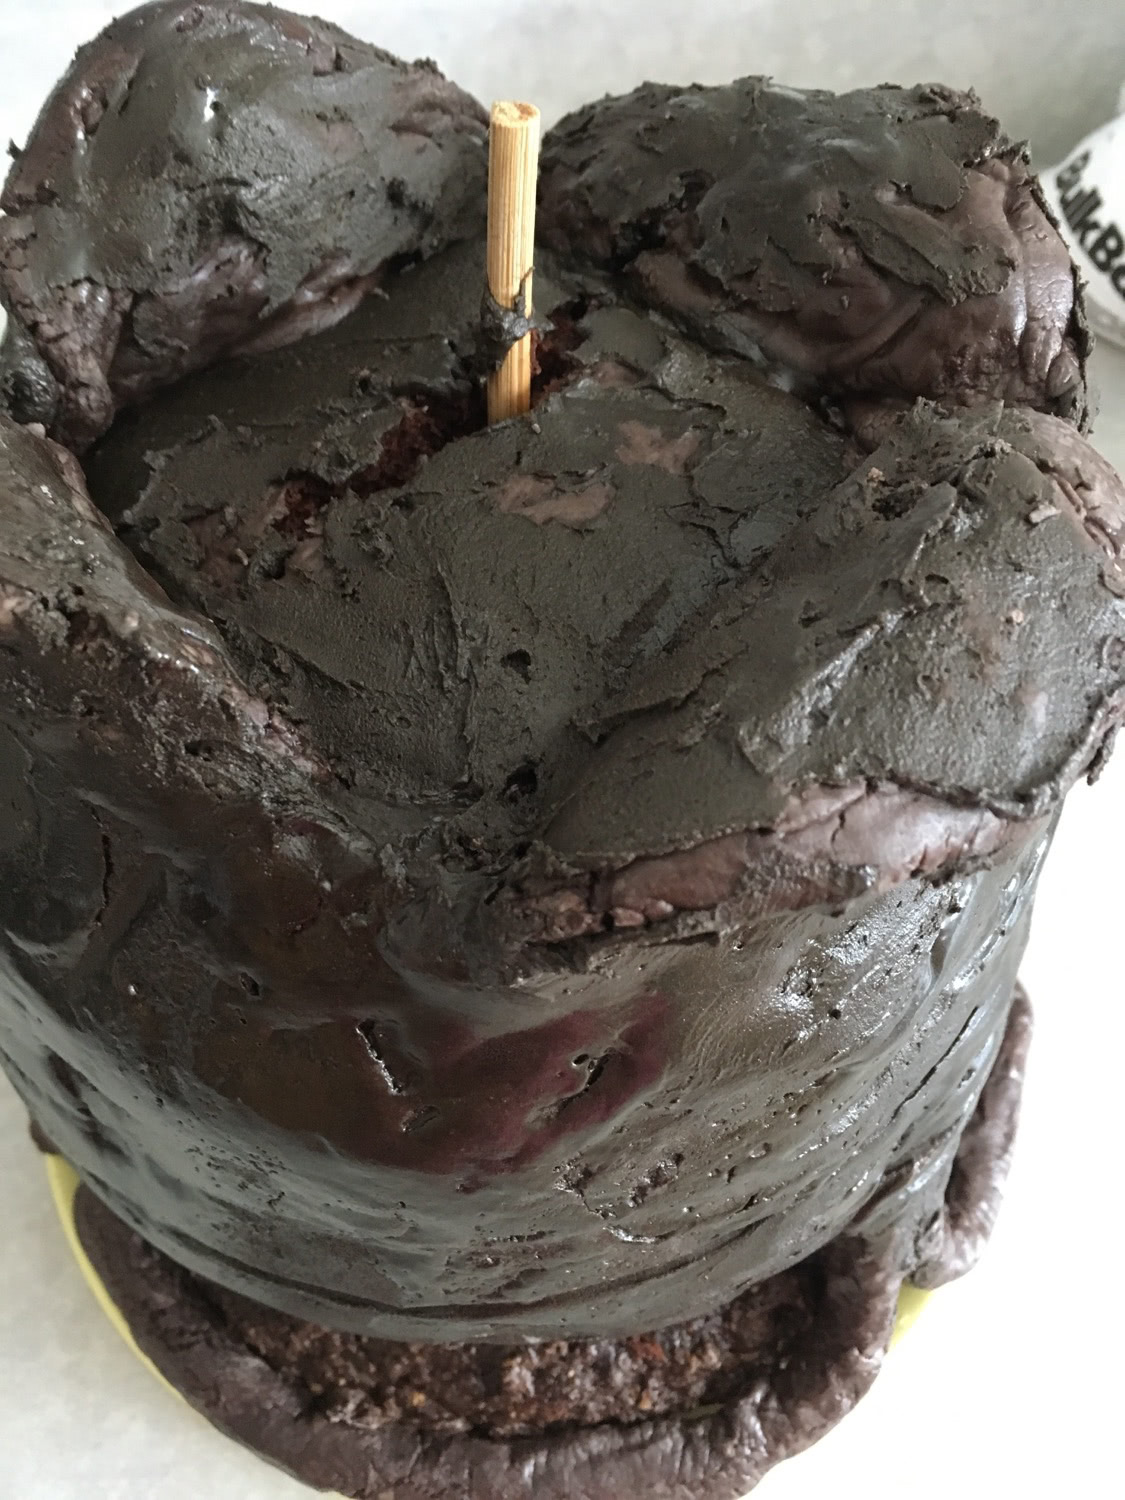
Once the cake was feeling good and solid, I was able to do the final finish to the top – more pie filing and whipped cream together in a messy goo!
I left the chopstick in while carrying the cake over to the restaurant, and was lucky enough to have received two shipments recently that provided nice boxes that worked for a safe carrying system
Next posts < give me a day or two!>:
Part 1.5 – Where is that pesky FaceHugger?
Part 2 – Someone is having a bad day…