And I made them. And I watch the video and read the directions, my rebel baker said, no… I’m not using paper cups ( I don’t have any so I’m not going to buy them) .
And I thought hmmm.
And ChocoPom Dark Blobs were born…
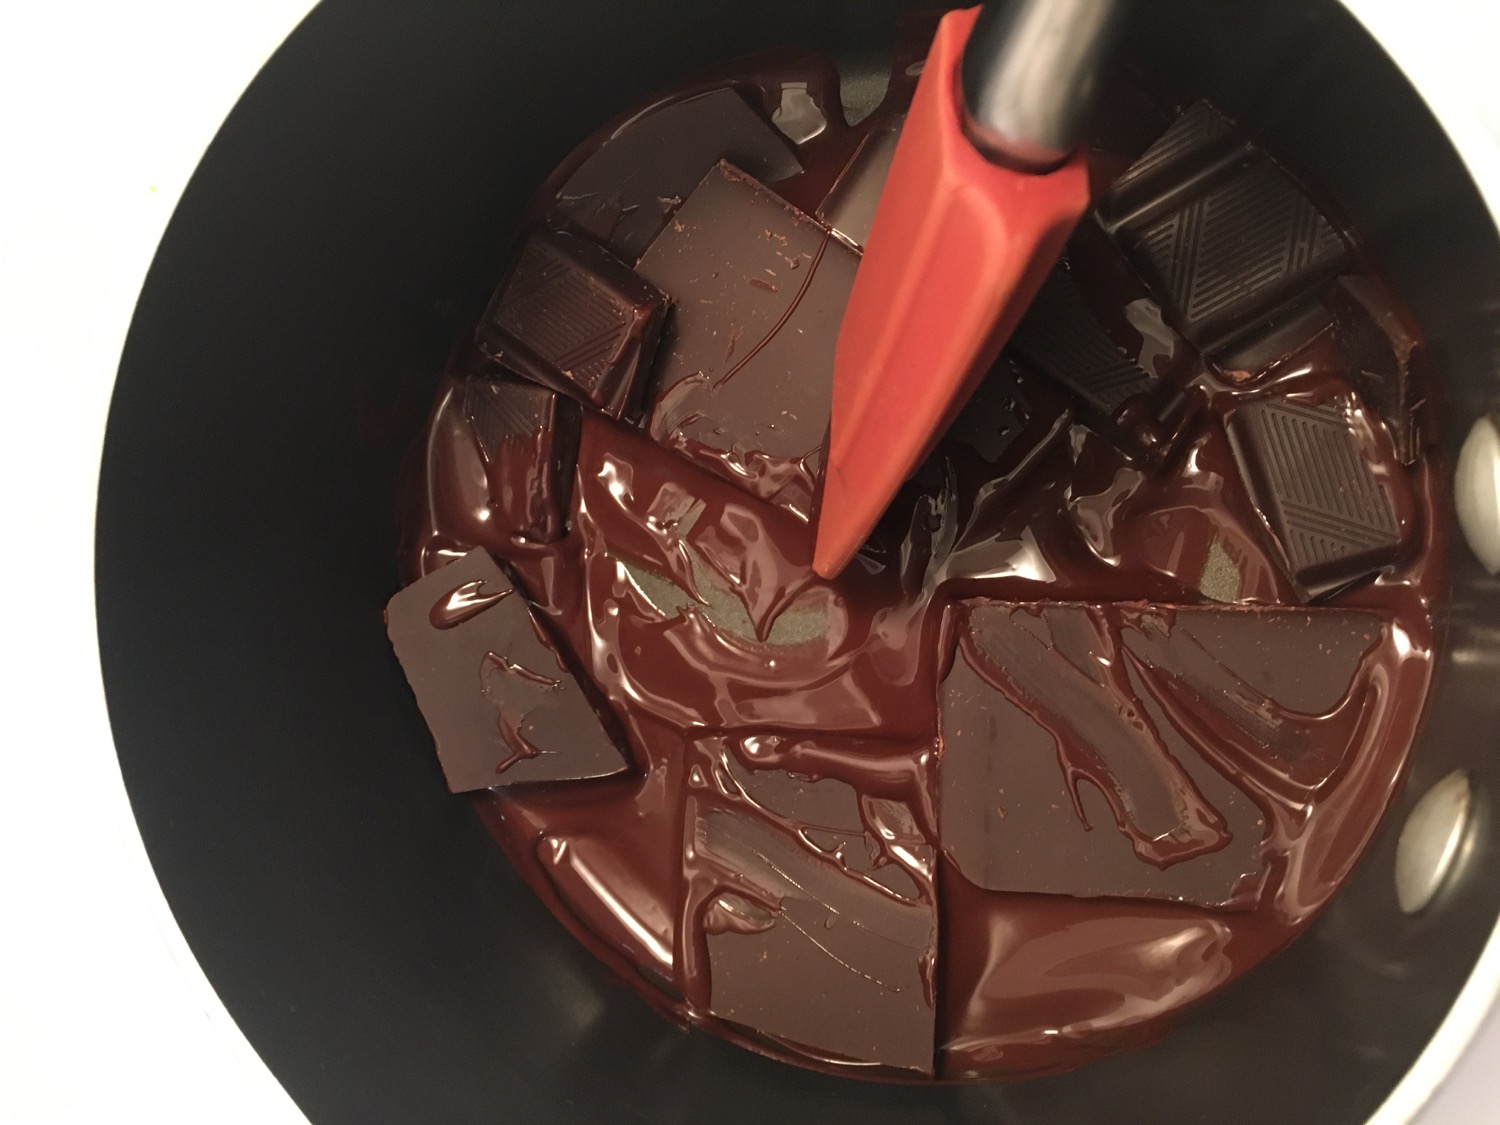
Melt a dark chocolate bar on low heat.
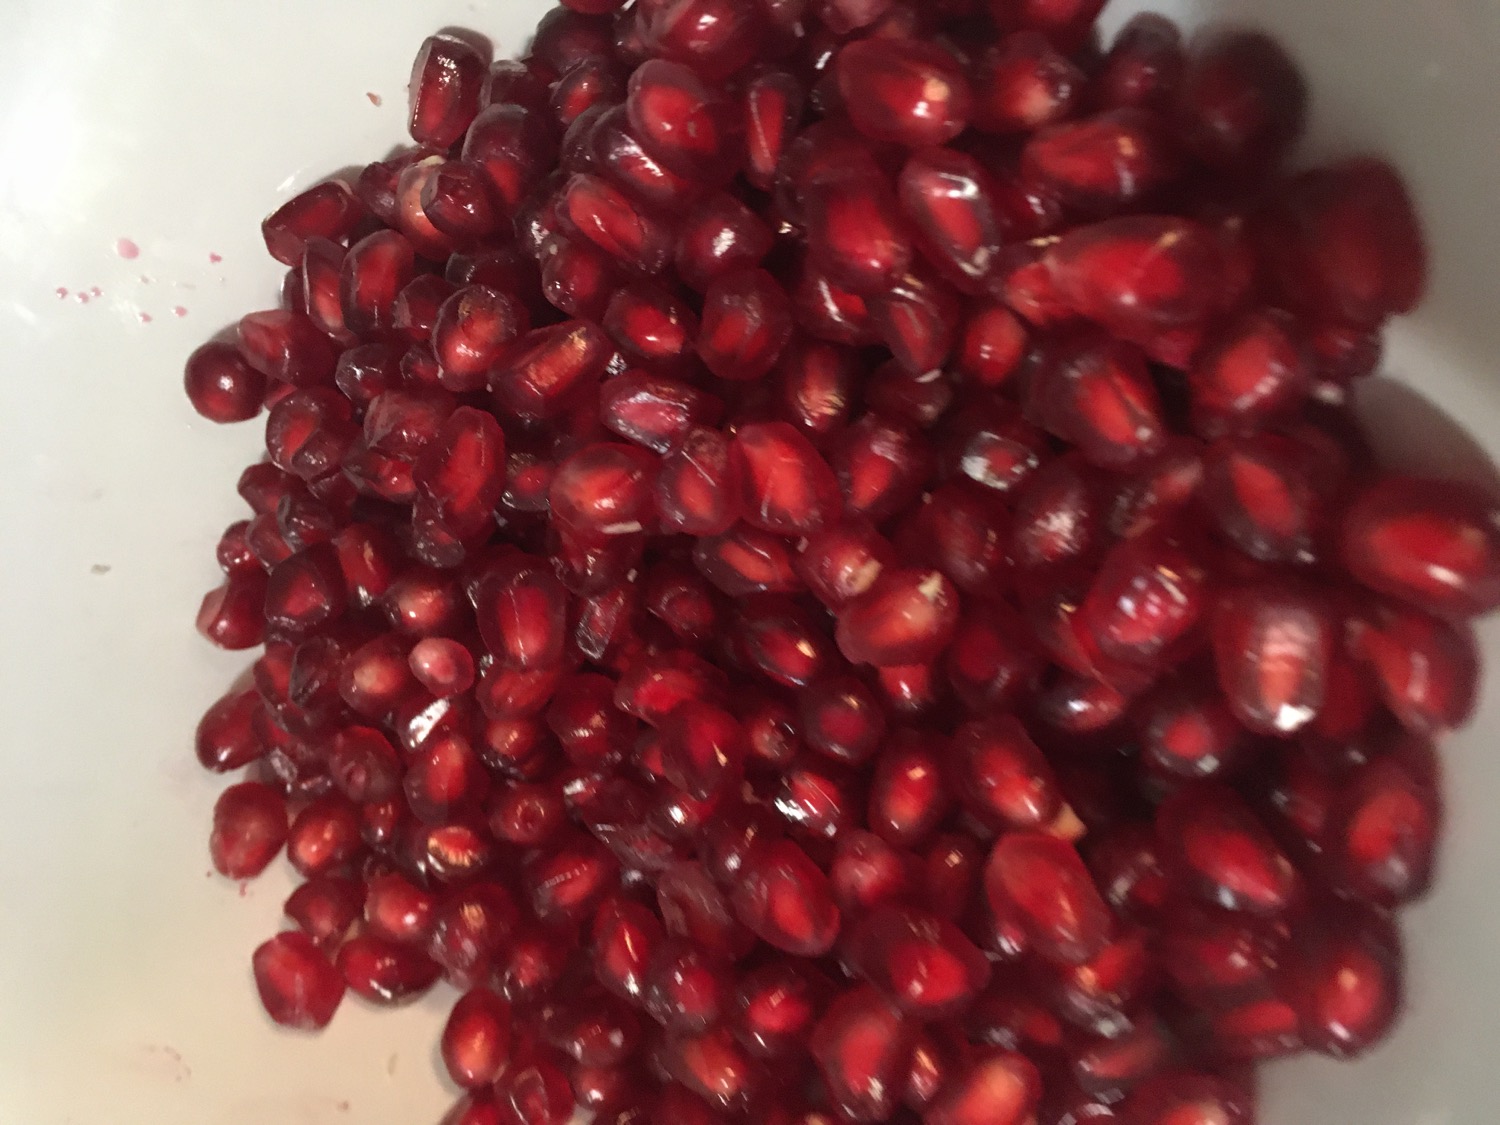
Dump in the pomegranate seeds. Stir.
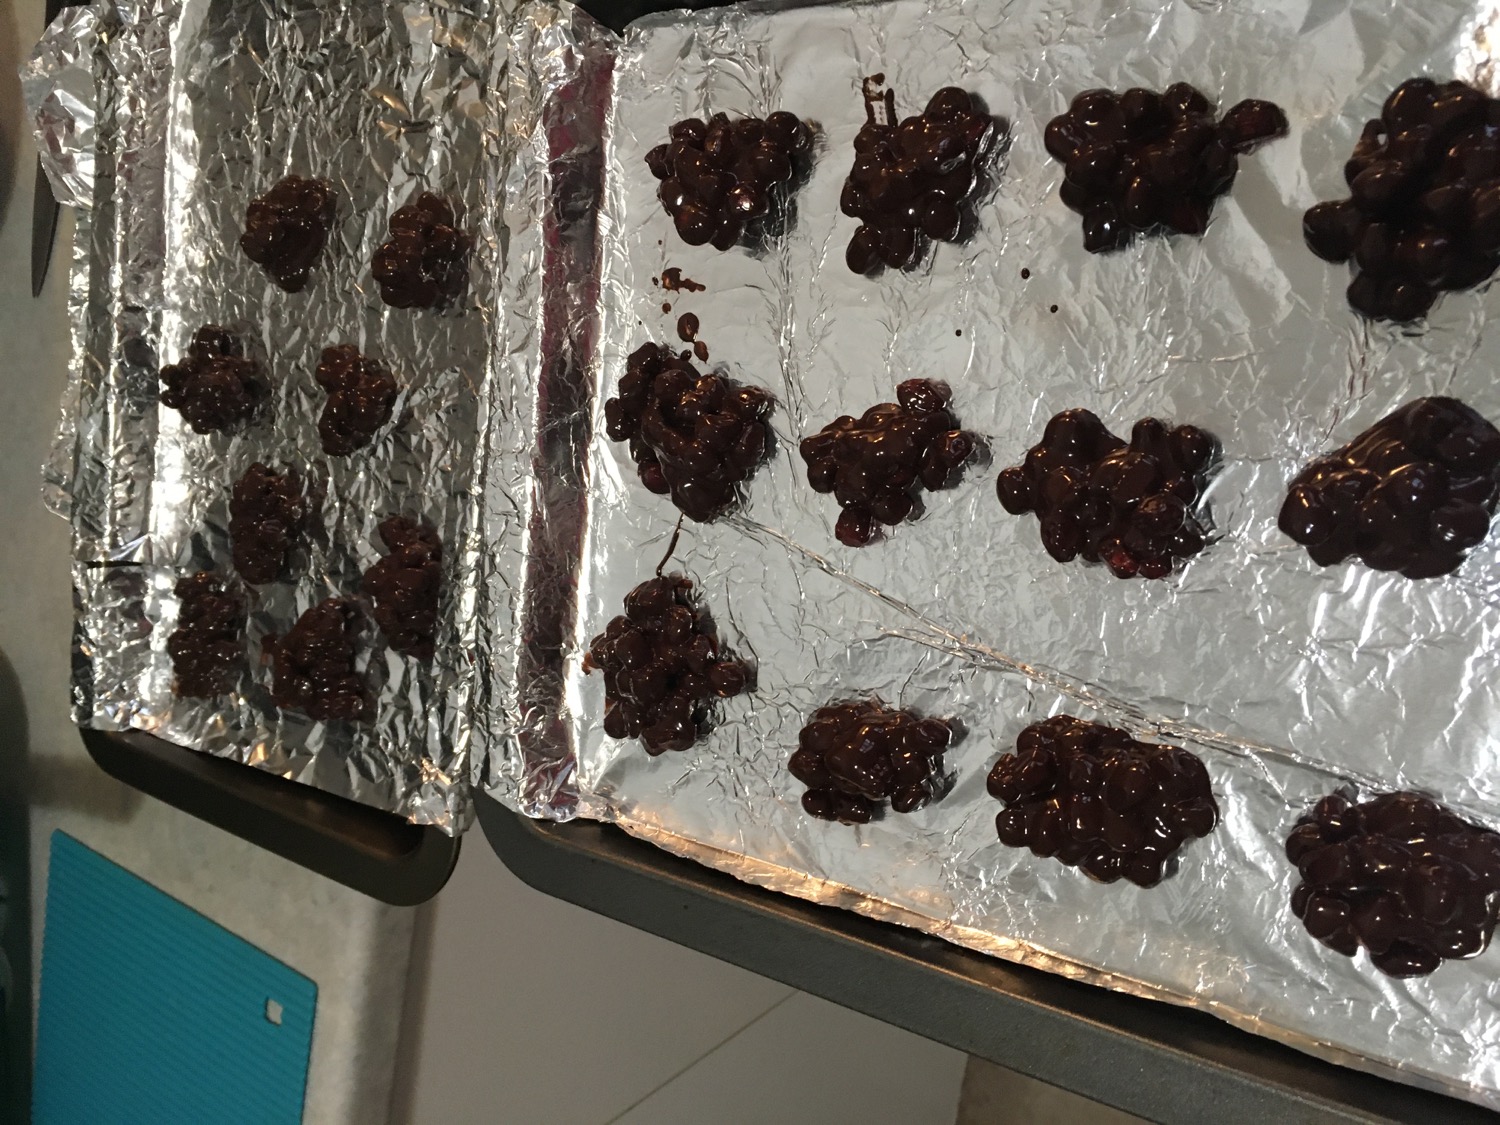
Drop by spoonfuls into foil or parchment lined baking sheet.
Chill. Enjoy!
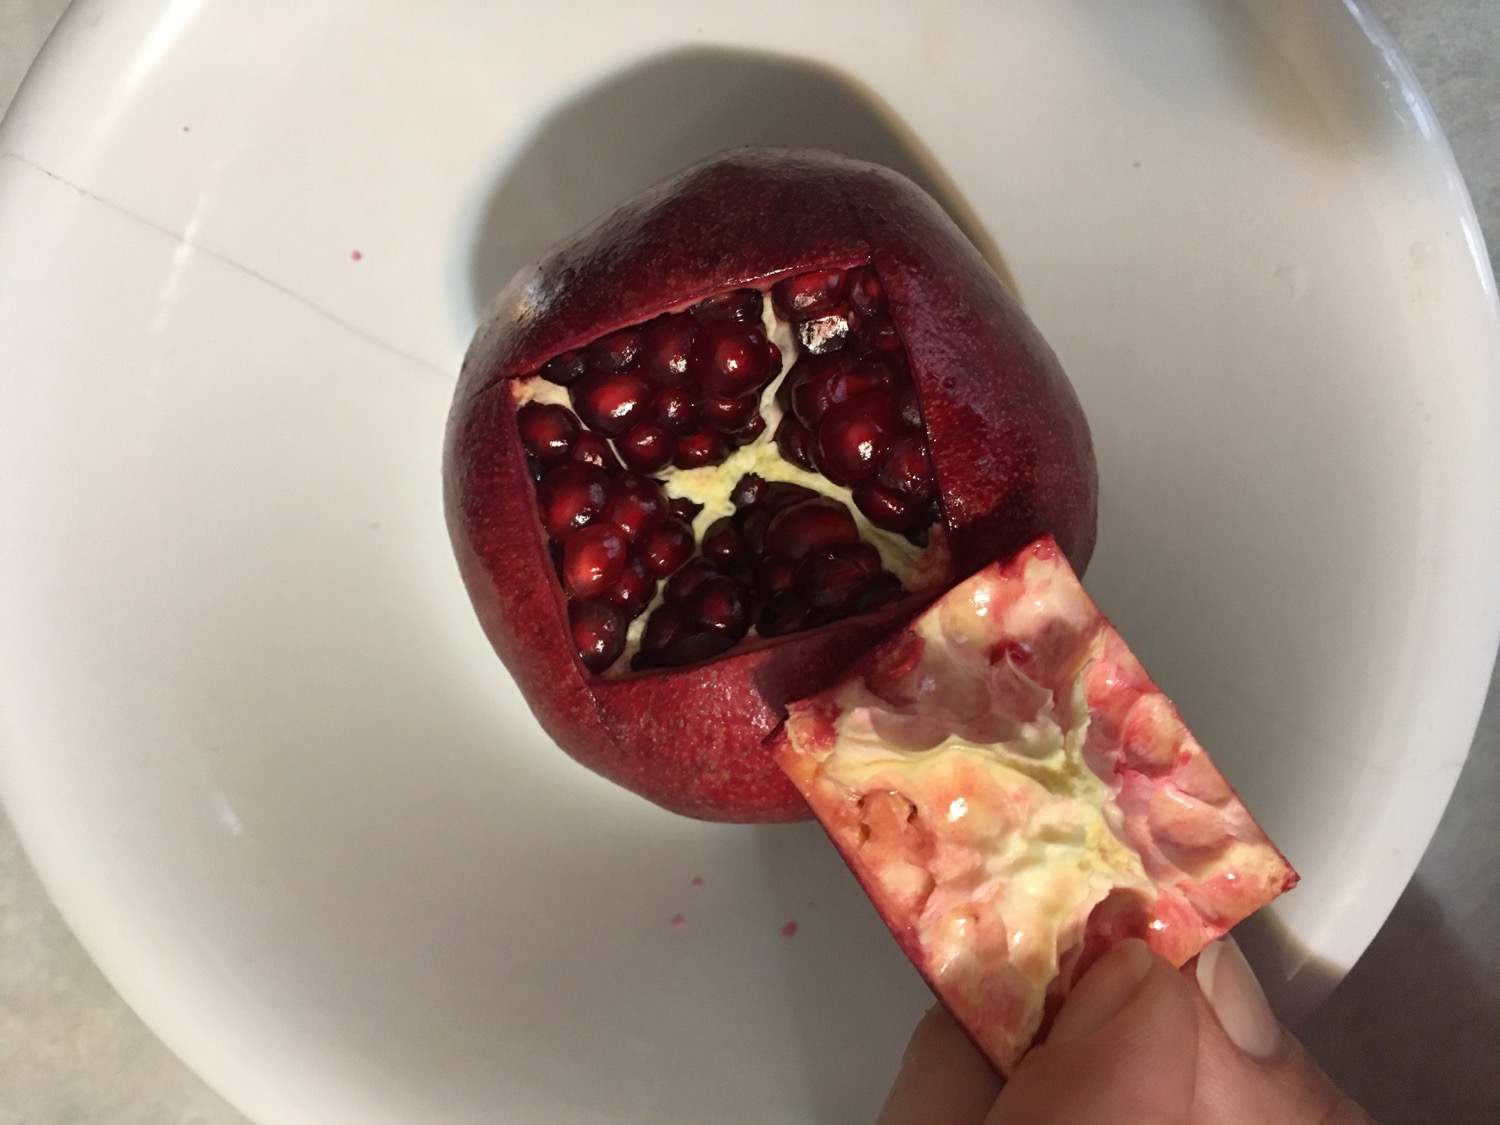
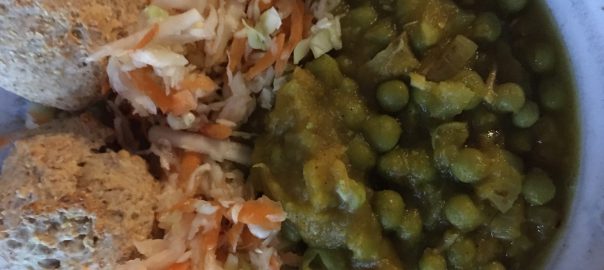
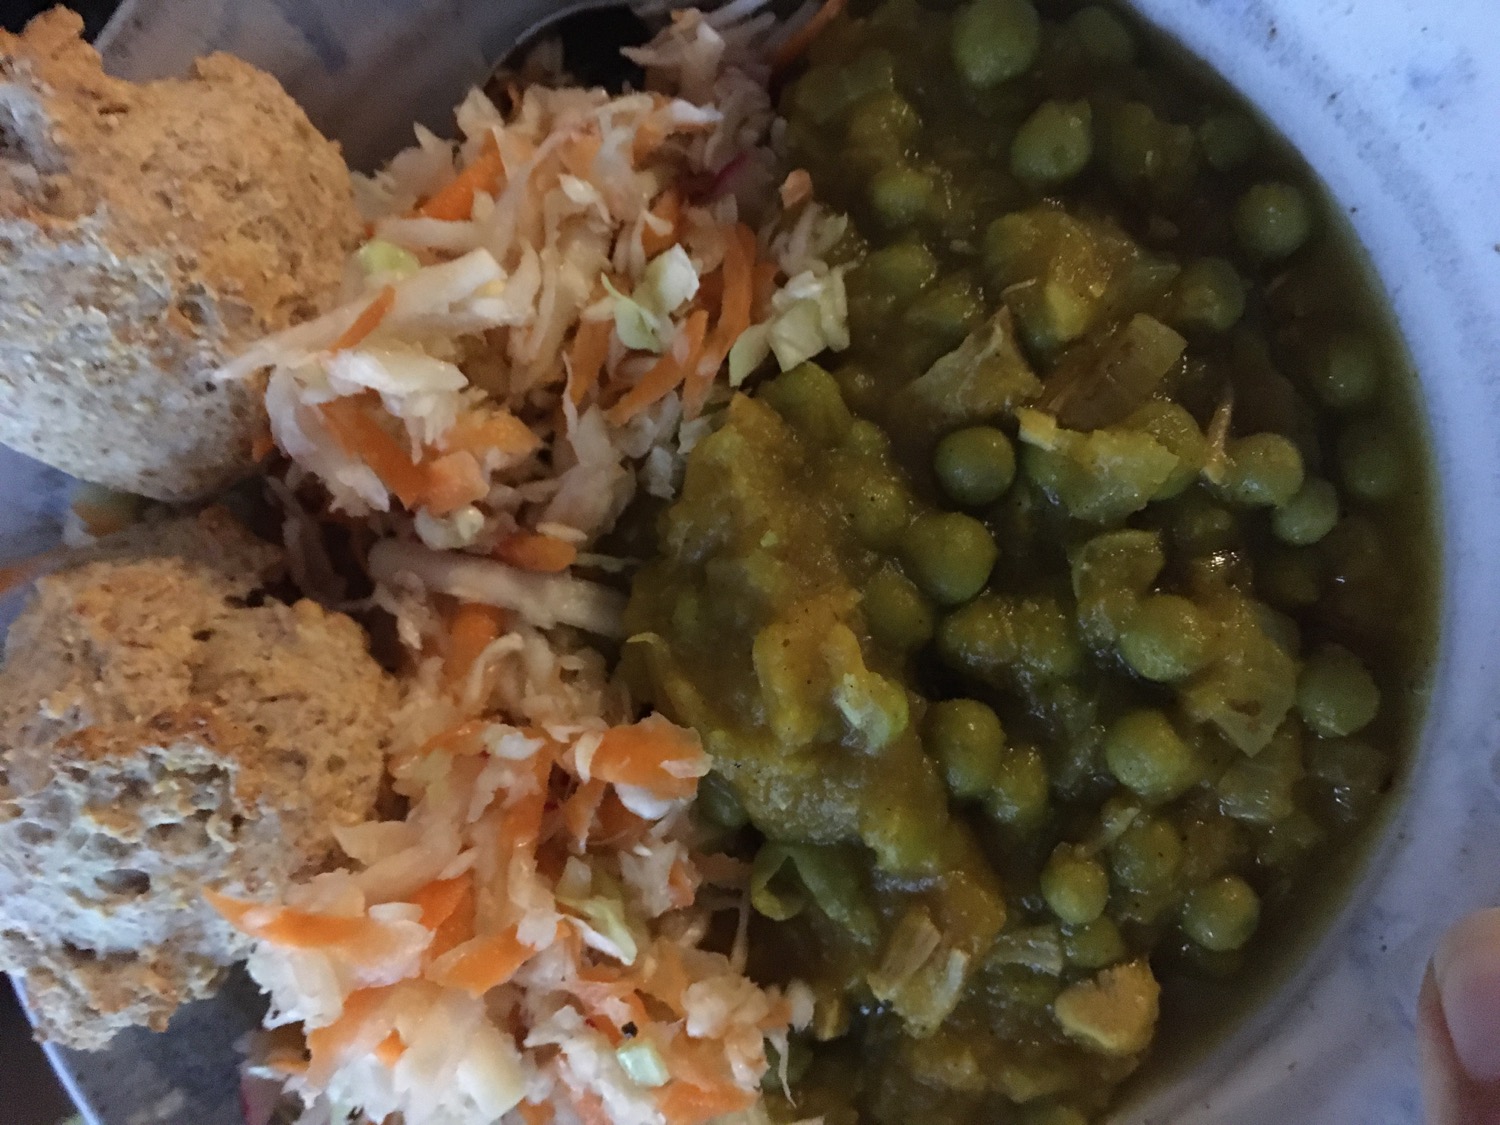
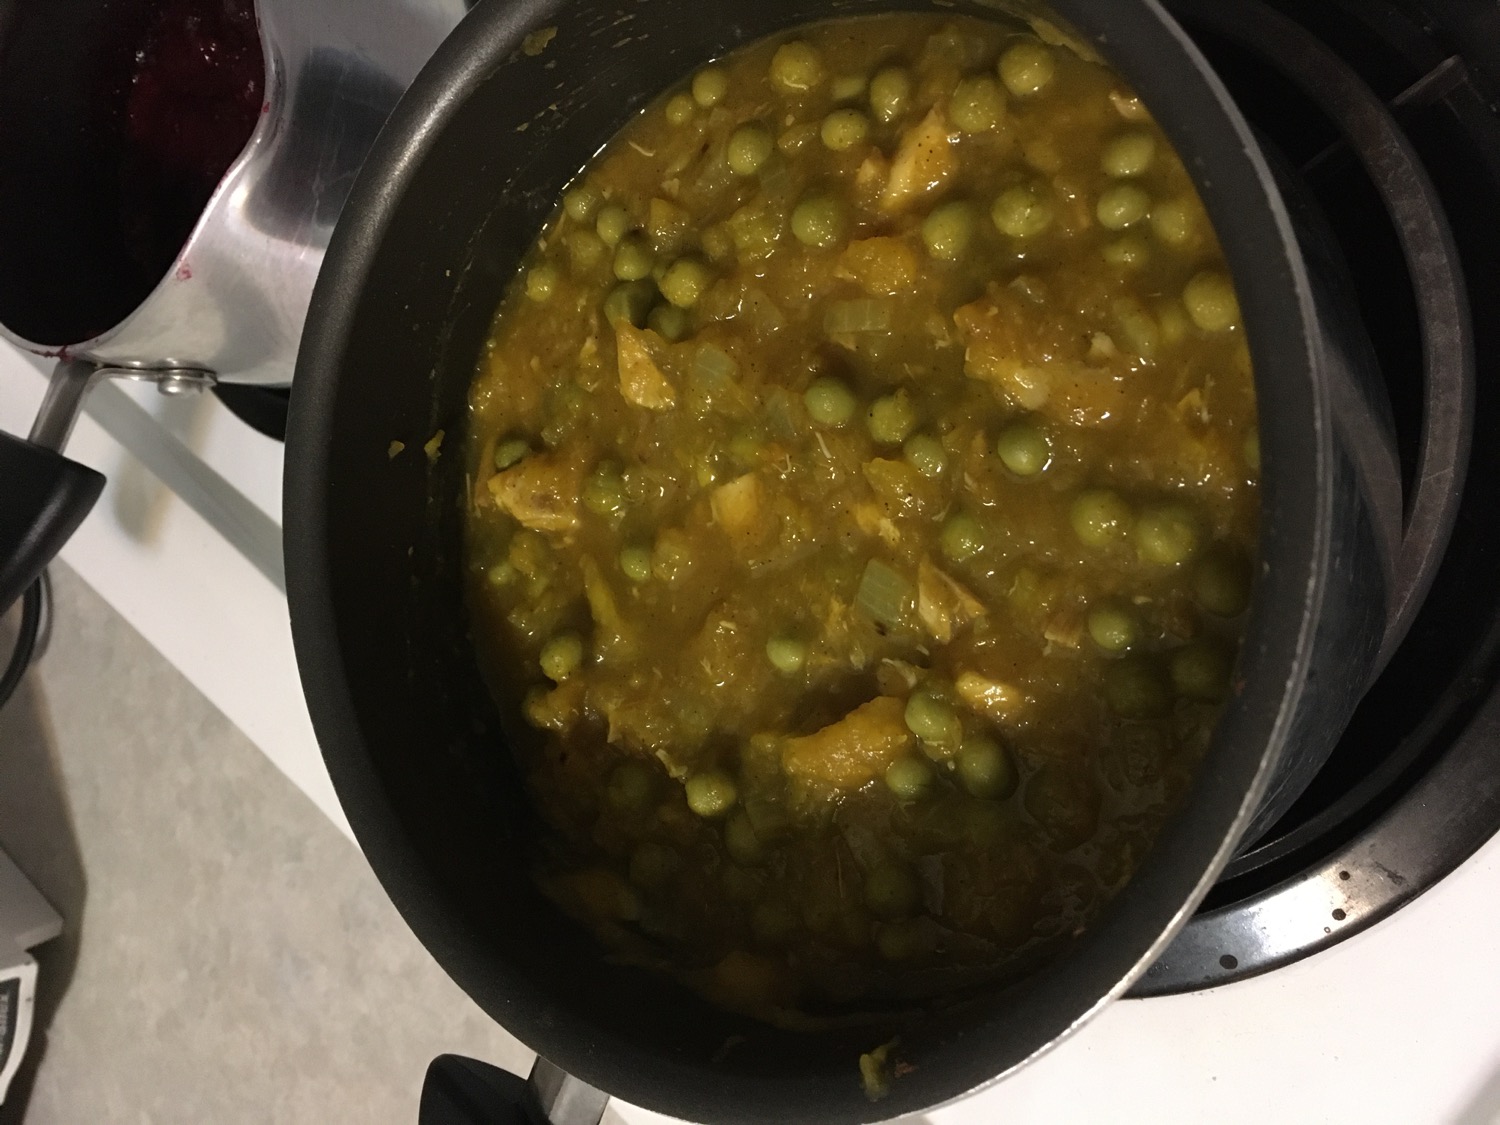
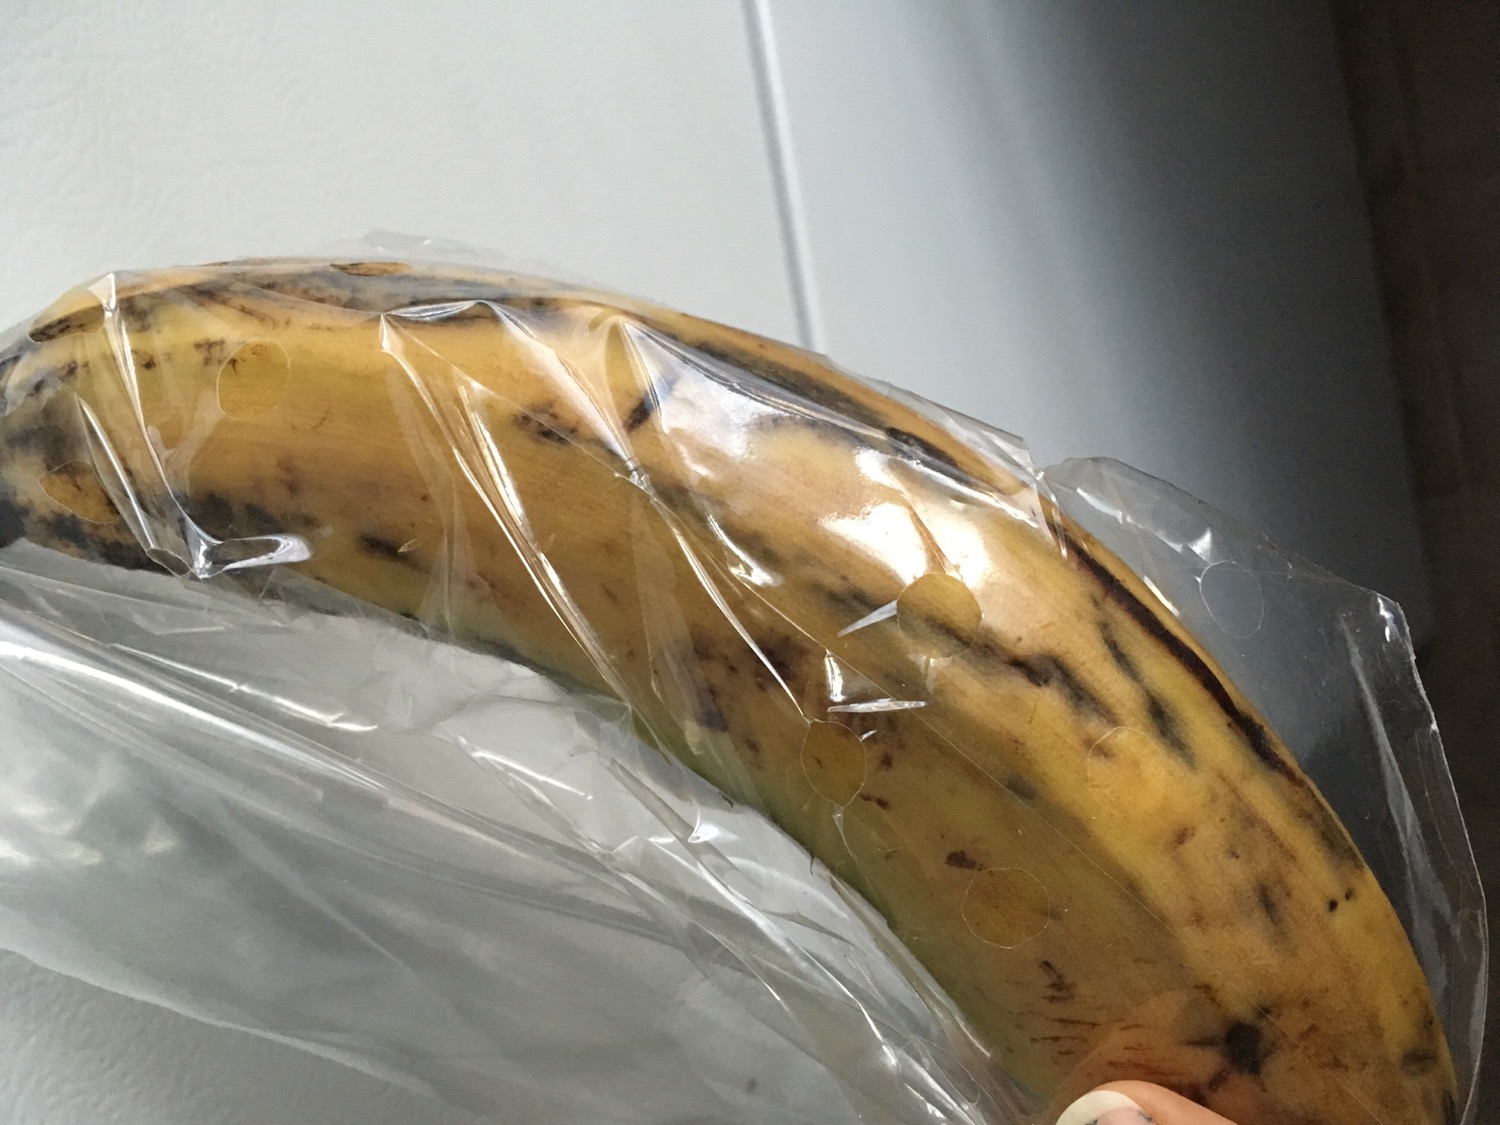
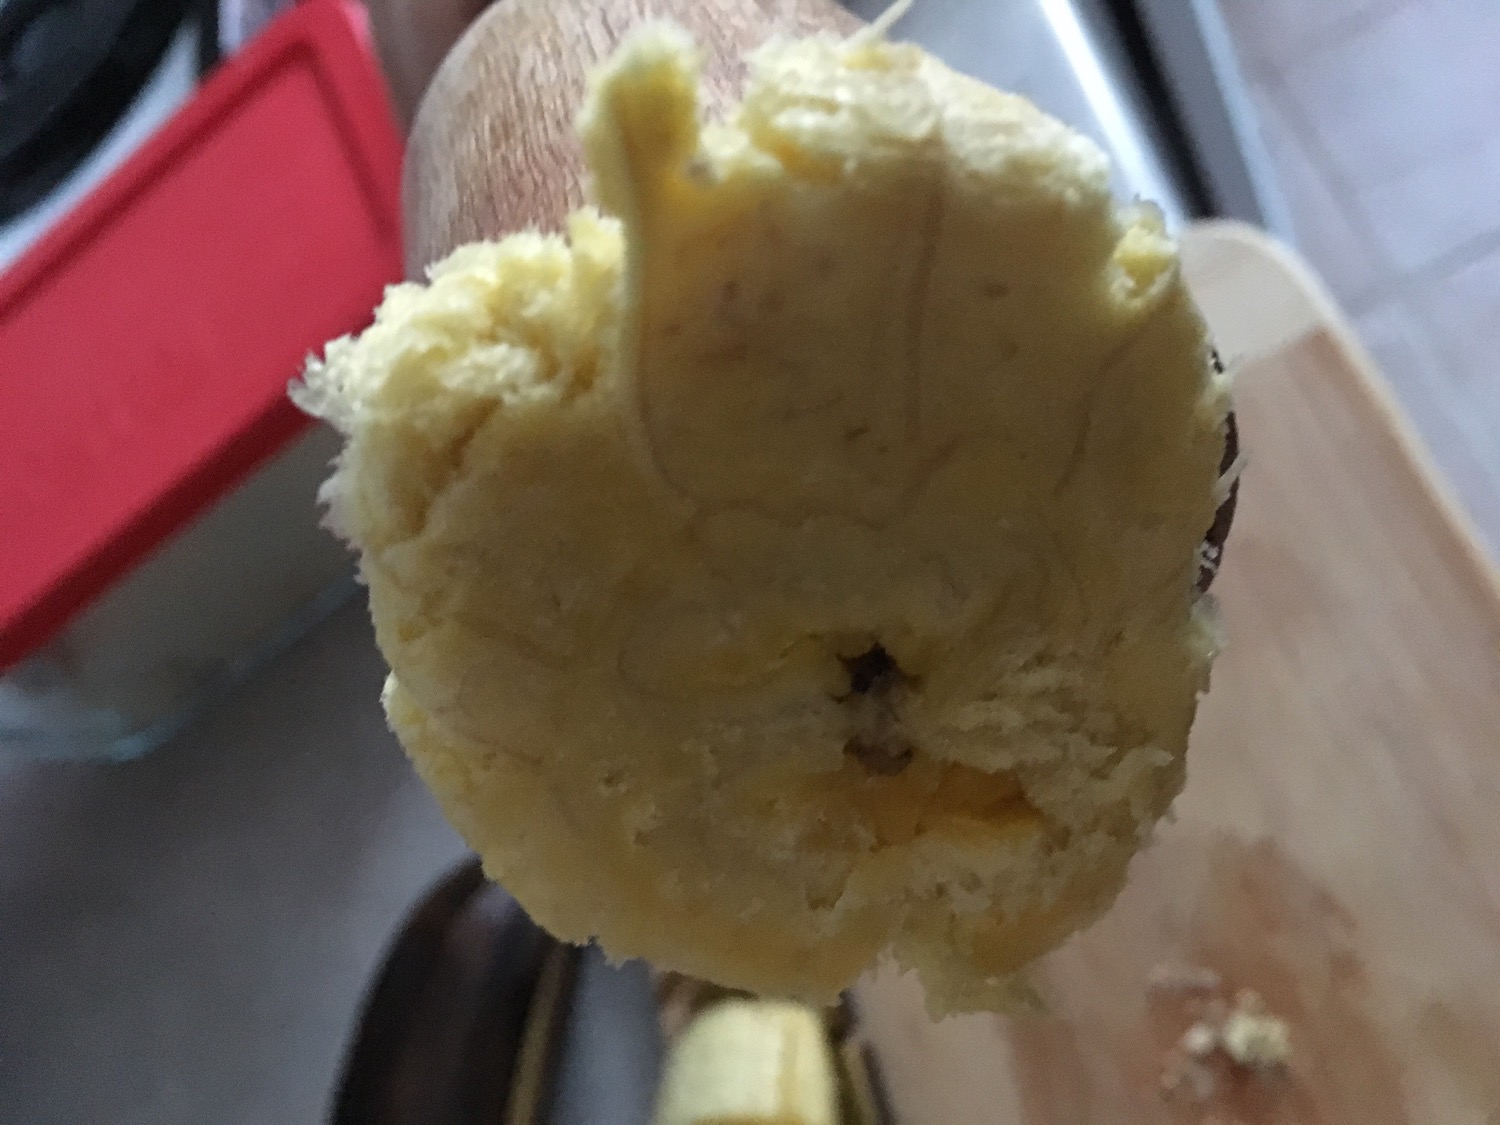
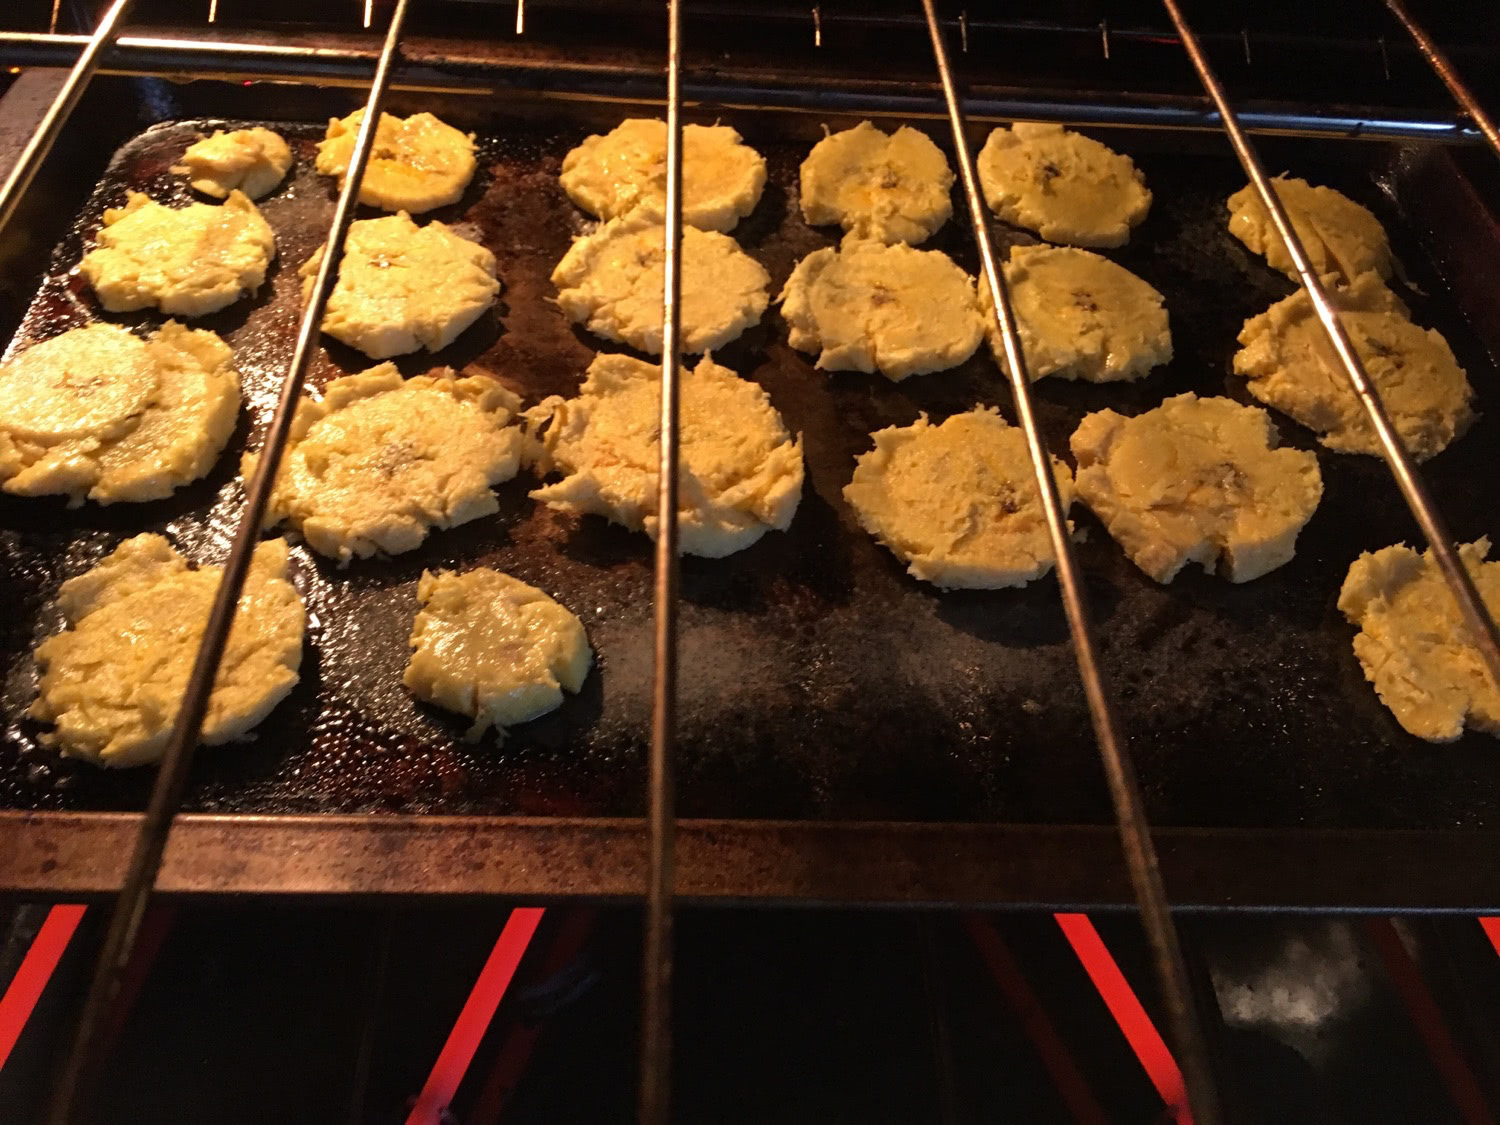
72 % dark chocolateFreshly released pomegranate seeds/berries?There’s a video floating around showing how to get the insides out easily…Washed and reused foil, spooned out the blobs
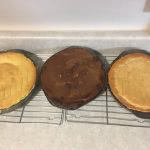
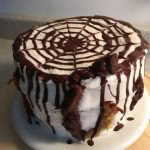
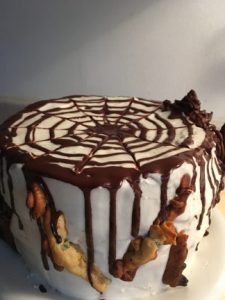
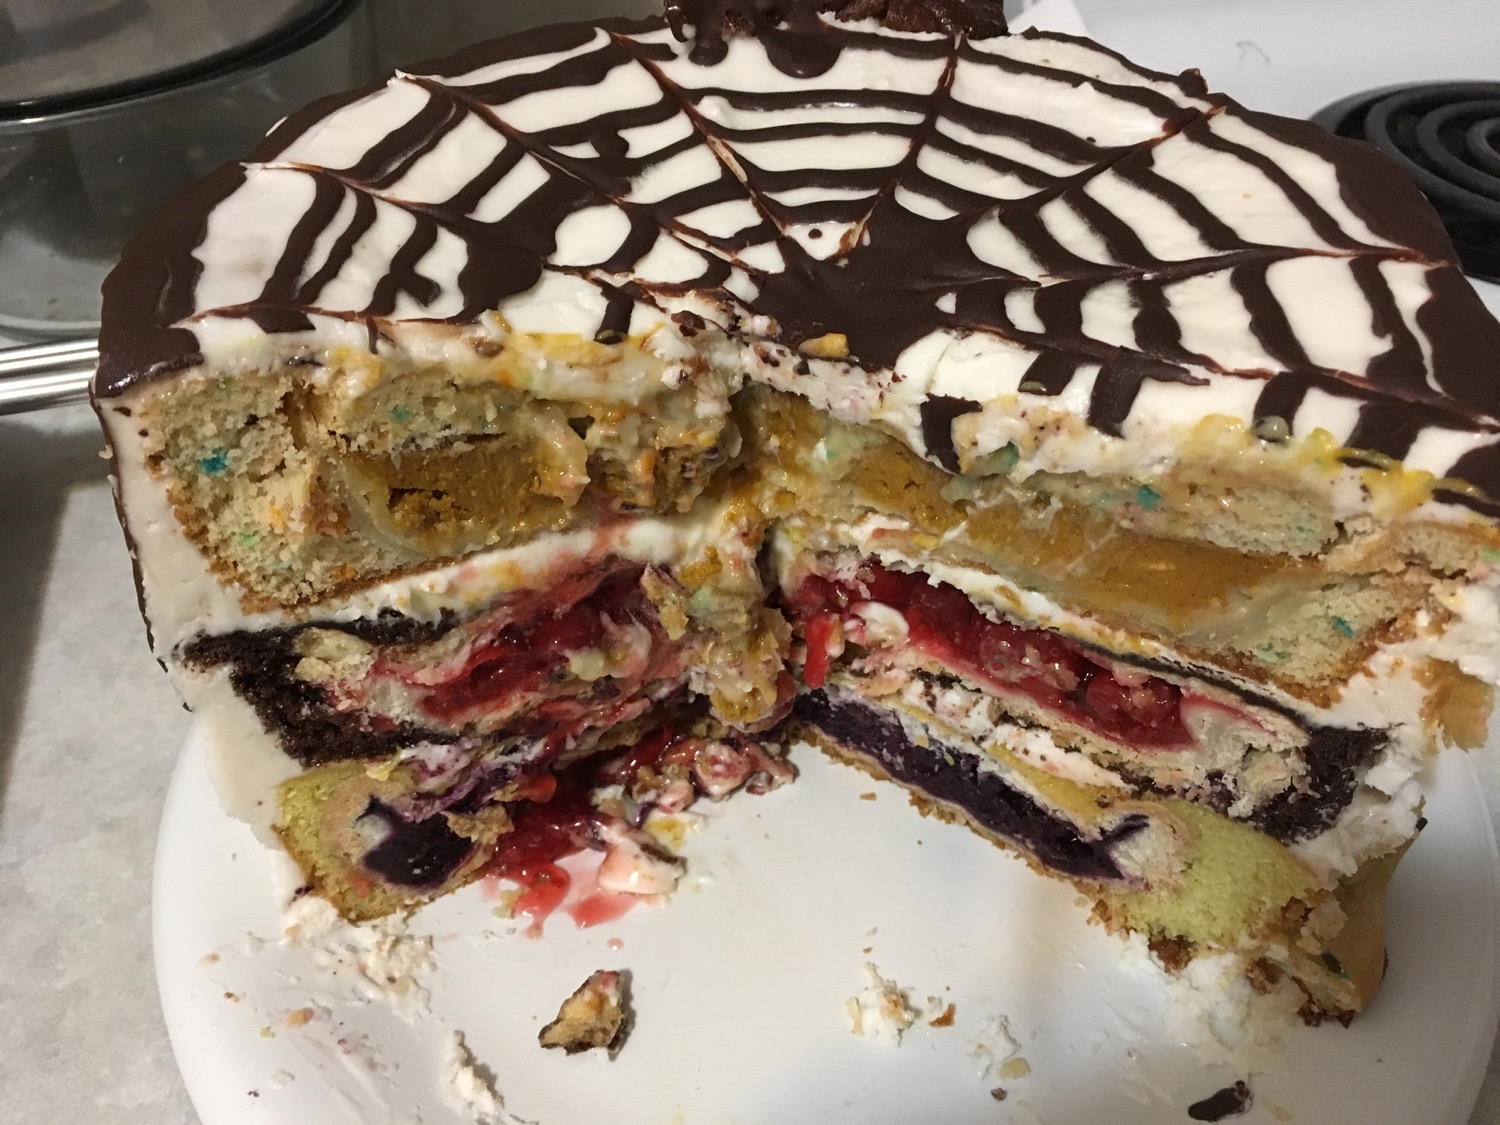
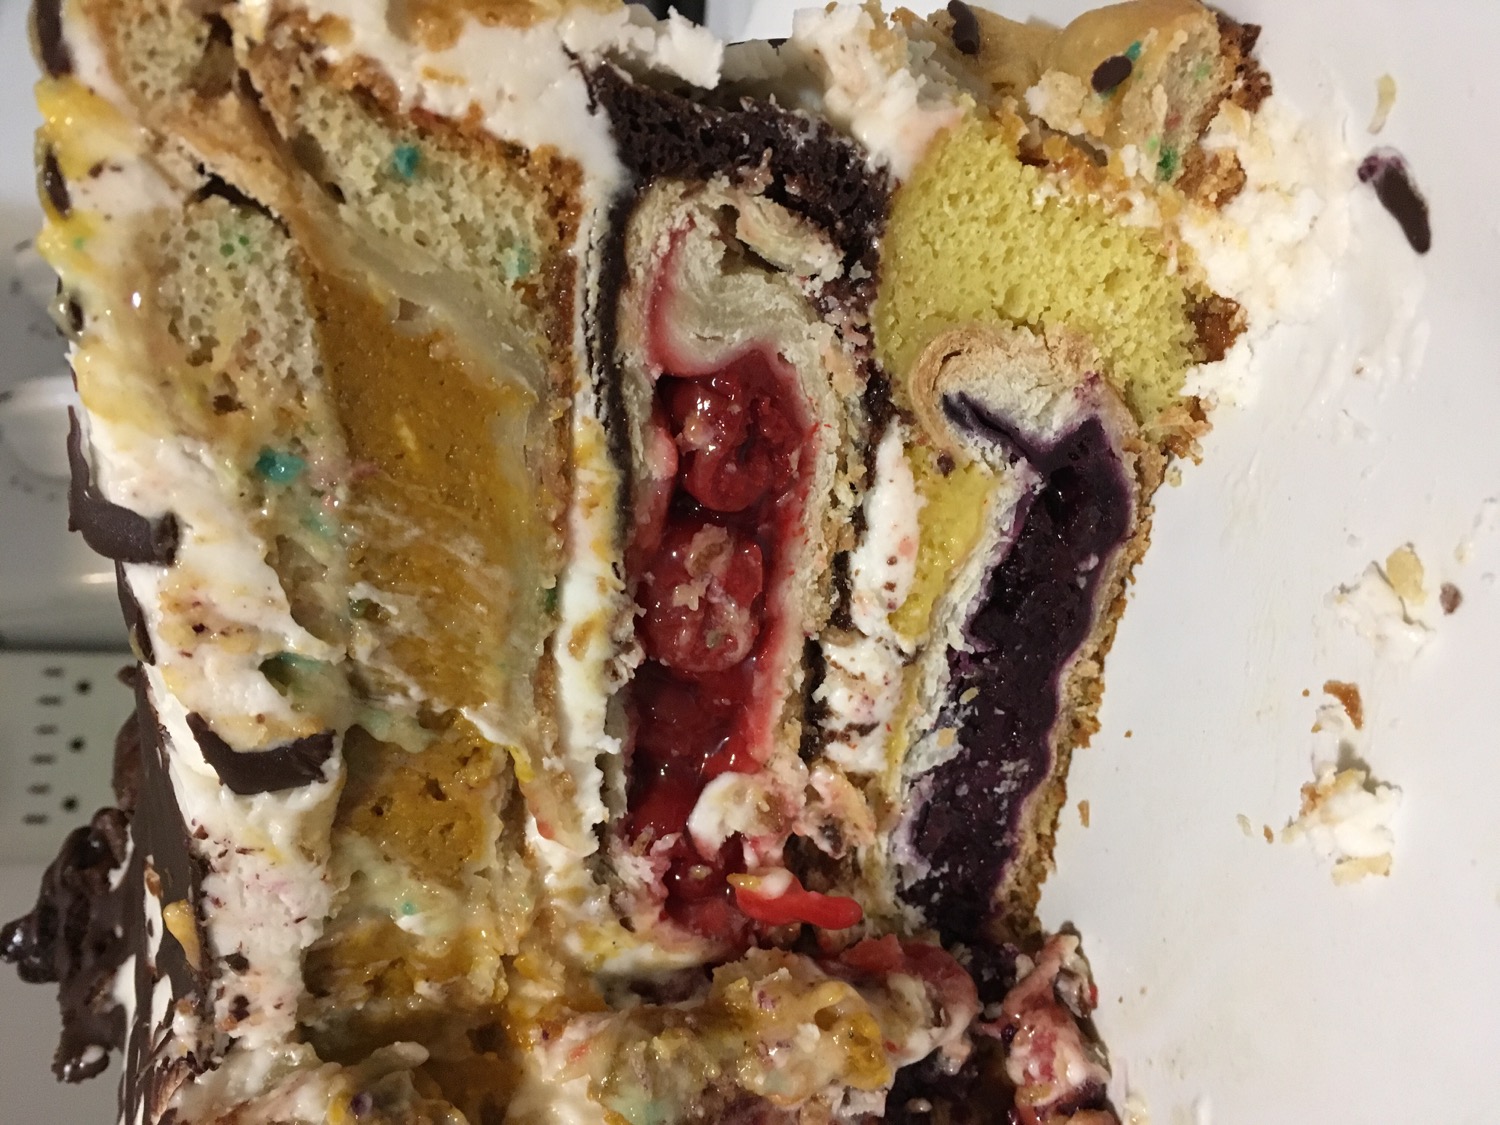
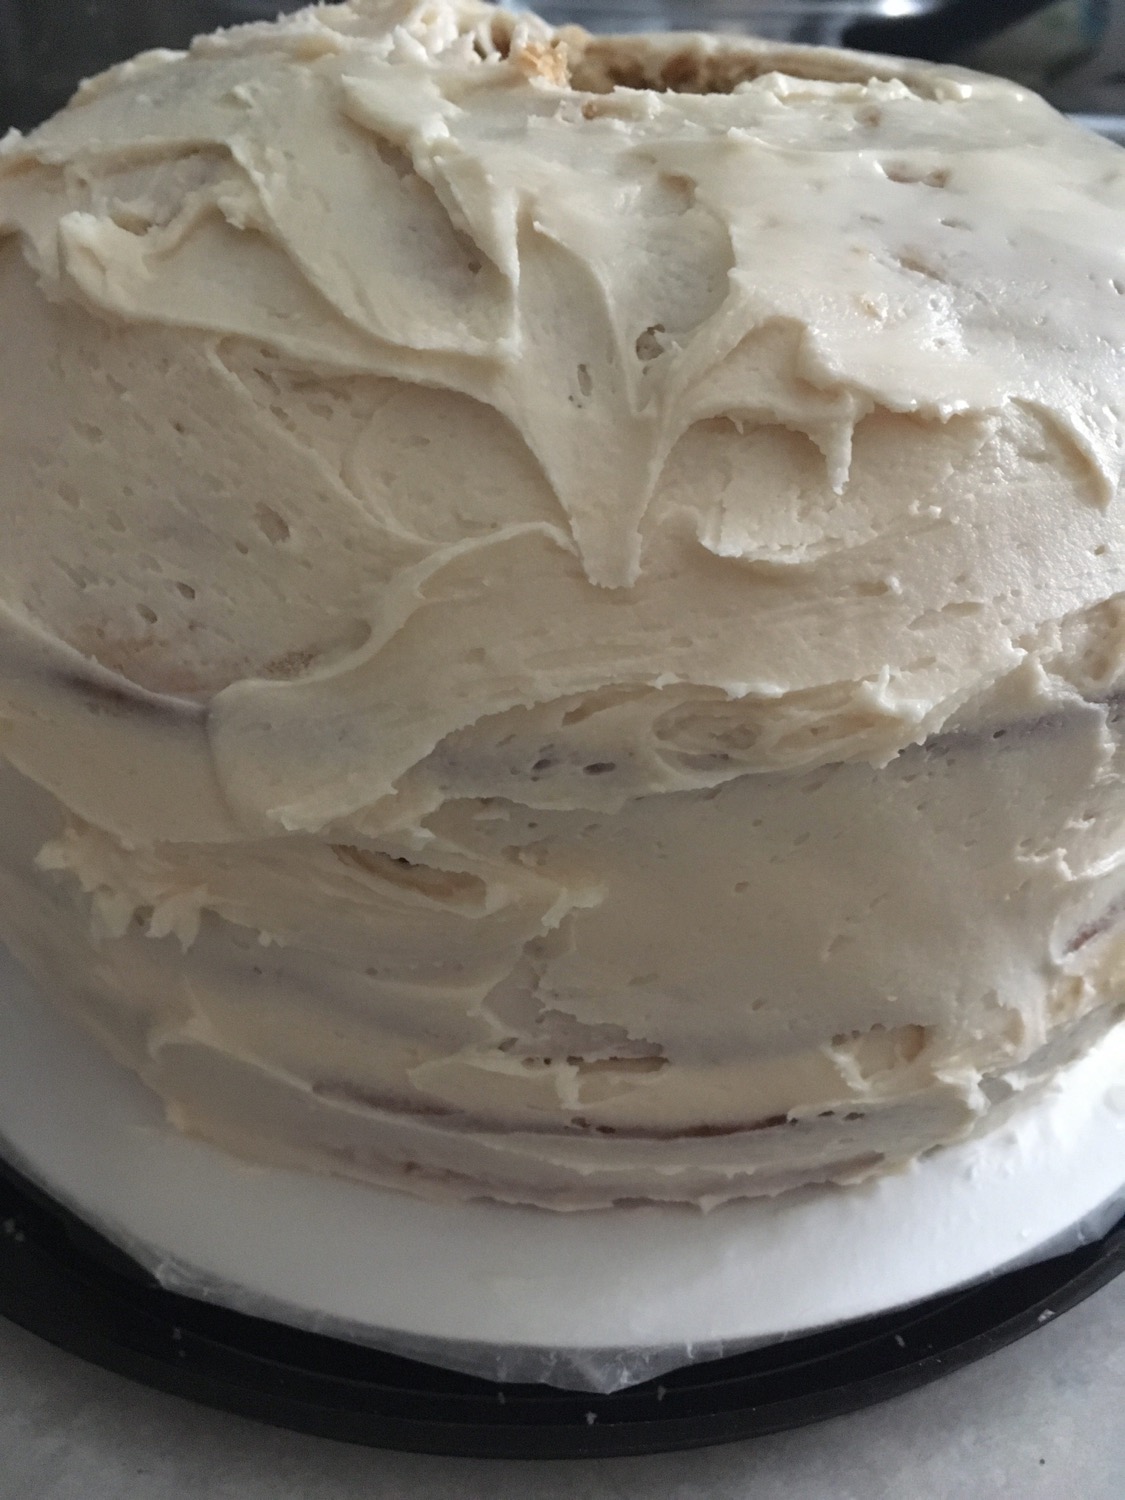
I’ve made piecaken/ Cherpumple in the past and this smaller version has one other difference- the Lemon Cake with Blueberry pie baked into it.
It is also Dairy free, with the substitution of lactose free margarine in the buttercream icing, coconut oil melted with the dairy/nut free dark chocolate drizzle, and reduced fat in the cakes, using apple sauce instead of oil.
The gallery shows the stages- the concept being to have 3 pre made and baked pies, mix 3 cakes up and put cake batter and a pie in each cake pan.
Bake for longer than recommended, about 20 minutes extra.
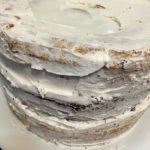
Chill each layer completely for at least 3 hours before assembling.
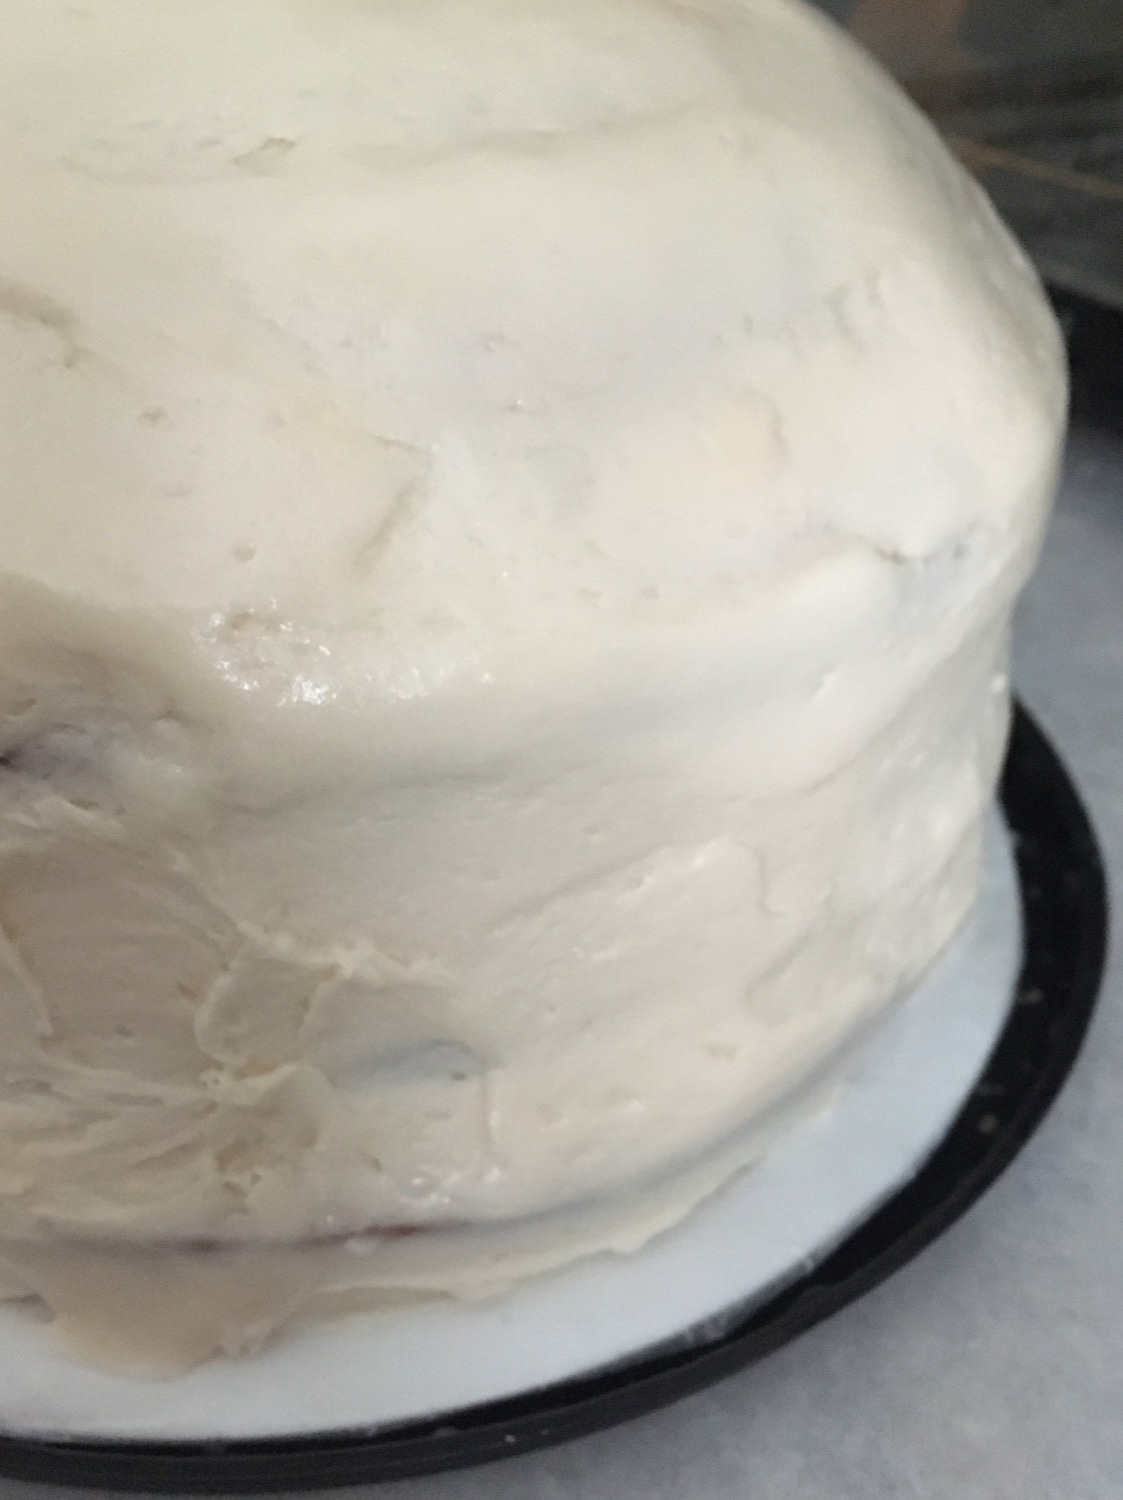
Apply a crumb coat to the cool cake.
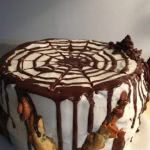
Chill again and then frost fully and decorate as you wish.
The spiderweb was created by melting coconut oil and dark chocolate together and drizzling it onto the surface, letting it drip.
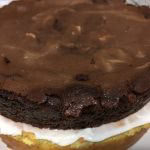
The gnarly cake bits were cut off from the overflow that happened when the cakes were baking. I thought there might be some spillage, so I put each tin on a cookie sheet, and the overflow looked like cooled lava! Great fluke that added to the finished look!
Boxed mixes
Oat milk for the pumpkin pie and frosting
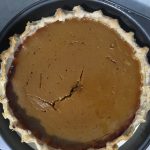
Pumpkin pie
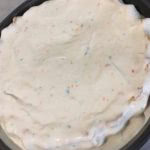
confetti cake with pumpkin pie
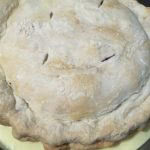
homemade crust made with margarine…
Lemon Cake
Cherry pie
Devils food cake ready for Cherry pie
Lemon/ blueberry layer
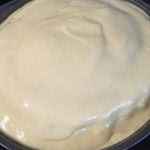
Dairy free frosting
3 layers ready to go!
2 layers chilled and stacked
3 layers filled and stacked.
crumb coat and chilling time
Cake drippings create a fab gnarly texture!
More awesome cake drippings and drizzled coconut/dark chocolate .
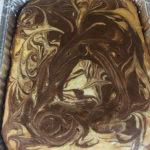
Marble cake from the leftover batter!
Cake drippings create a fab gnarly texture!
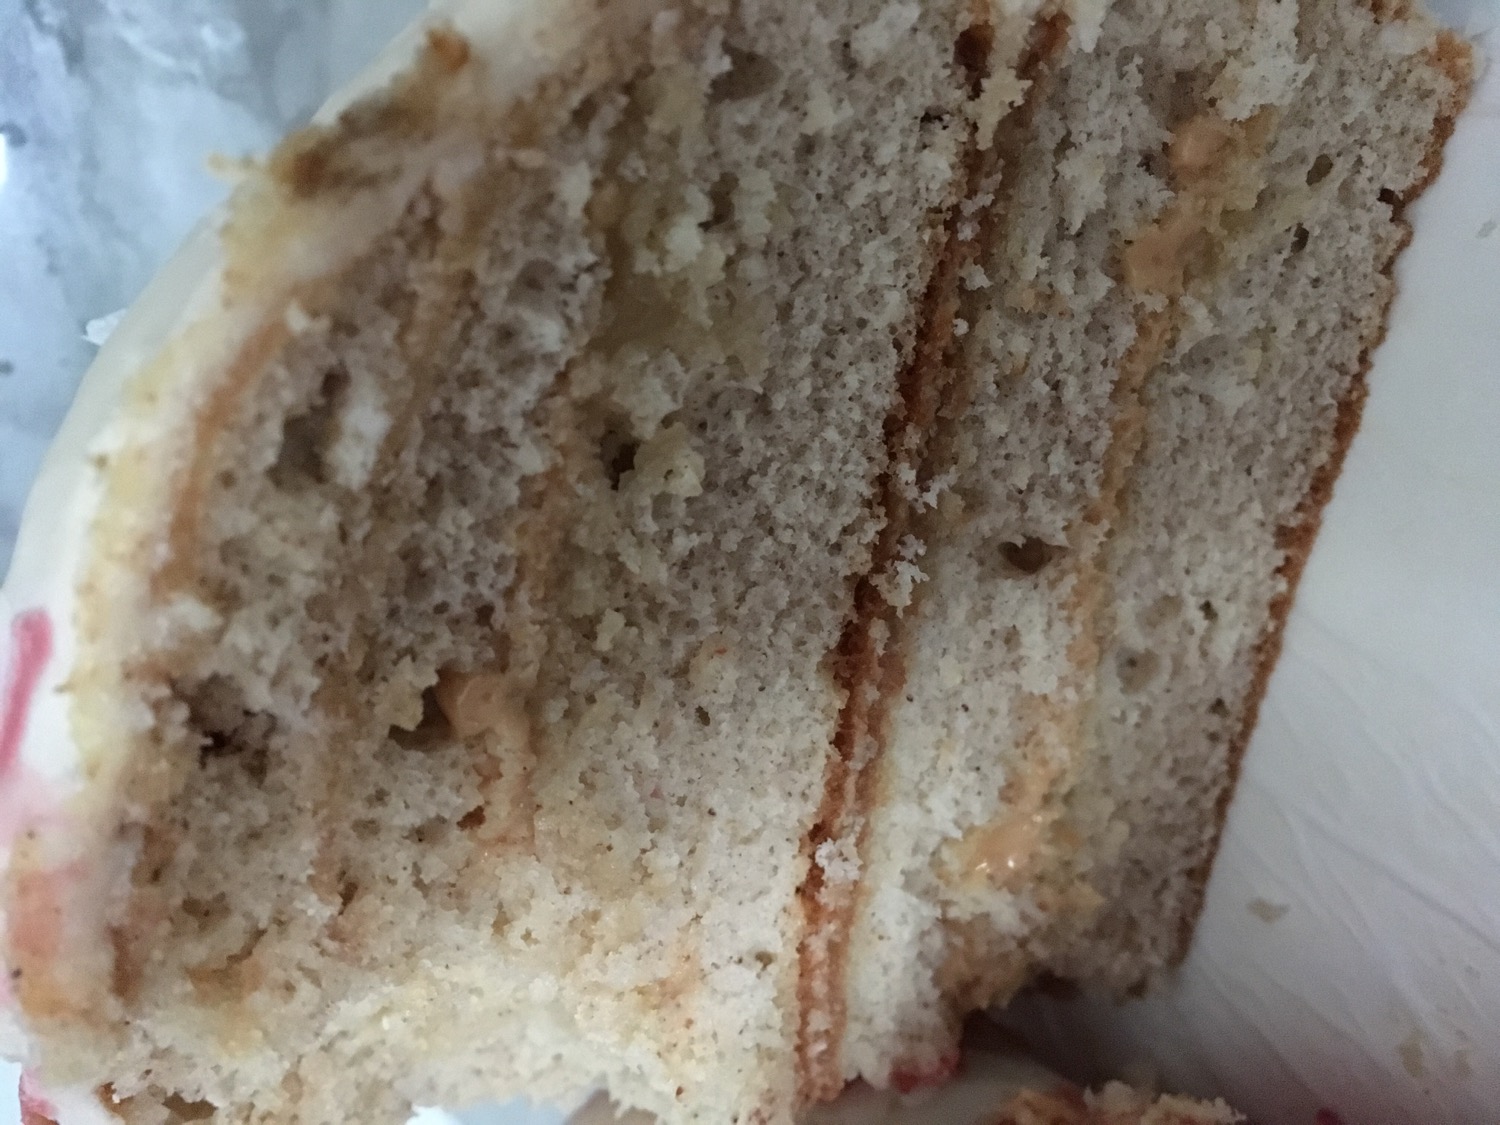
Inside – the 6 desserts in one!Pretty even layers, the layer of “buttercream” was very sweet, but it offset the tartness of the blueberry lemon layer and the cherry layer!
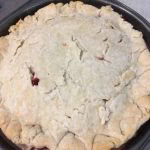
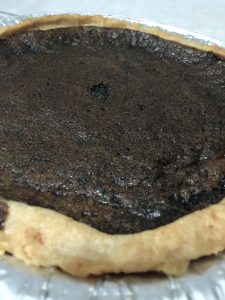
So, apparently, back in the early fall of 2006, John Scalzi made an awesome pie and posted the recipe here.
Somehow, over the past couple of months, this link came through my social media feed – and I clicked through and thought – yeah, that does sound perfect.
“Dark. Rich. And oh so bittersweet.”
So, today. For Christians it is “Good Friday”; for the Jewish community, it is Passover; and in the US today is National Garlic Day and tomorrow is Husband Appreciation Day… before I get lost down that rabbit hole, coming back to Canada and for me, today is the beginning of some cocoon time over this weekend, having even sent my furbaby off to visit her Aunt D.
And I suddenly wanted to make pie. And then I remembered the Schadenfreude Pie!
With it having been Aunt D.’s < Sprocket’s “Aunt”/ 2nd mom, not my Aunt> birthday recently, AND Happy Belated Kristine, <John Scalzi’s lovely wife>, I could make 1 for us, 1 for her and a mini so that I could make sure it was actually as good as the recipe sounded before sending a fresh pie off with her! The mini was amazing – will share our remaining pie with the hubby to show him appreciation… even here in Canada…
My modifications bring it across the border into Canada < northern US could use these variations too, I’m sure!> as well as being based on what I had in the cupboard.
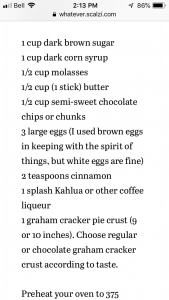
The original ingredients < be sure to visit the World’s First Schadenfreude Pie post for the rest of the mixing and baking directions>:
What I changed:
1 cup dark corn syrup – 1 cup dark maple syrup – or any colour maple syrup
½ cup semi sweet chocolate chips. ¼ cup white chocolate chips and ¼ cup black cocoa
Along with the cinnamon, I added 1 teaspoon of powdered ginger
I skipped the booze as I did not have anything handy – but would try it in the future!
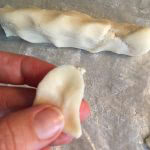
and I rolled out some previously made frozen pie crust – classic style- and split it into 2 smaller pie tins and 1 mini and I prebaked them for about 10 minutes before filling them.
Beyond that, I followed the original recipe and it is perfect.
Thank you, John Scalzi, for bringing more enjoyment to my world – he’s a fun writer too folks!
I would probably serve with whipped cream < Aunt D’s suggestion> and maybe have a shot of dark rum or the suggested booze with it, or just a nice dark coffee…
The mini cooked a bit faster and may have had more of the molasses in it.
Aunt D’s pie – no wound.
Our pie – slight wound from poking it to check that it was baked
Oh, and if you are wondering what Schadenfreude is:
https://en.wikipedia.org/wiki/Schadenfreude
Mom is having a significant birthday in a few days, and for scheduling, the BIG PARTY was this weekend.
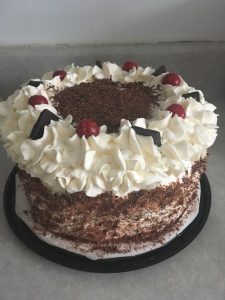
I offered to make her dessert. Upon asking her what she wanted, her quick response was Black Forest Cake – I got this!
We have a few varied dietary needs withithn the family realm though and so I also offered to bring something non-dairy/gluten free as a side snack for those folk.
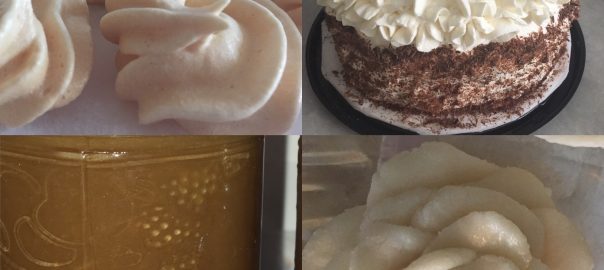
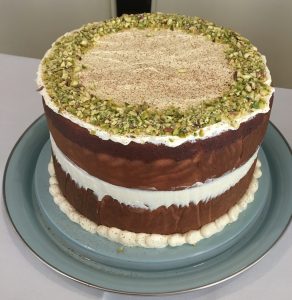
Another awesome baker in the family, Sarah, offered to make a cake as well to cover the full-on healthy desssert option. Her cake is amazing:
Sarah’s cake
My plans: cake, moulded roses as an accent, and a variant on my granny’s butterscotch cream pe – meringues …and then I went way off road for this “variant” – maple curd
Black Forest Cake :
3 layers of chocolate fudge cake – a box mix using the lower fat option – baked in 8 inch pans
500 ml Whipping cream with added Oatker Stabilizer as this puppy has to travel!
1 can cherry pie filing – ½ sugar very – but yes, in a can
1 block from a full size bar, shaved chocolate – I hate making shaved chocolate, but I had a lovely Lindt dark chocolate bar so I was able to shave the minimum I needed to cover the patchy whipped cream sides of the cake.
Once the alyers were baked, I shaved the domes off the layers to make them flat. Assemble: layering cherry pie filling on the bottom layer, then filling and whipped cream on the 2nd layer. Cover with whipped cream in the style of your choosing and sprinkle the shaved chocolate and few saved cherries on top to make it pretty.
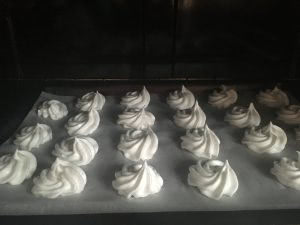
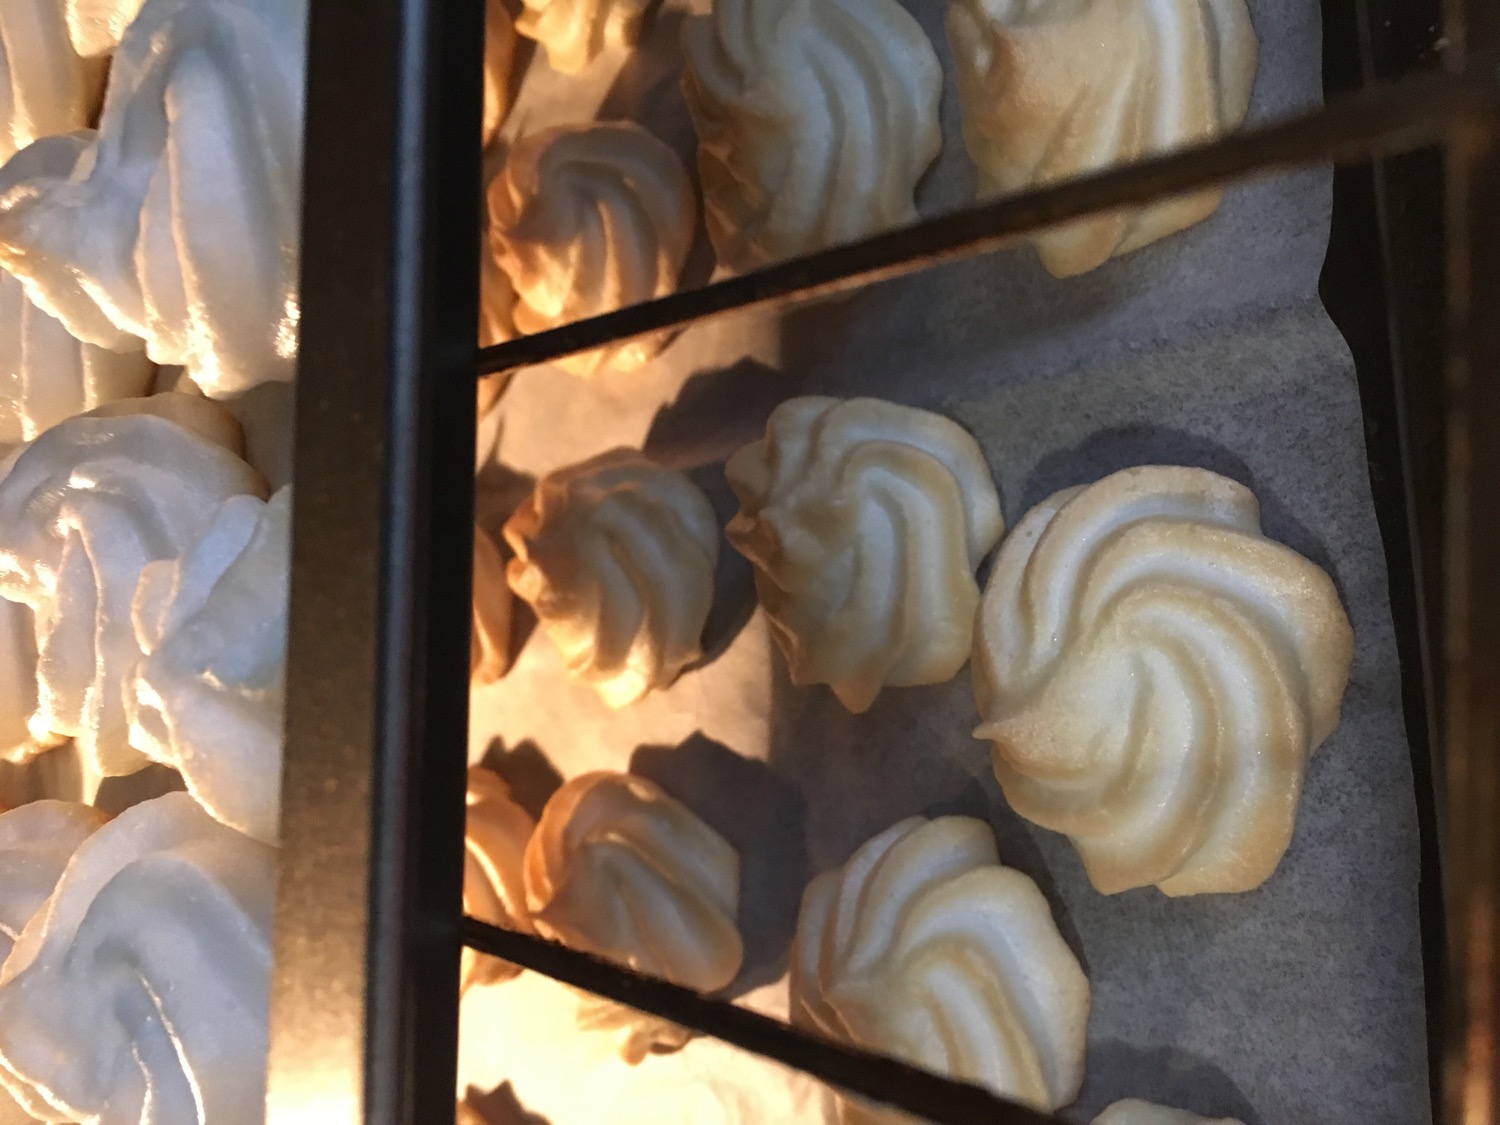
Meringues:
4 egg whites at room temperature
¼ tsp cream of tartar
¼ cup icing sugar – too much – I’ll use less in the future
Whip it up good, pipe onto parchment lined cookies sheets and bake for 55 minutes at 250 degrees, then turn off the oven and let them sit for another hour or more.
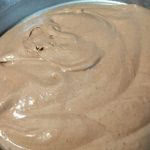
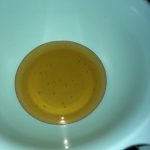
Maple Curd:
The big adventure…
In a sauce pan, mix together really well:
1 cup brown sugar
2 tablespoons coconut milk powder
Then add and mix all together
½ cup maple syrup
½ cup water
Cook on medium heat until it boils and stirring constantly let it reach 105 degrees on a thermometer – maybe higher would have been better – that’s just what I did.
In a small bowl, beat
4 egg yolks
Then pour some of the hot syrup into the bowl, mixxing to heat up the egg yolks, then pour the mix back into the sauce pan and let cook for another 5 minutes.
Bring off the heat and add
1tsp vanilla extract
1 tablespoon coconut oil
Stir well and pour into mason jars. Cool and store in fridge. Shake well before using.
This created a sauce that was drizzled over the meringues – giving a light sugar kick without dairy or gluten – but does have eggs.
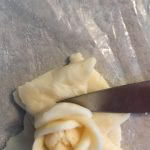
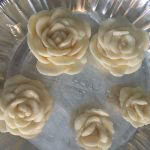
Moulded chocolate roses:
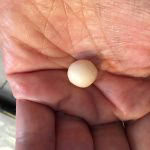
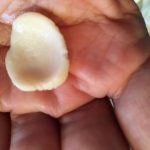
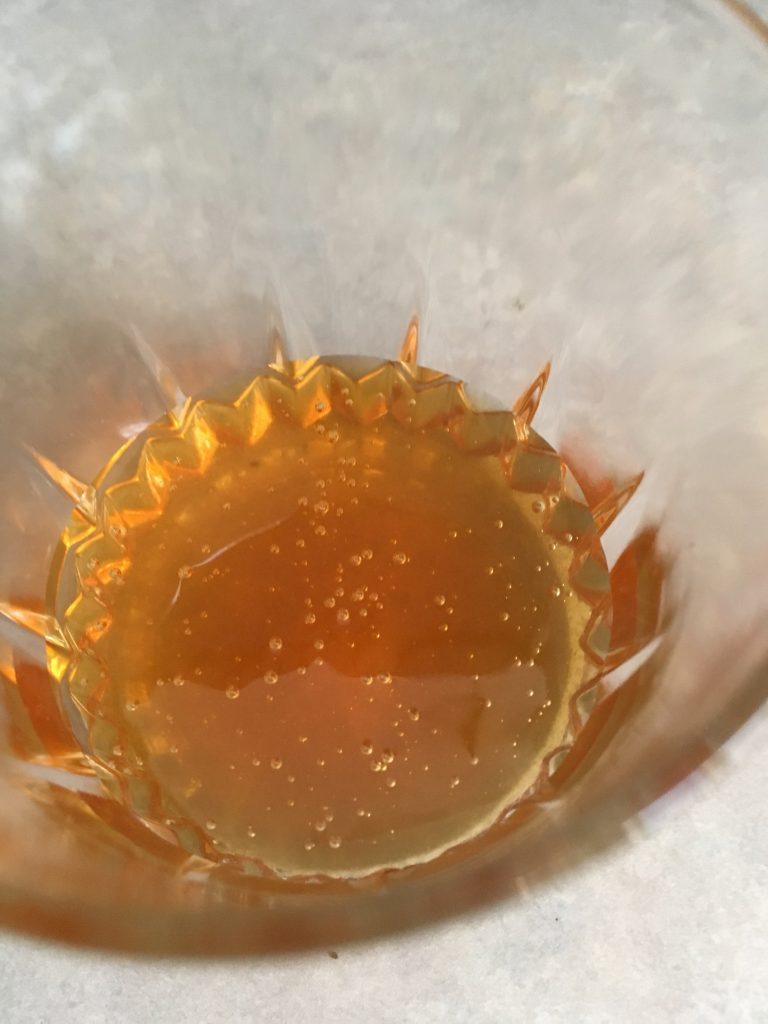
Based on the method from my previous post about using moulded chocolate, I once again melted the chocolate and added the honey, then covered it with plastic and let it chill on the counter for a few horus while I did other stuff.
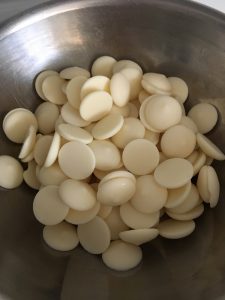
120 grams of white chocolate discs
1 ounce of honey by weight
I am canadian and thus bilingual when it comes to measurements – my scale has both
After kneading the chilled chocolate, I then played witha few ways to create the roses.
The first one was made by shaping small bits of chocolate into flattened petal shapes, but they had a lot of length to them and I wouold cut it off at the abse after adding it.
For the next one I tried rolling a tiny ball in my hand then squishing it with my thumb to create each petal, and placing them overlaping around a started bud/blob. This worked better and I continued with this method for the remaining ones.
Eventually, with both techniques, it built up a lot so I have to cut off the base on each one so that it was not too thick.
I think I did pretty well for a first time! *pats self on back*
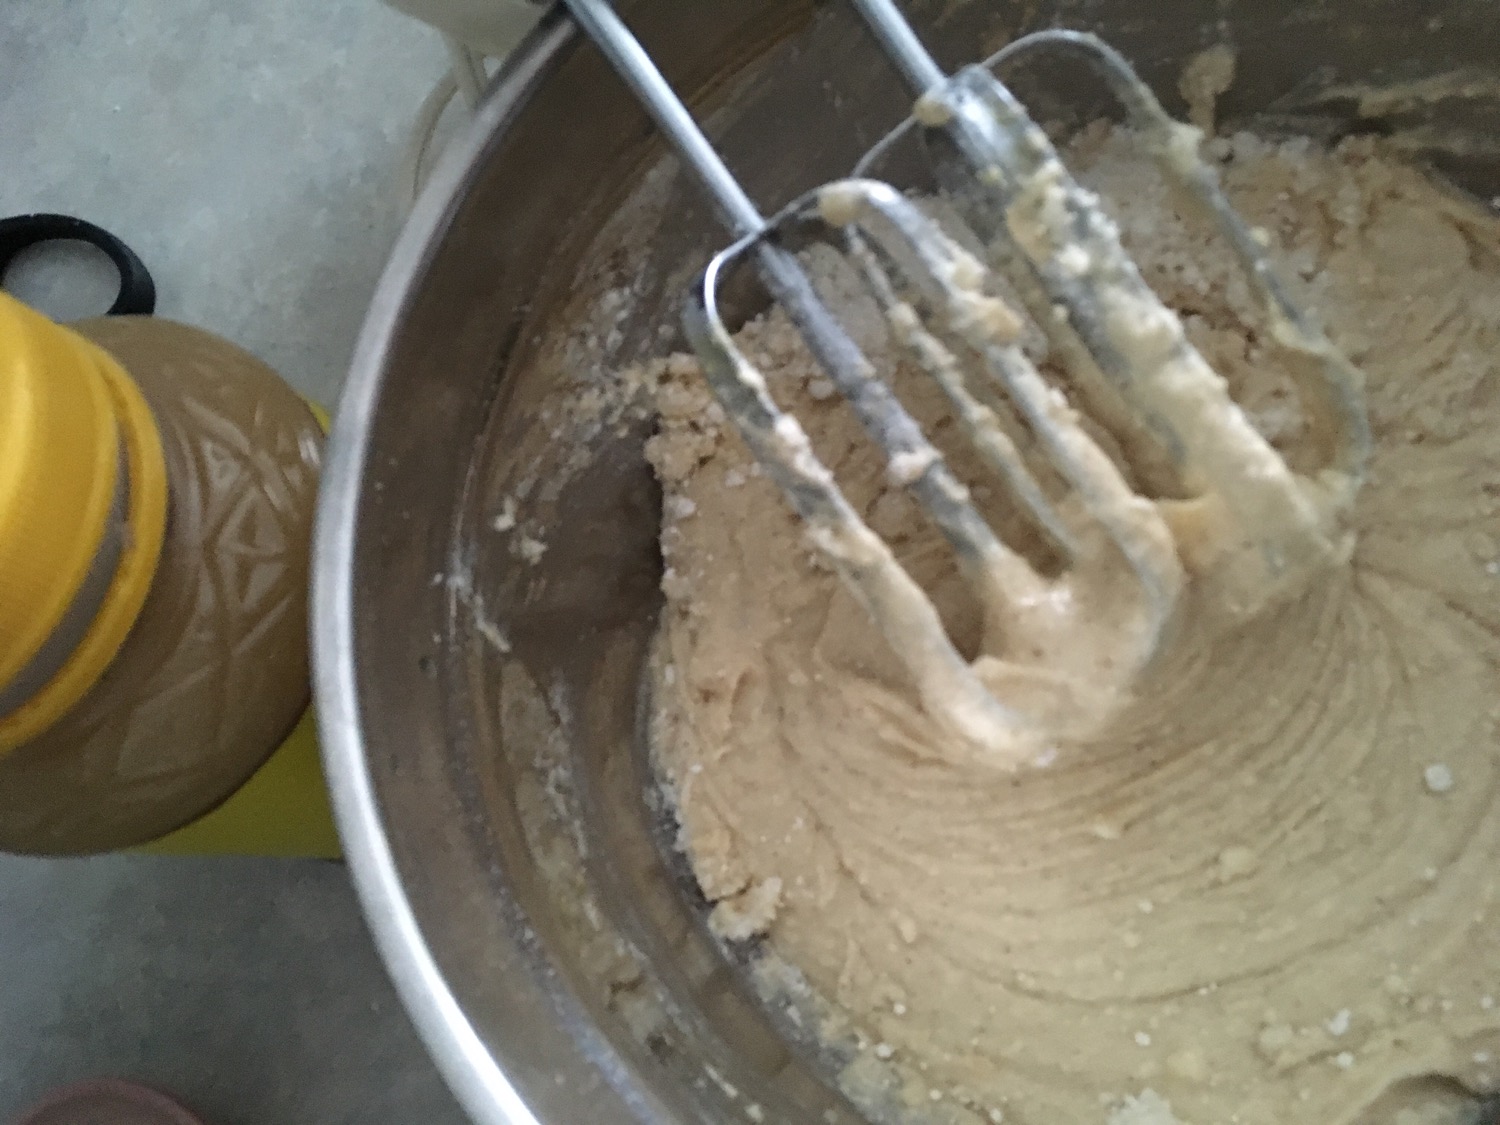
For my final birthday cake, I wanted to create the chest burster, and was originally going to make another black forest cake, but we still had leftovers from the first one. I opted instead to go with a spice cake made from a french vanilla box cake mix.
I used the lower fat version on the box – using applesauce instead of oil, and added about 1 tsp of each – cardamon, allspice, cinnamon,and ginger to the cake batter.
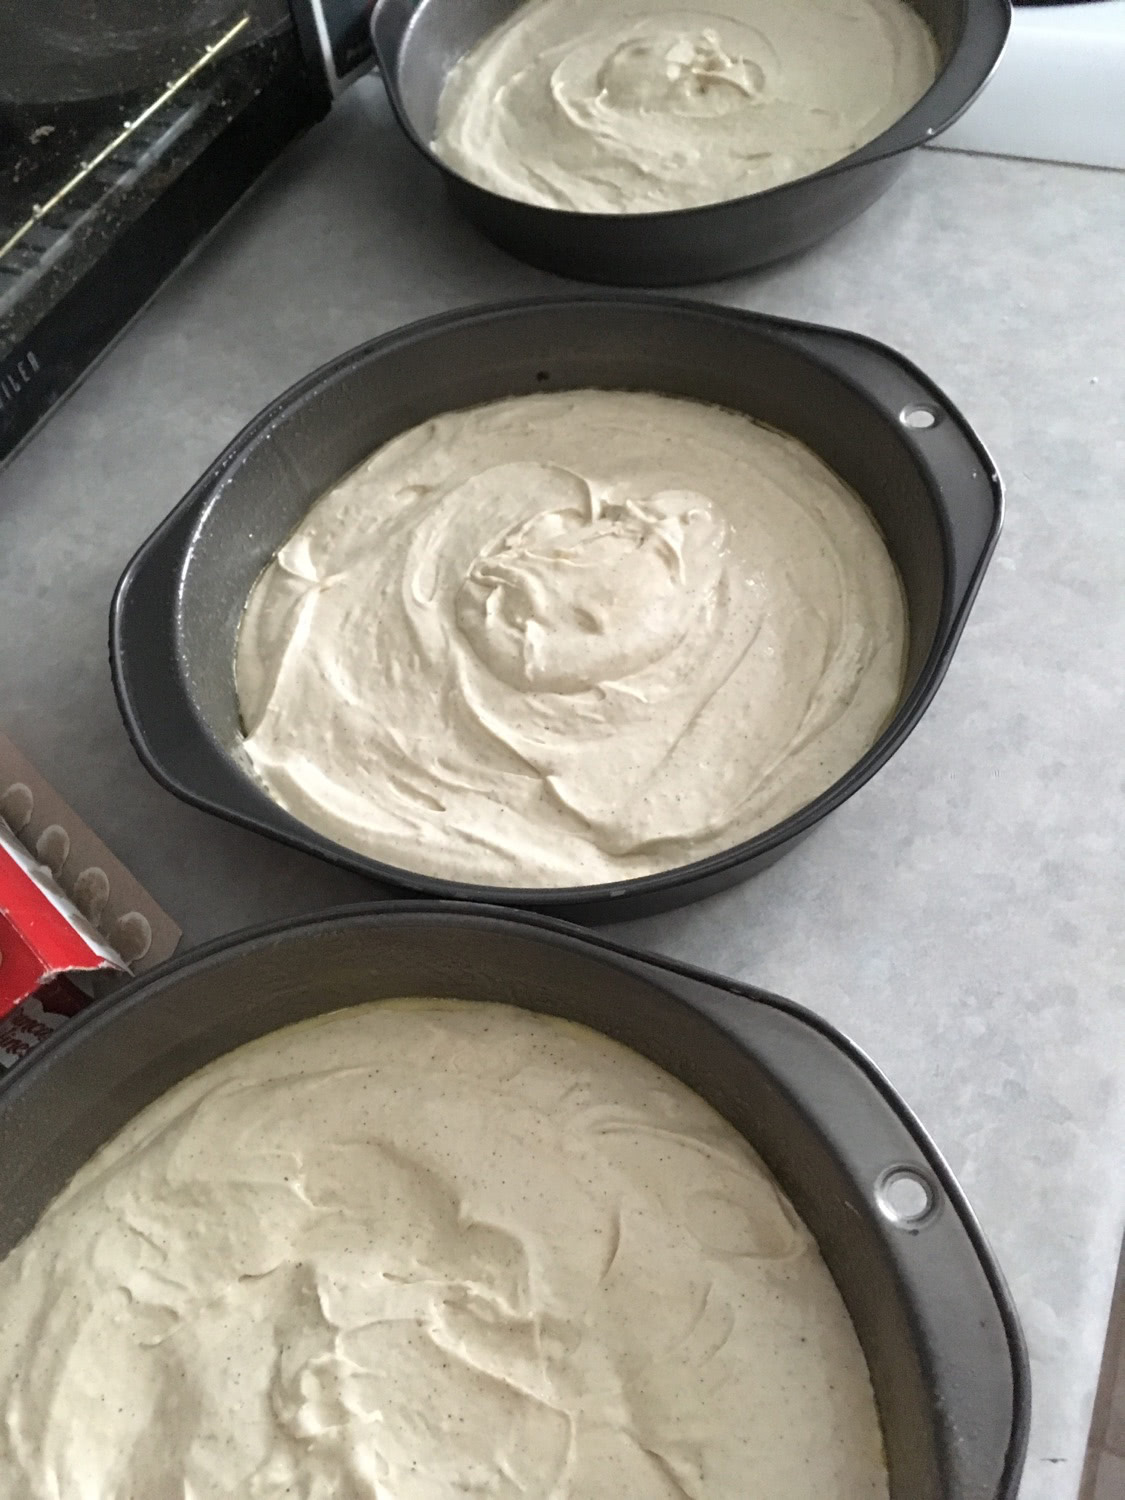
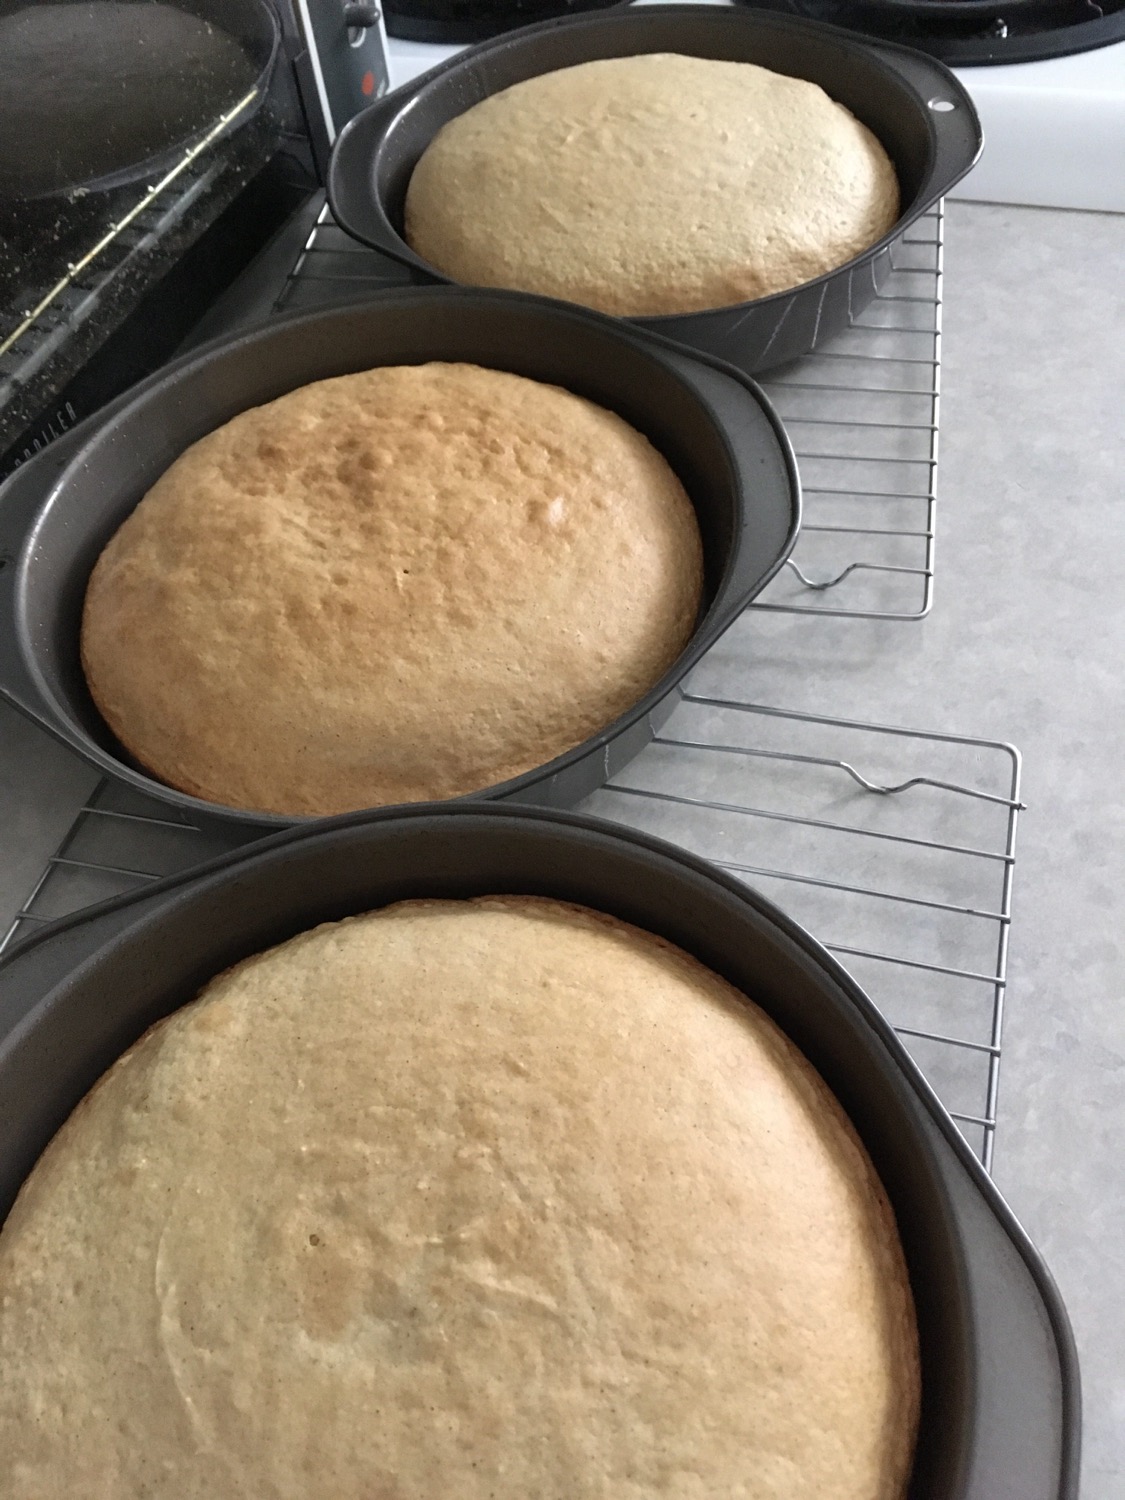
I proceeded as per the box and chose to use 3 pans instead of 2 to speed the cooking time and it gave me more layering of flavours!
Box mix of french vanilla – used apple sauce instead of oil and added spices!3 – 8 inch cake pans3 gorgeous fool proof layers!
Once the cakes cooled, I wanted to have a nice gentle flavour without being too sweet, so I had purchased some pre-made dulce de leche, and mixed about ⅓ cup with a few tablespoons of heavy cream and whipped it all together. I think butterscotch pudding would work in a pinch too 🙂
dulce de leche with heavy cream to be whipped together for the filling
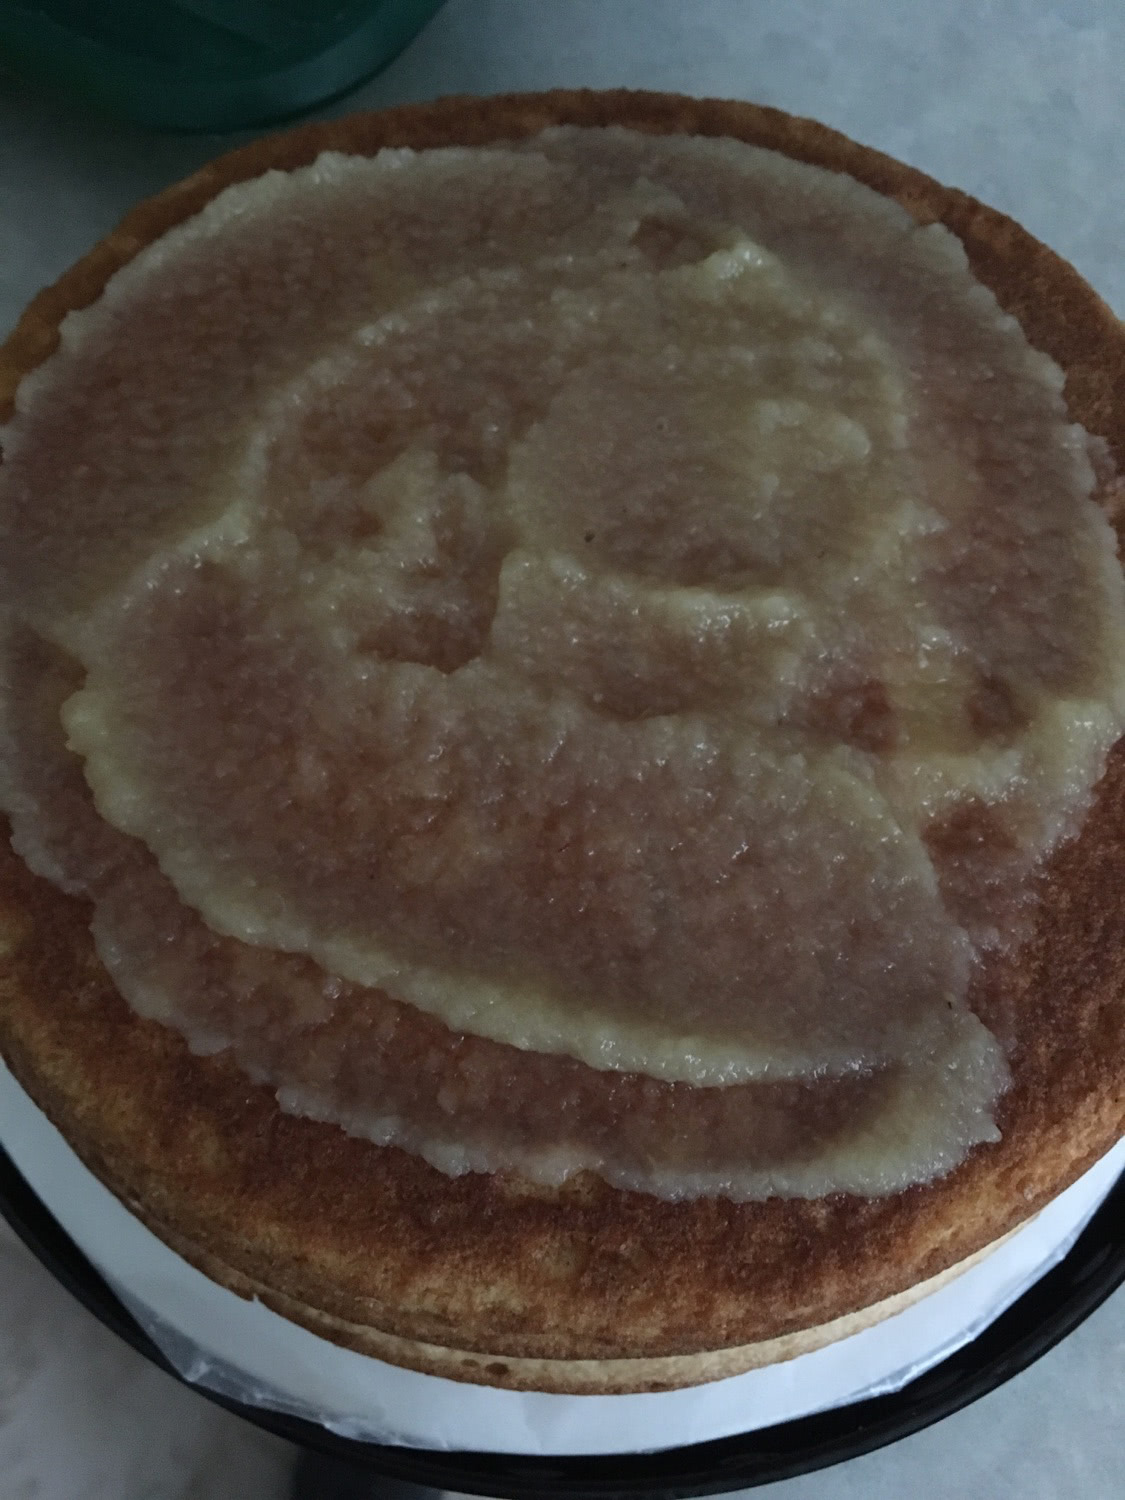
After slicing off the domes of the layers – making them all level, I stacked the three layers with apple sauce and the dulce/whip fillings.
layering with apple sauce and then the cream filling.
the cream filling over the apple sauce.
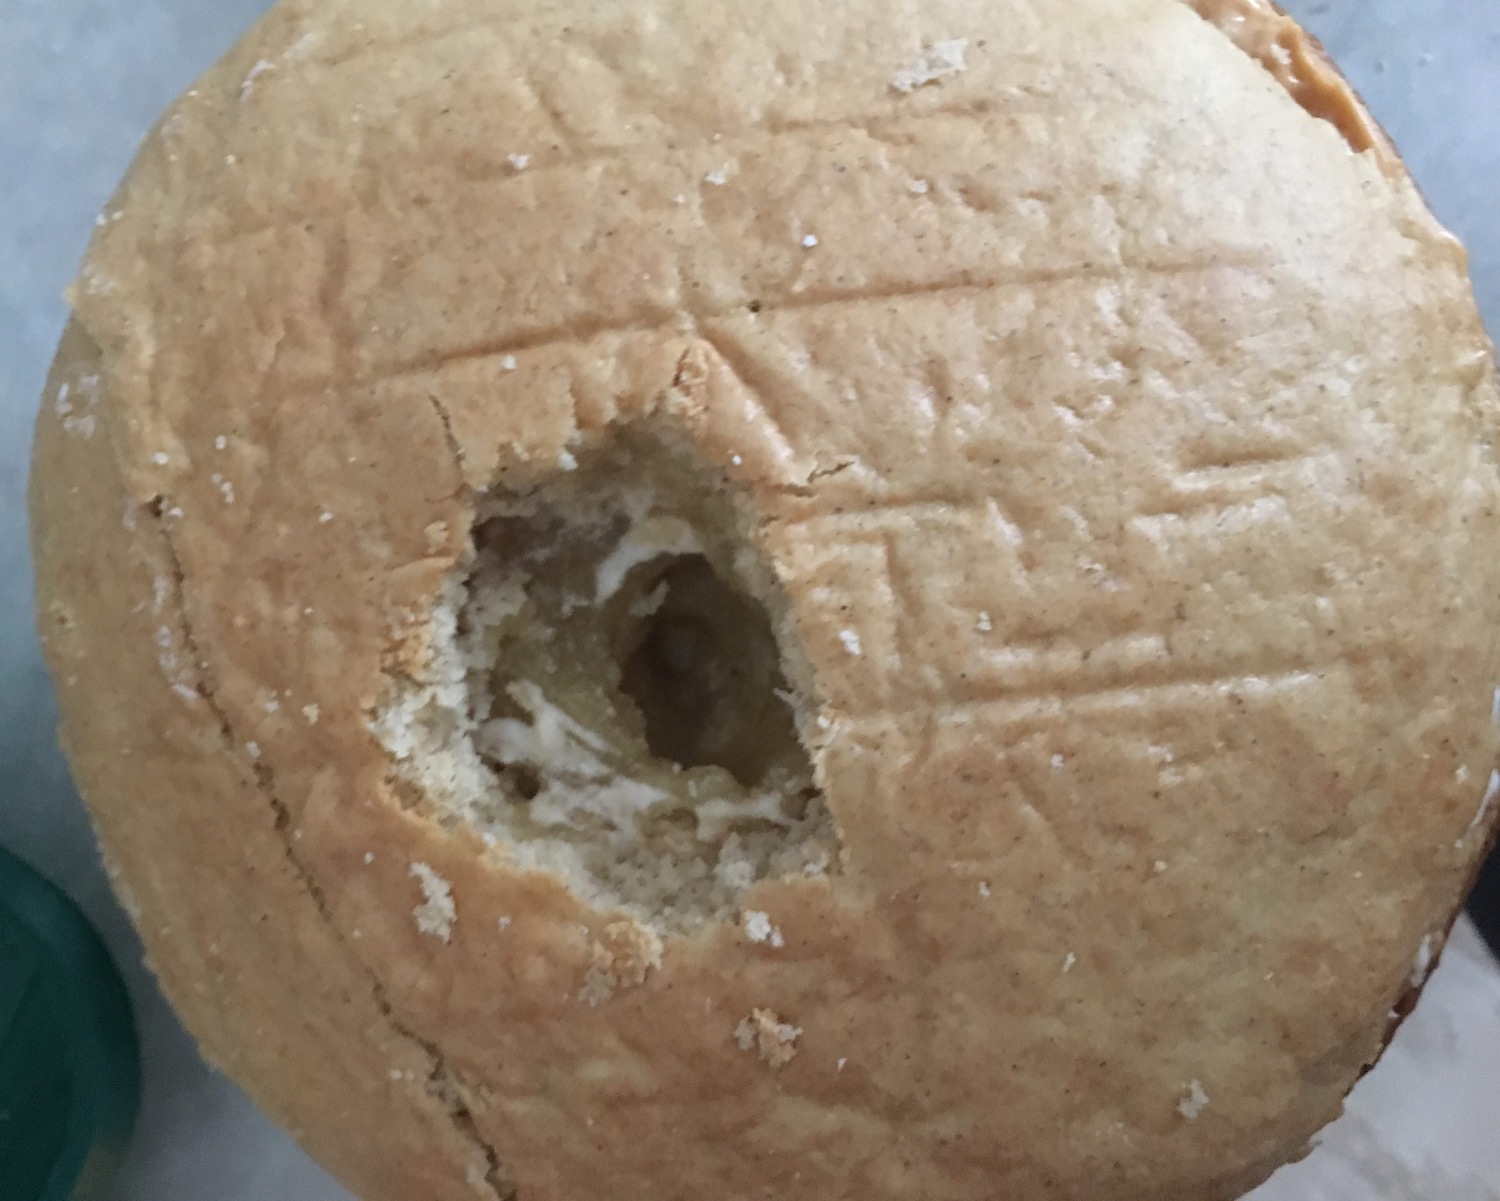
To create a nice base for the insertion of Fred, I built up the top with more sauce and cream filling and the sliced off domes, cutting the centre hole for Fred.
Capping it off with one of the cut off parts – to create a mound at the top of the cake. The hole is for the little guy!
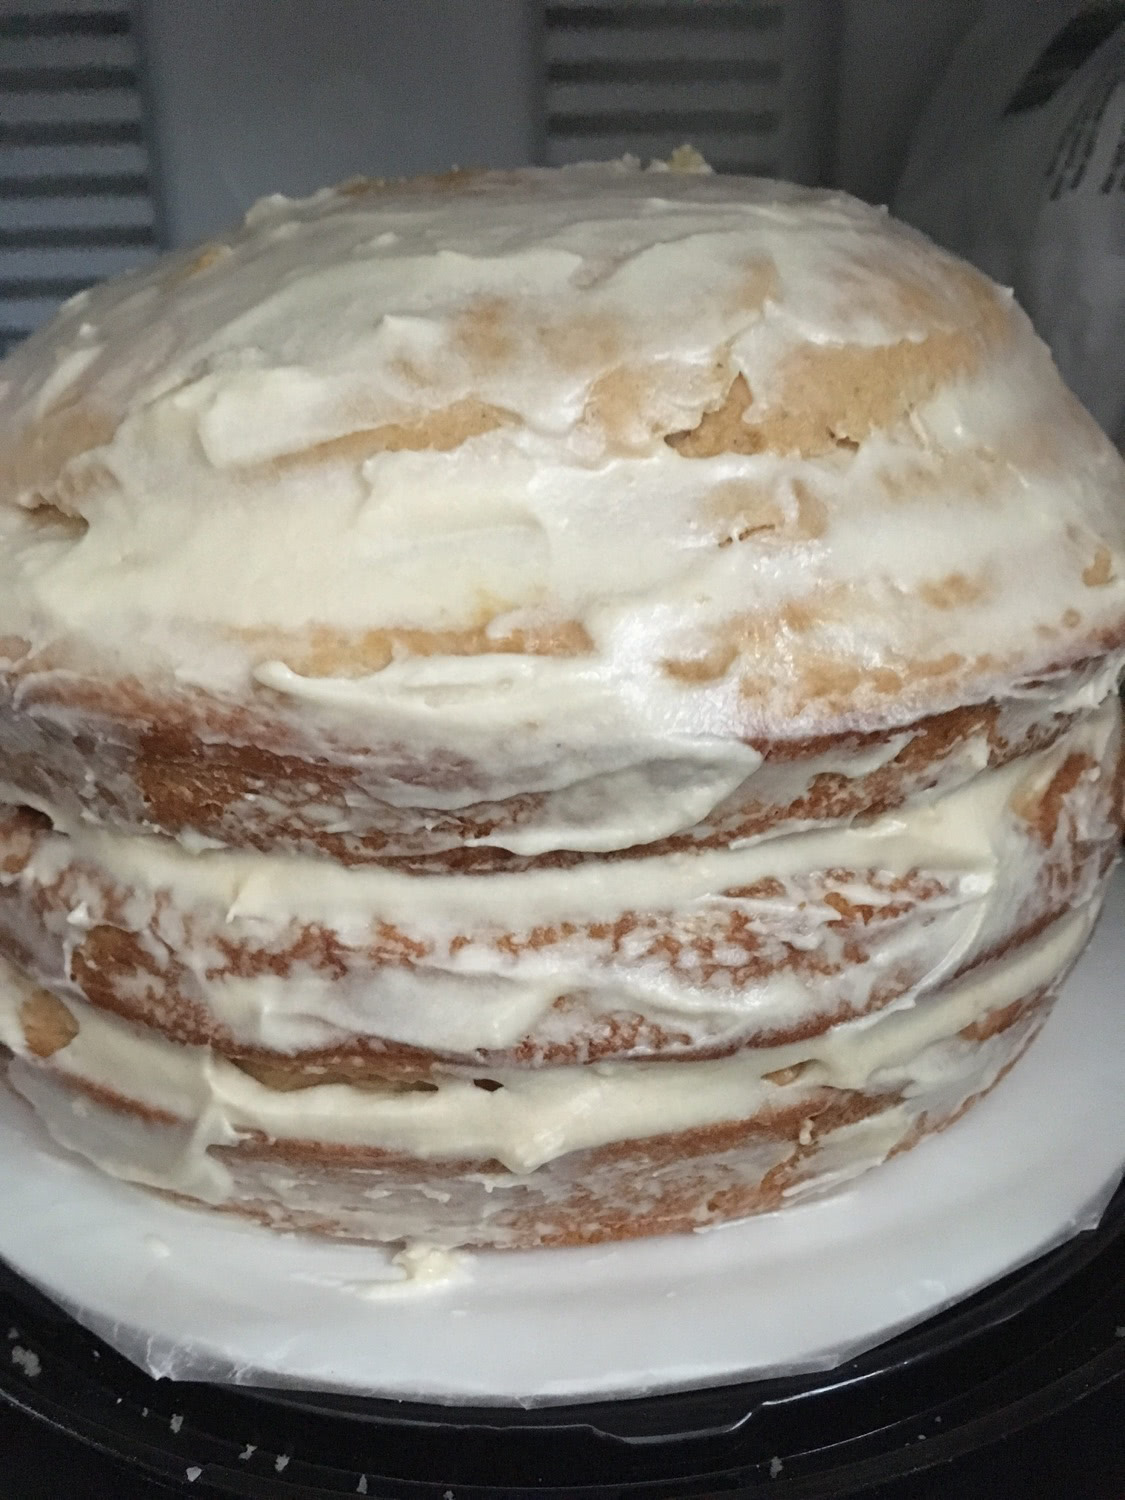
And on to normal cake finishing – notes with each picture.
Crumb coat then chill – butter cream mixed with Dulce de leche.the finishing layer of buttercream.I like to smooth out the surface with wet fingers – well washed, of course! It lets the sugar melt just a tiny bit and creates a smoother look.
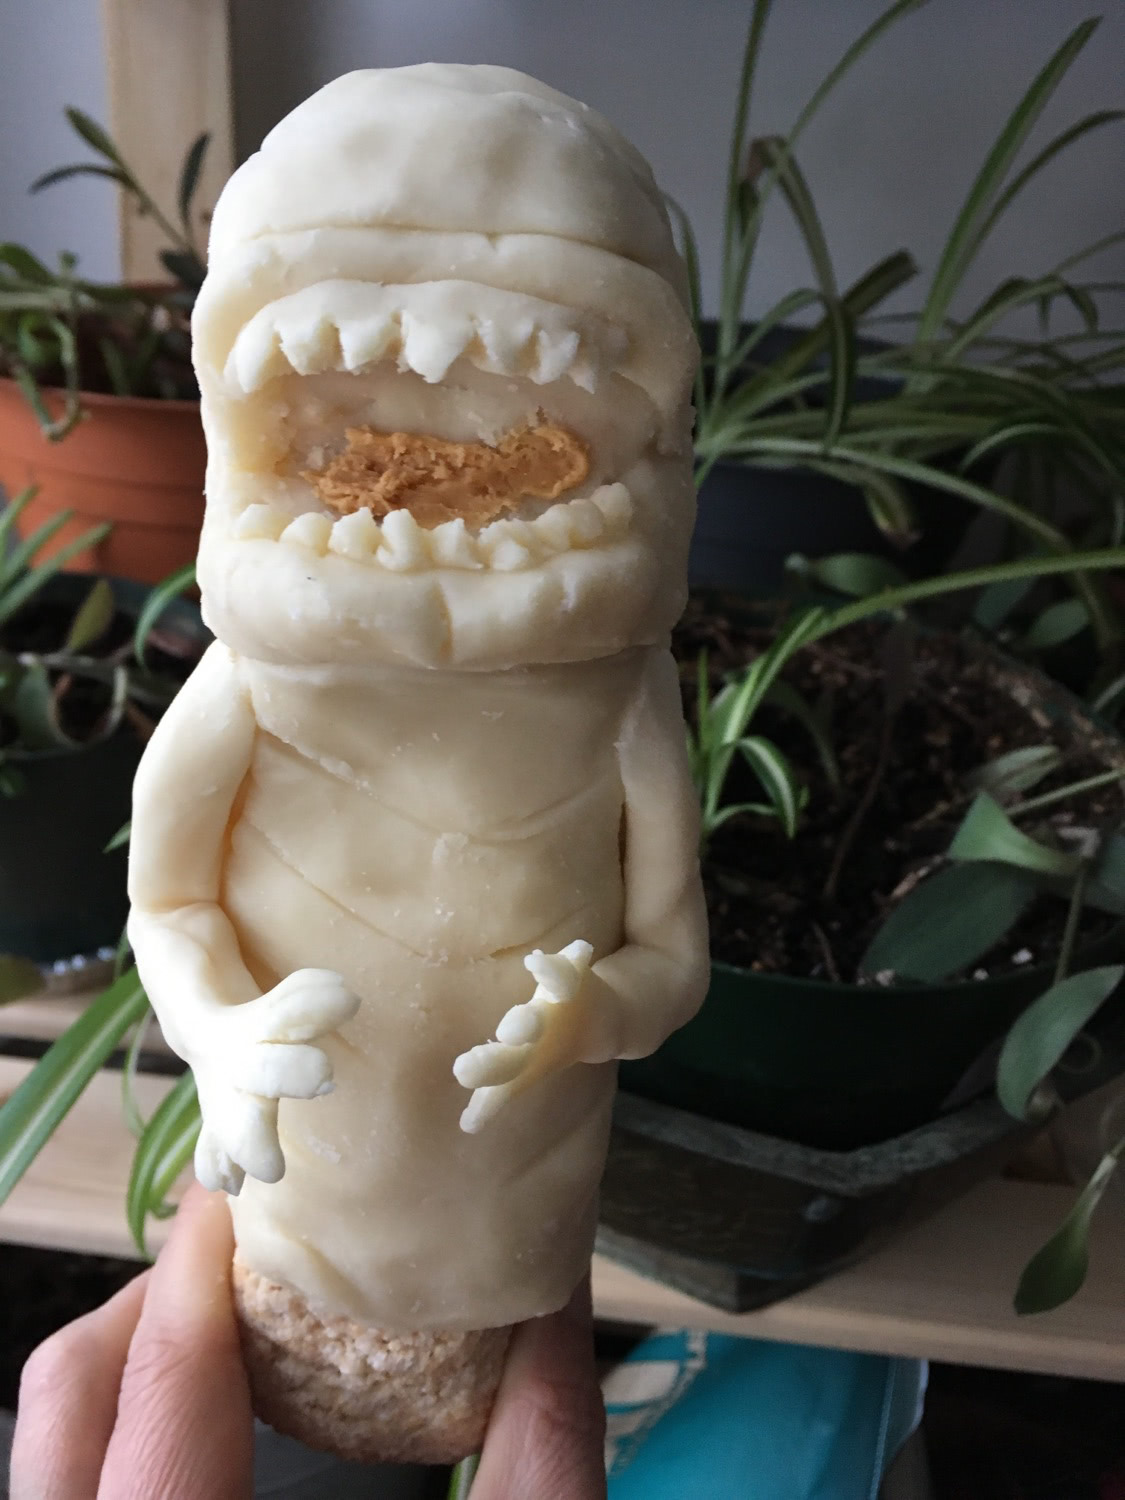
The final addition is – let’s call him Fred!
Sketch from DragoArt which was my inspiration!
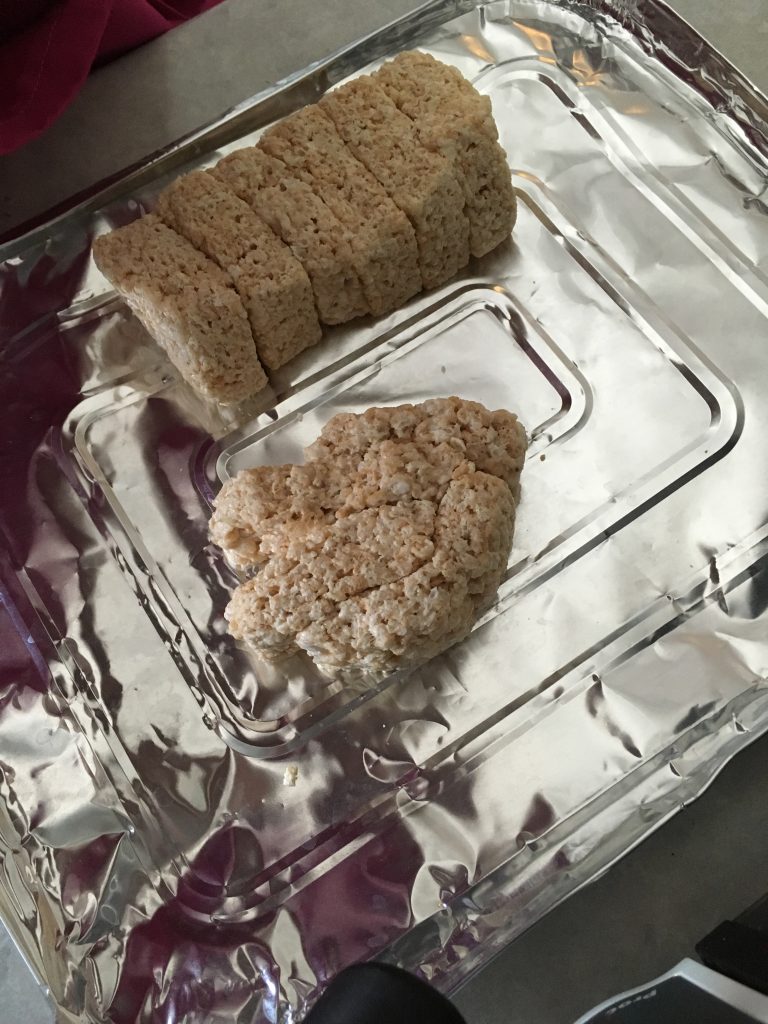
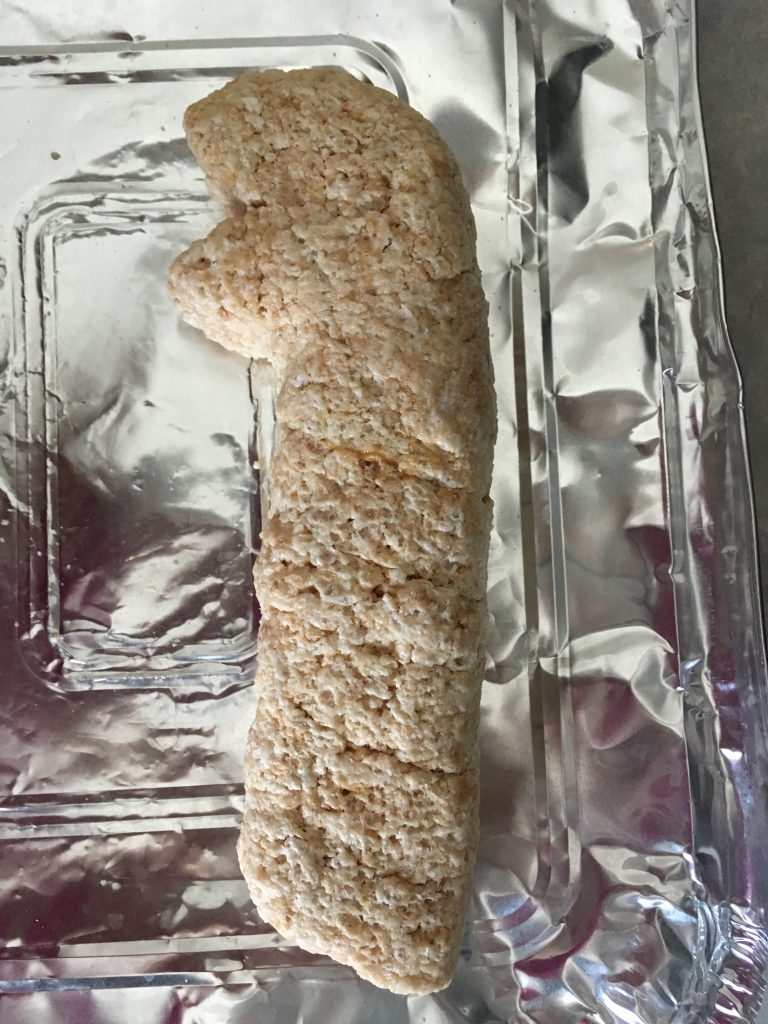
I made him from rice crispie treats. I used pre-made ones as I did not want to purchase everything to make them and have leftover marshmallows etc. – but they are nut free…
stacking and squeezinggetting there…
The moulding chocolate was a new adventure and these folks here explained it best – so click to check their link – you can see most of the details there.
The difference with mine is that I used honey as a direct substitute for corn syrup and it worked perfectly.
Molding Chocolate – approx 250 gramsHoney – approx 3 ounces by weight.The seized chocolate sealed in a bag and resting for about 8 hours.
And TADA !
Kneaded and moulded around the base and carved:
Hey Fred!You can see the Rice Krispie square base that I left uncovered – it gave me a bit to handle for insertion into the cake later.
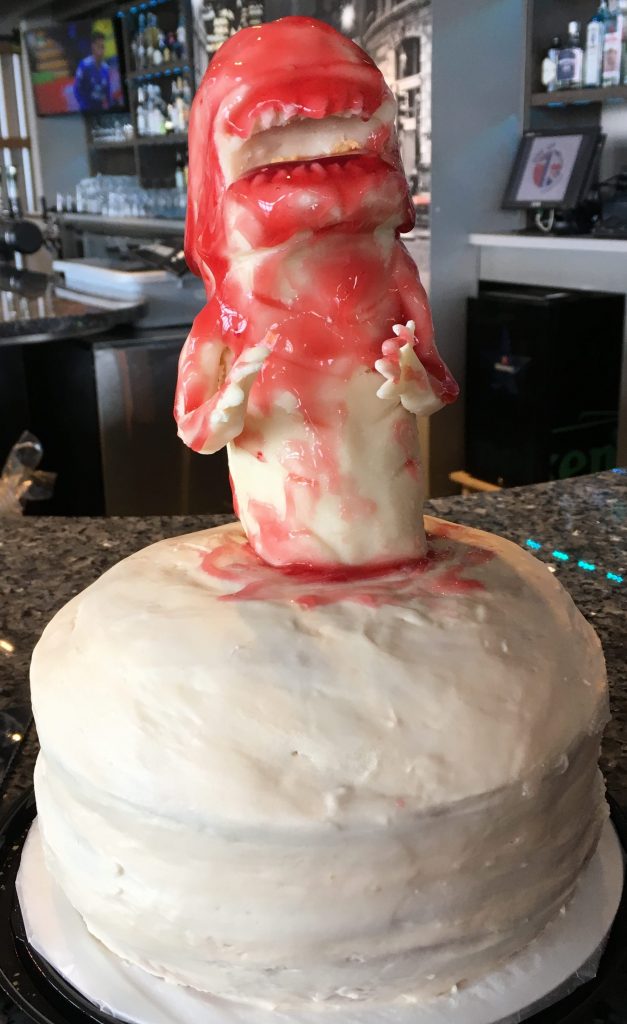
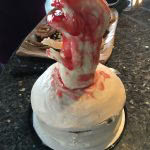
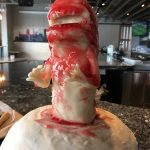
And finally – fully set up at the party:
Meet Fred, dressed in cherry red…. pie filling syrup that is…
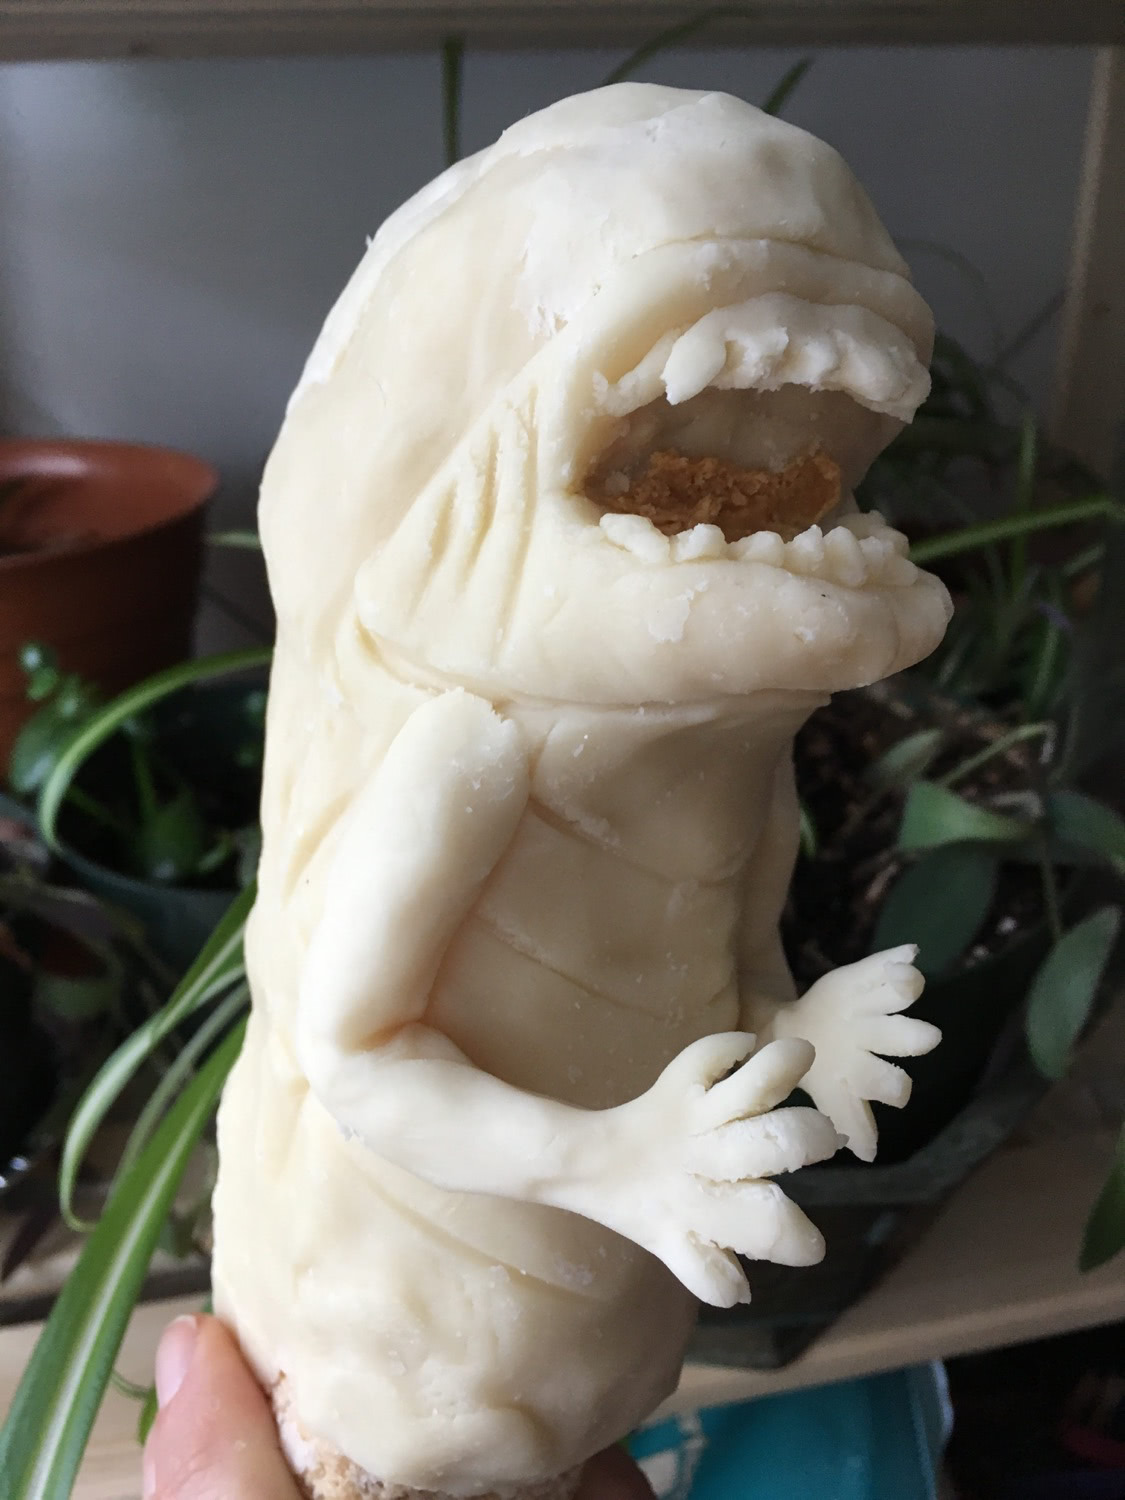
Fred has just emerged
Fred is happy to see you
Fred appreciates your sacrifice.
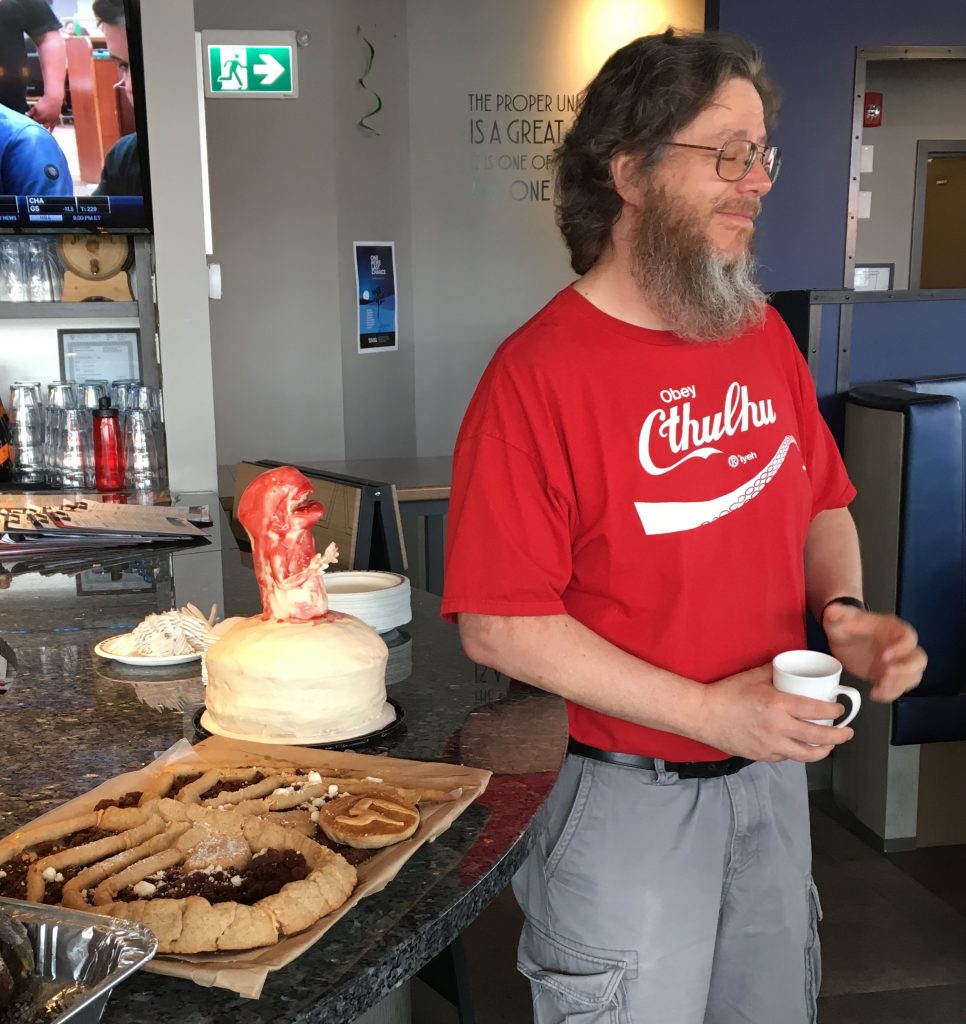
Two middle stages of Xenomorph life and the Birthday Guy!
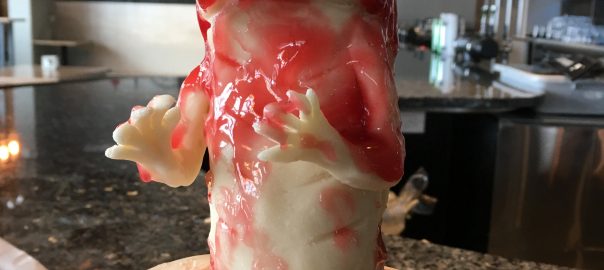
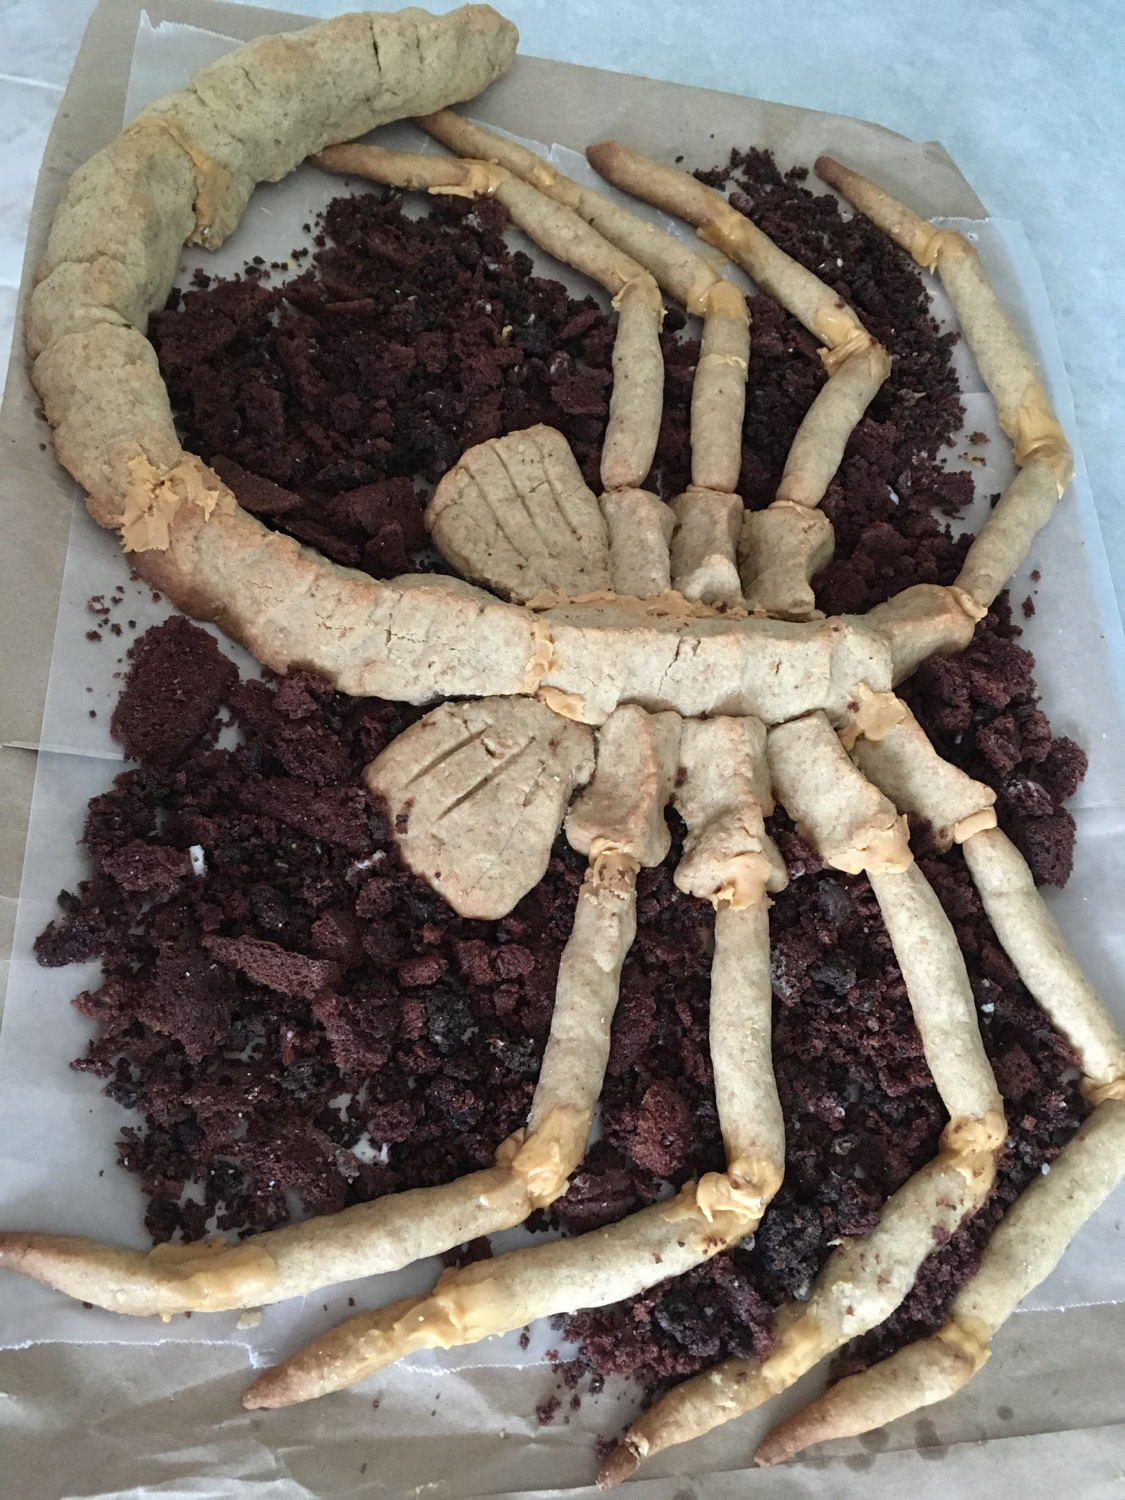
The facehugger – scary, and fast, and my proportions were way off when I got this one finished. Instead of wrapping it around the egg, he lives on the bed of cake crumbs – could be the floor of the cavern, or ya know – whatever.
The ideas bounced between making a sugar cookie in the correct colour – which was what I ended up doing – and making it out of gum paste or fondant. I liked the idea of the cookie as it was a simpler edible item. While it is very rough and fragile, I had originally hoped to apply it with buttercream to the sides of the Xenomorph egg cake, but am okay with it living on it’s bed of crumbs.
The initial sketch and recipe got me started:
Can you read my recipe up in the corner?
You can follow any standard recipe and directions – this is just what I used:
Sugar cookie recipe
Cream together:
1 cup butter
¾ cup brown sugar
1 egg
1 tsp vanilla
Mix in
2 ½ Cups whole wheat flour
¼ tsp baking soda
¼ tsp salt
Knead into a dough, wrap and chill for an hour or so. Then roll it out into the shapes you want.
Bake at 350 degrees until golden.
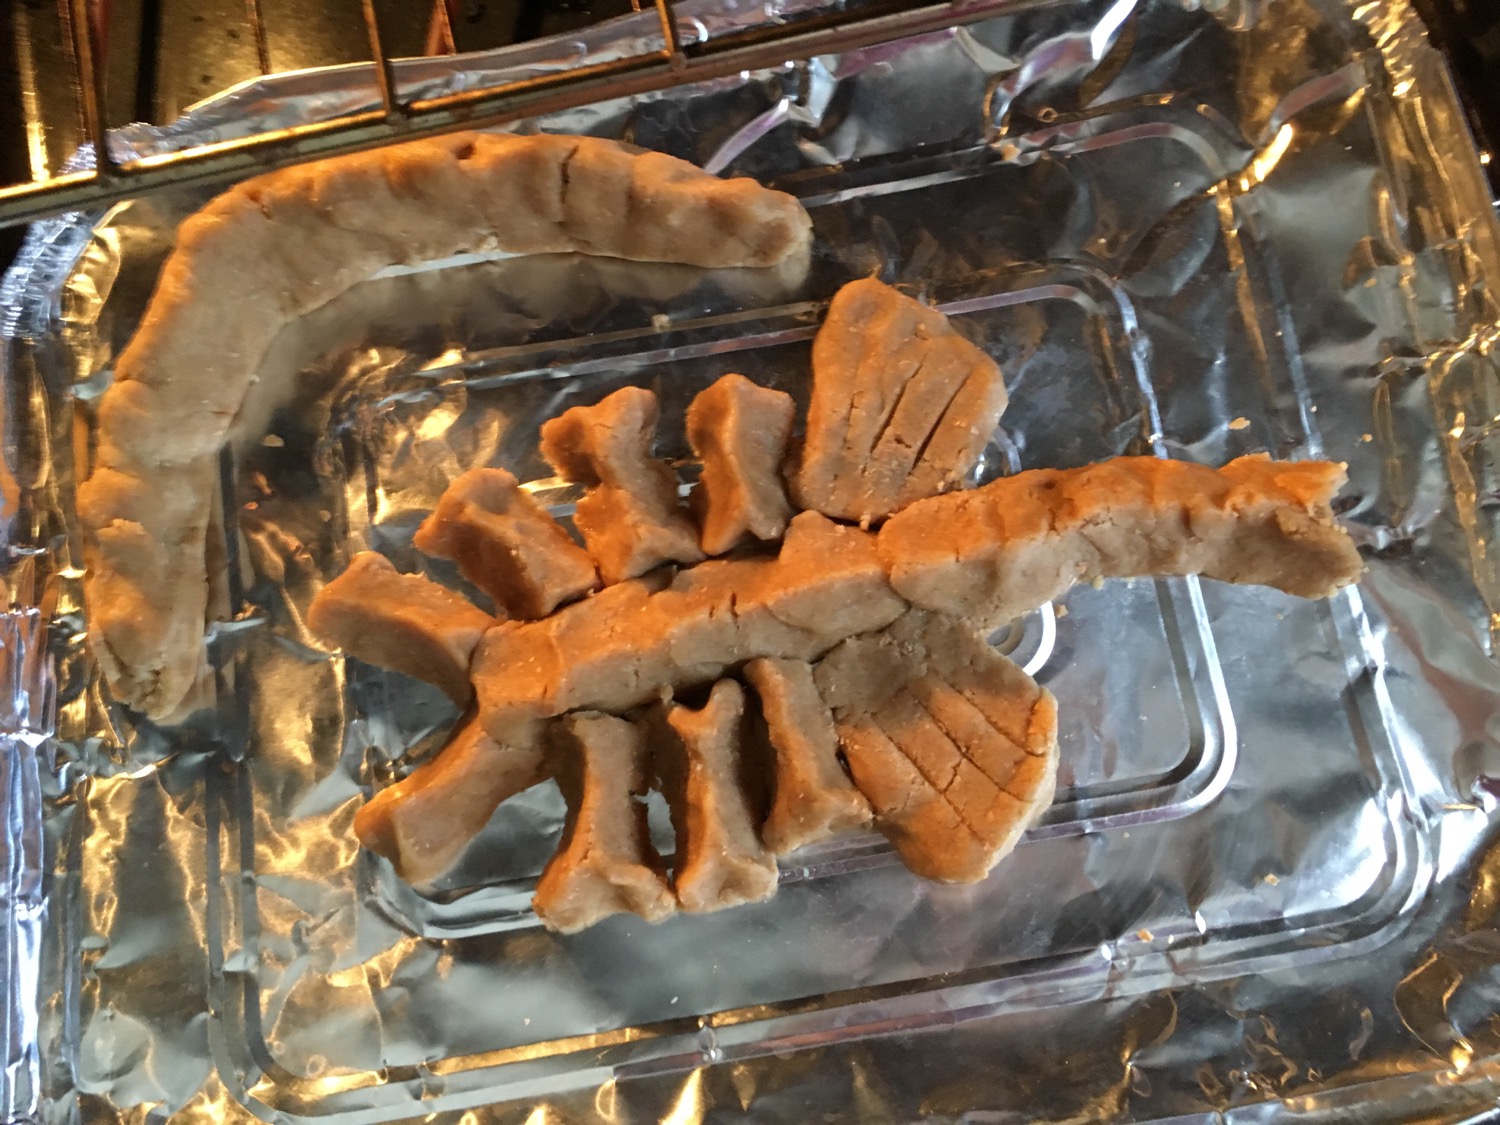
I did the digits, body and tail separately
Sorry for the soft focus …
I then assembled the pieces on the bed of leftover cake crumbs using buttercream icing that I mixed with a small amount of dulce de leche to give the almost perfect colour match.
I’m a fan of using different mediums to create art pieces- and baking is one of my favourite indulgences when I can share the results with awesome friends.
Today’s post is part 1, as I will have made 3 different elements of the Alien movie by the end of the weekend… two celebrations, 1 has already happened.
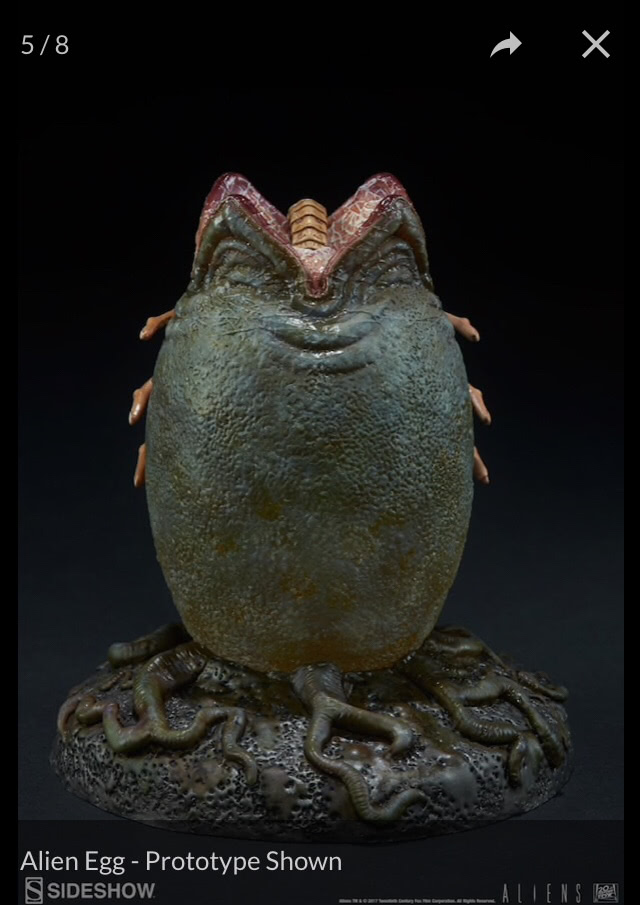
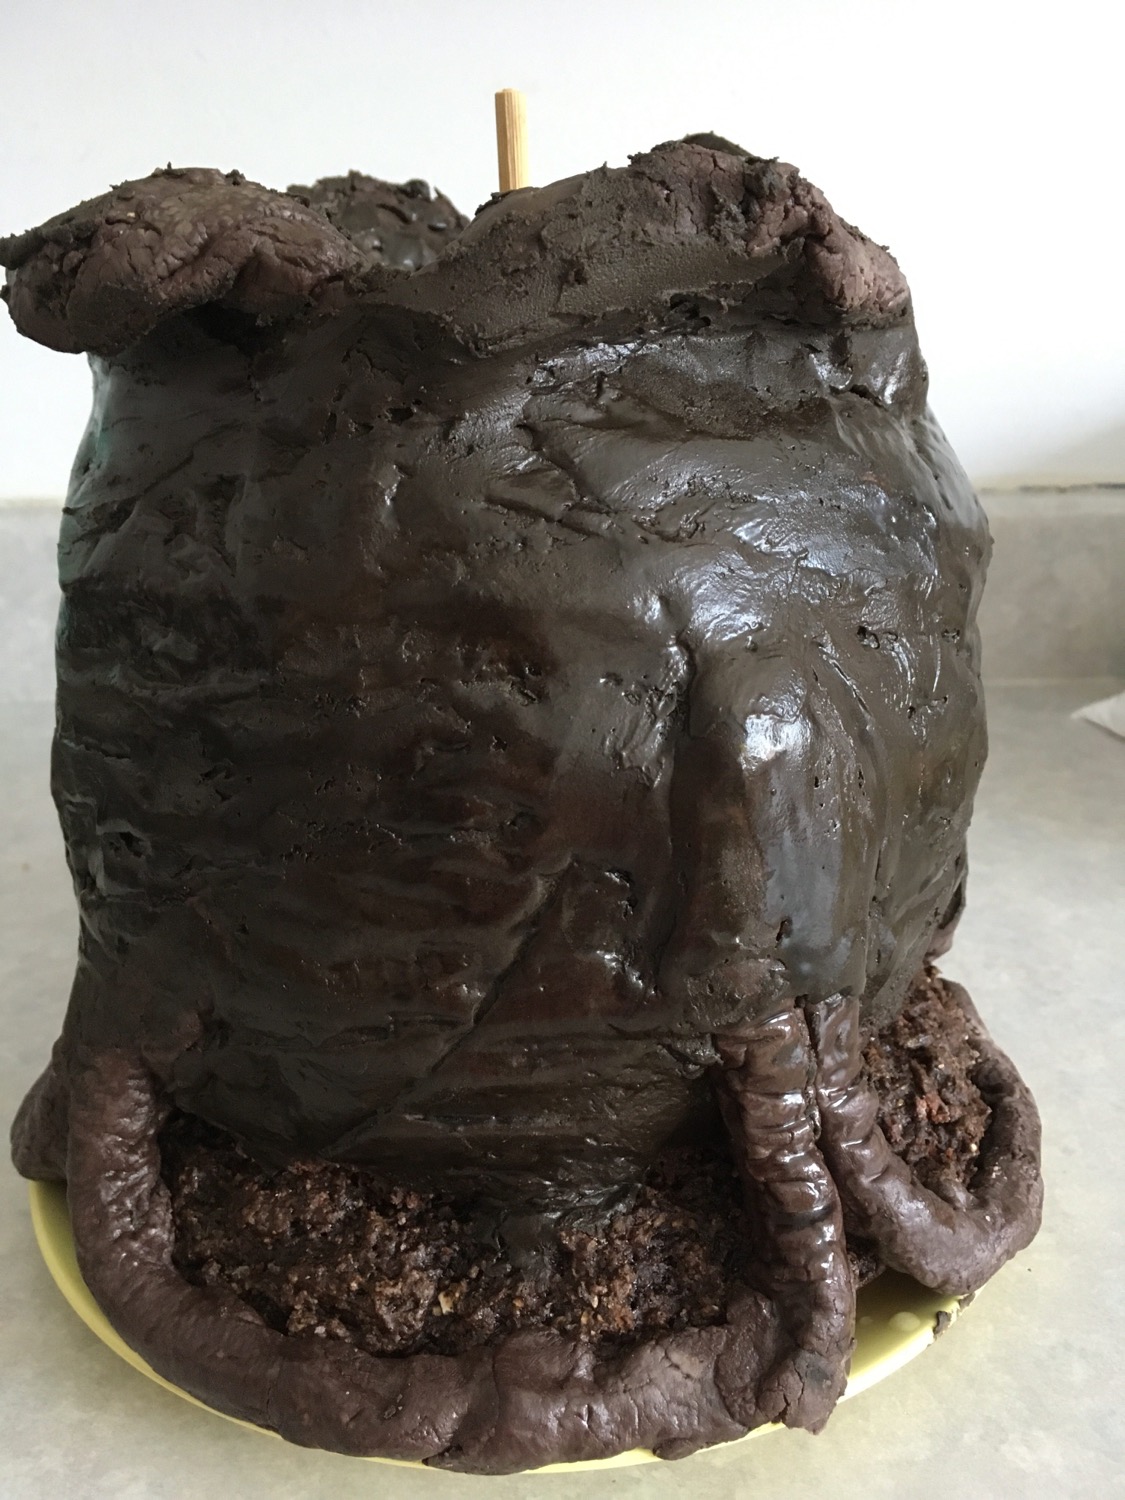
What came first- the egg…the Alien Egg:
This sculpture along with an entire Pinterest cluster of pics were my inspiration for the birthday desserts I decided I would attempt. I decided this about 2 weeks before his birthday. Two weeks where I had full time work in my design studio and busy weekends… but inspiration is a great place to start… and I cannot help myself, once I get an idea, I have to try to get it done!!
My inspiration…
I laid out my plan – I’ve made many Black forest inspired birthday desserts for my husband already in our 21 years together, and I always resort to keeping the cake, pie filling, and whipping cream parts simple so that I can be more creative with the deployment of the piece.
A quick trip to the Bulk Barn < this post was not sponsored by them, but it’s a great Canadian place to find stuff in bulk and fun to check out!> turned into 45 minutes of wandering around inside looking at all of my options, but I found some fun stuff to play with and use to create the Alien Egg Cake!
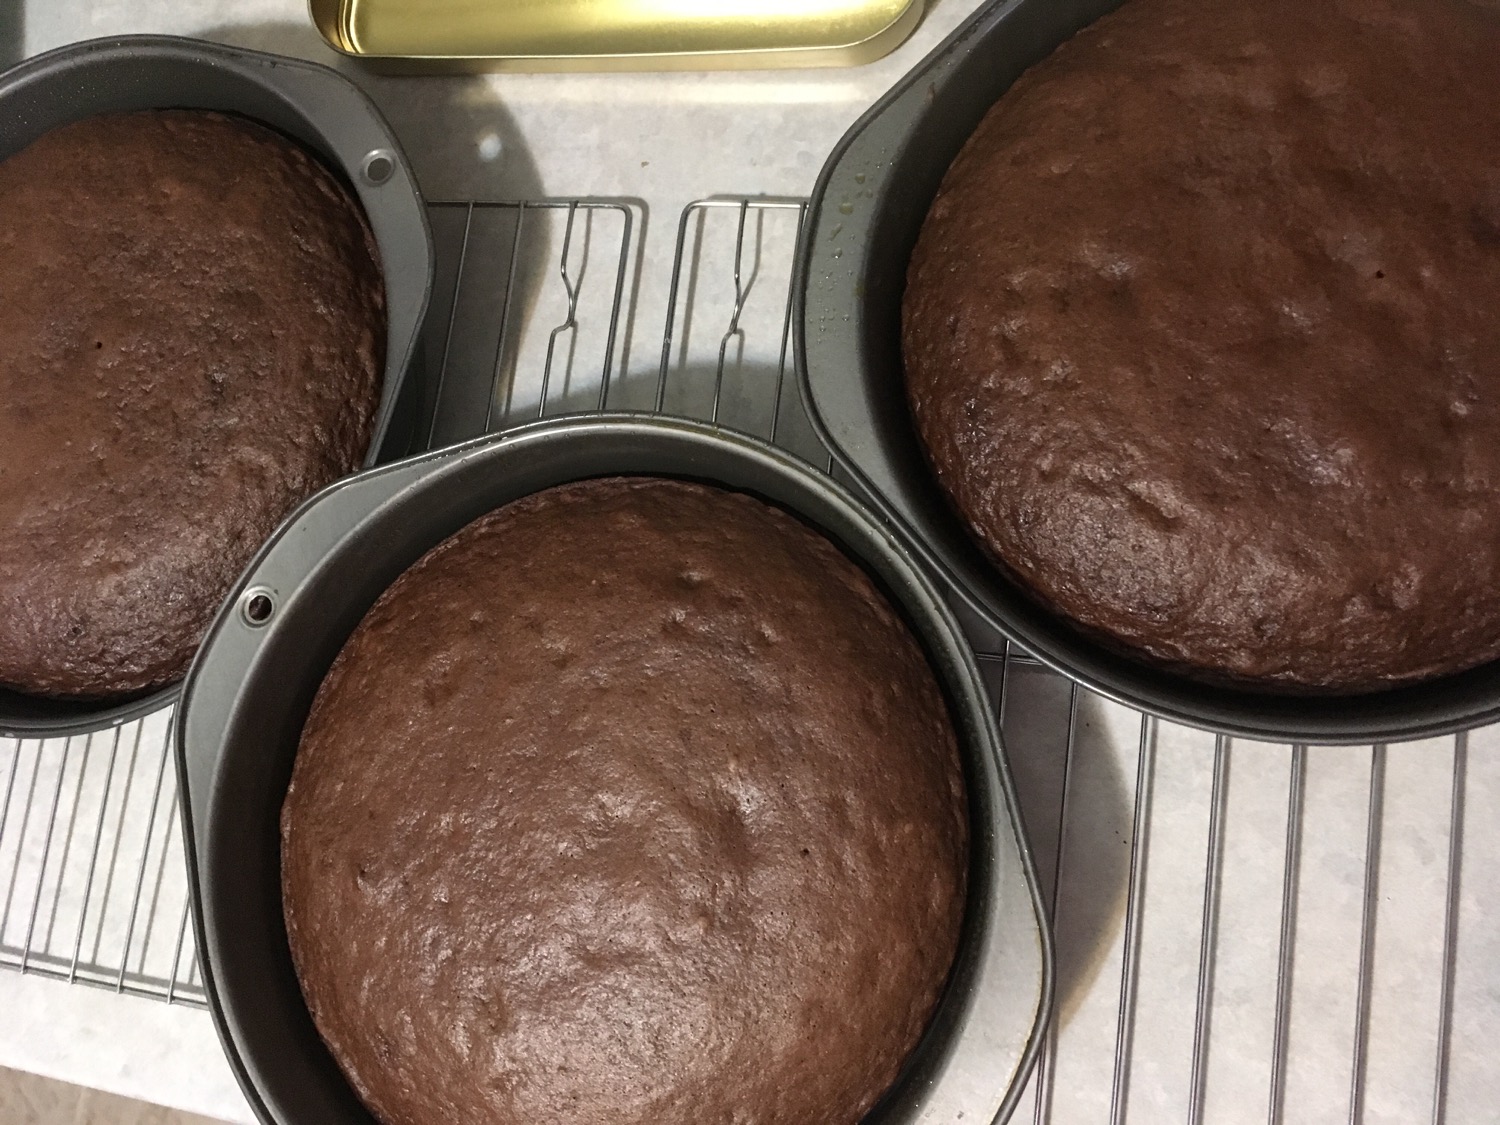
I made 2 Devil’s Food cake mixes up, dividing them between 3 – 8 inch/ 23 cm layers and 2- 8 inch/ 23 cm pie plates – hoping the curved edges would save me some time in the carving to come.
Then I realized that the fluffy, scrumptious devil’s food cake was going to be very light, and with 5 layers, I wanted a base layer that had some solidness to it.
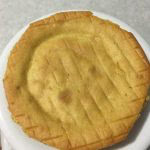
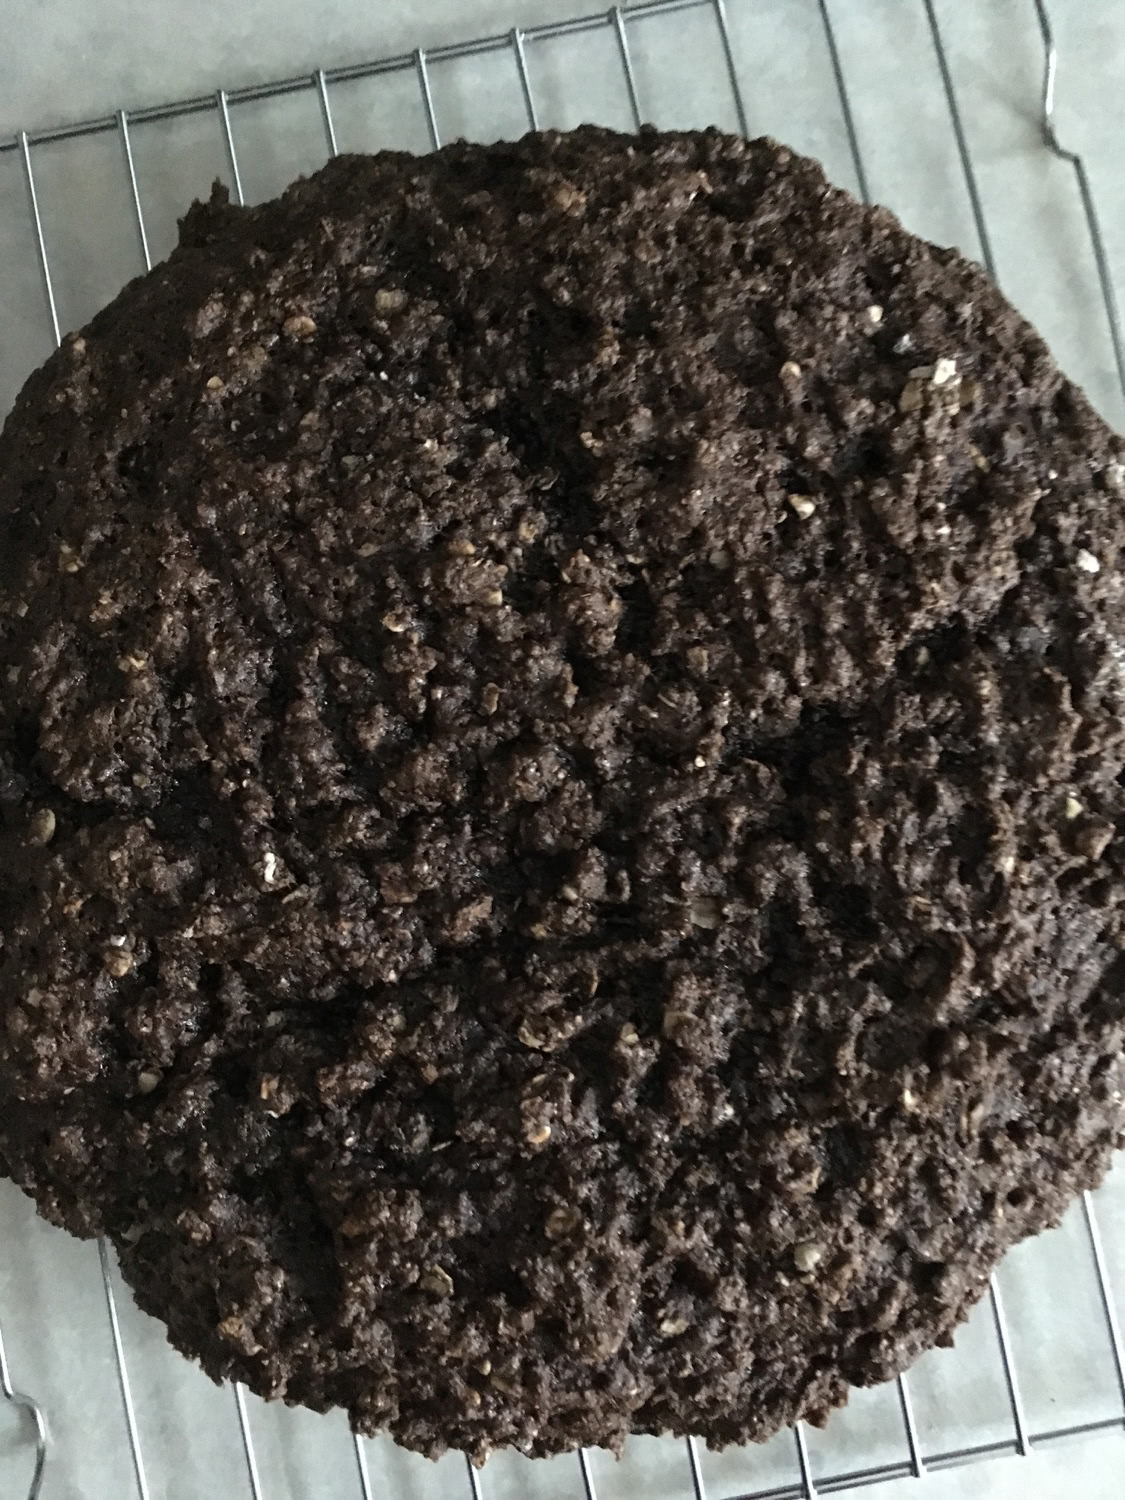
I pulled out my Betty Crocker cookbook from the 70s and found the Chocolate-Cherry Recipe on page 233, with its variations that include an Oatmeal-Molasses cake – and I added the black cocoa I had picked up to that version and created the most awesome base that already looked like rocky ground surface! Bonus!
Oatmeal-Molasses cake from Betty Crocker cookbook – with added black cocoa!
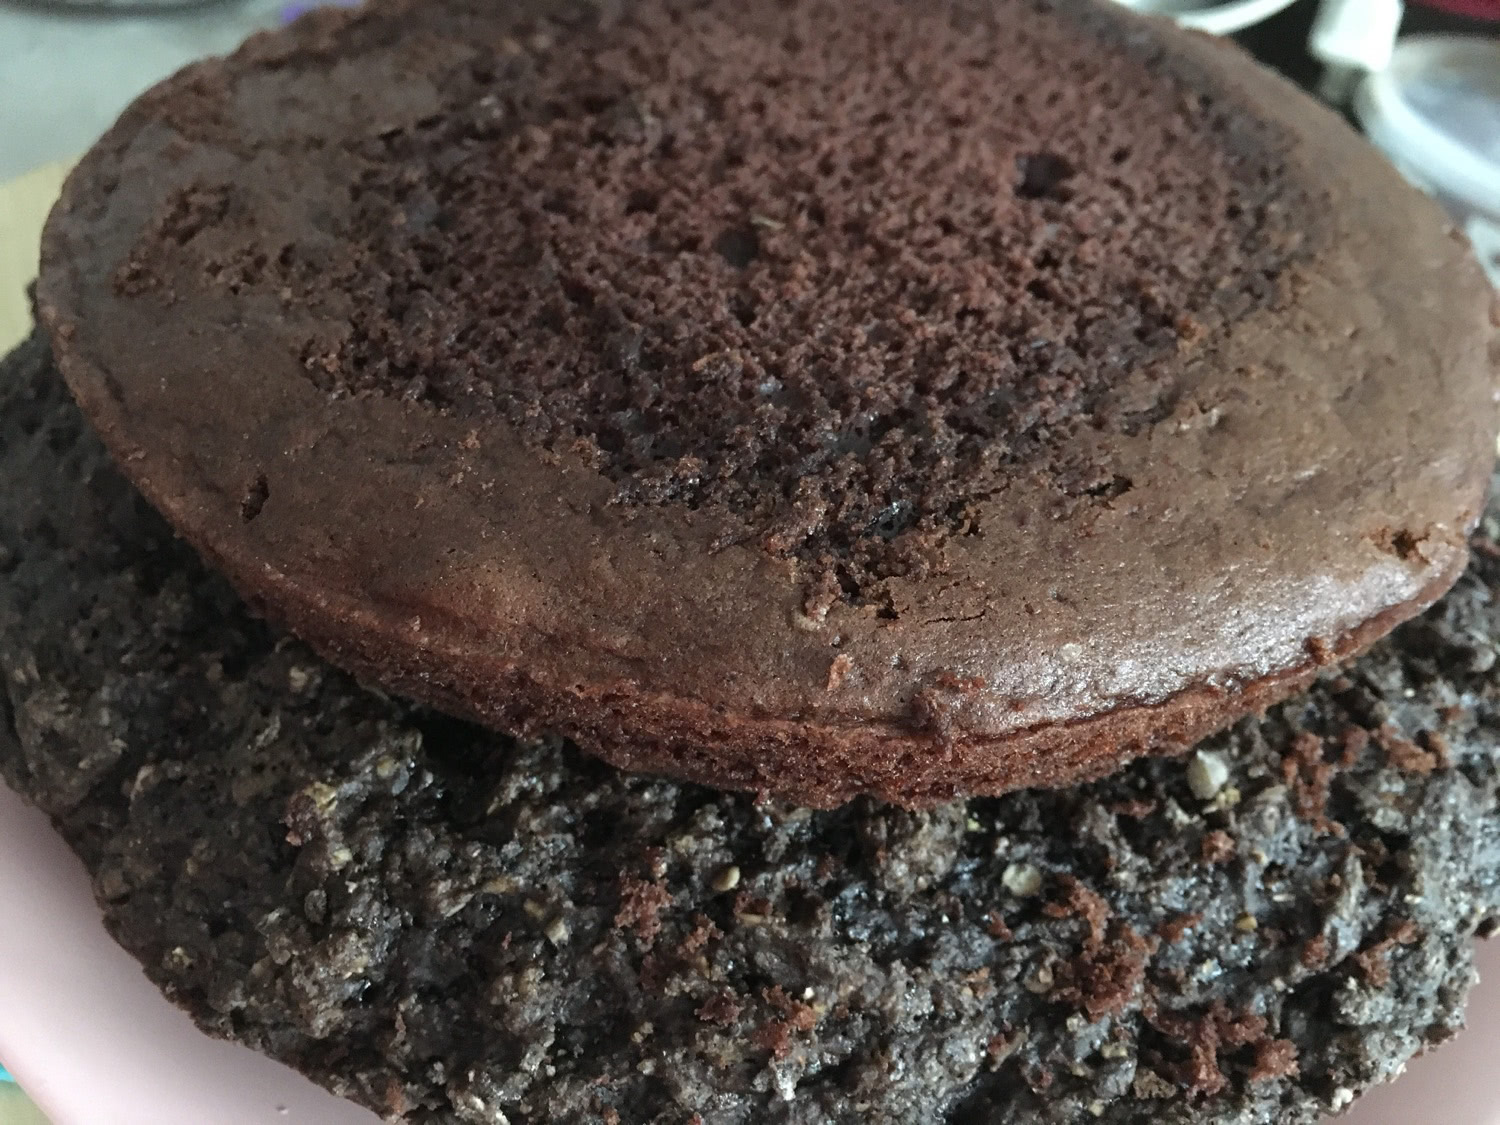
As mentioned, the cake layers were made up in advance, and I wrapped them in wax paper and froze them. I took them all out an hour before I was going to start the build to defrost them – and so then the stacking began.
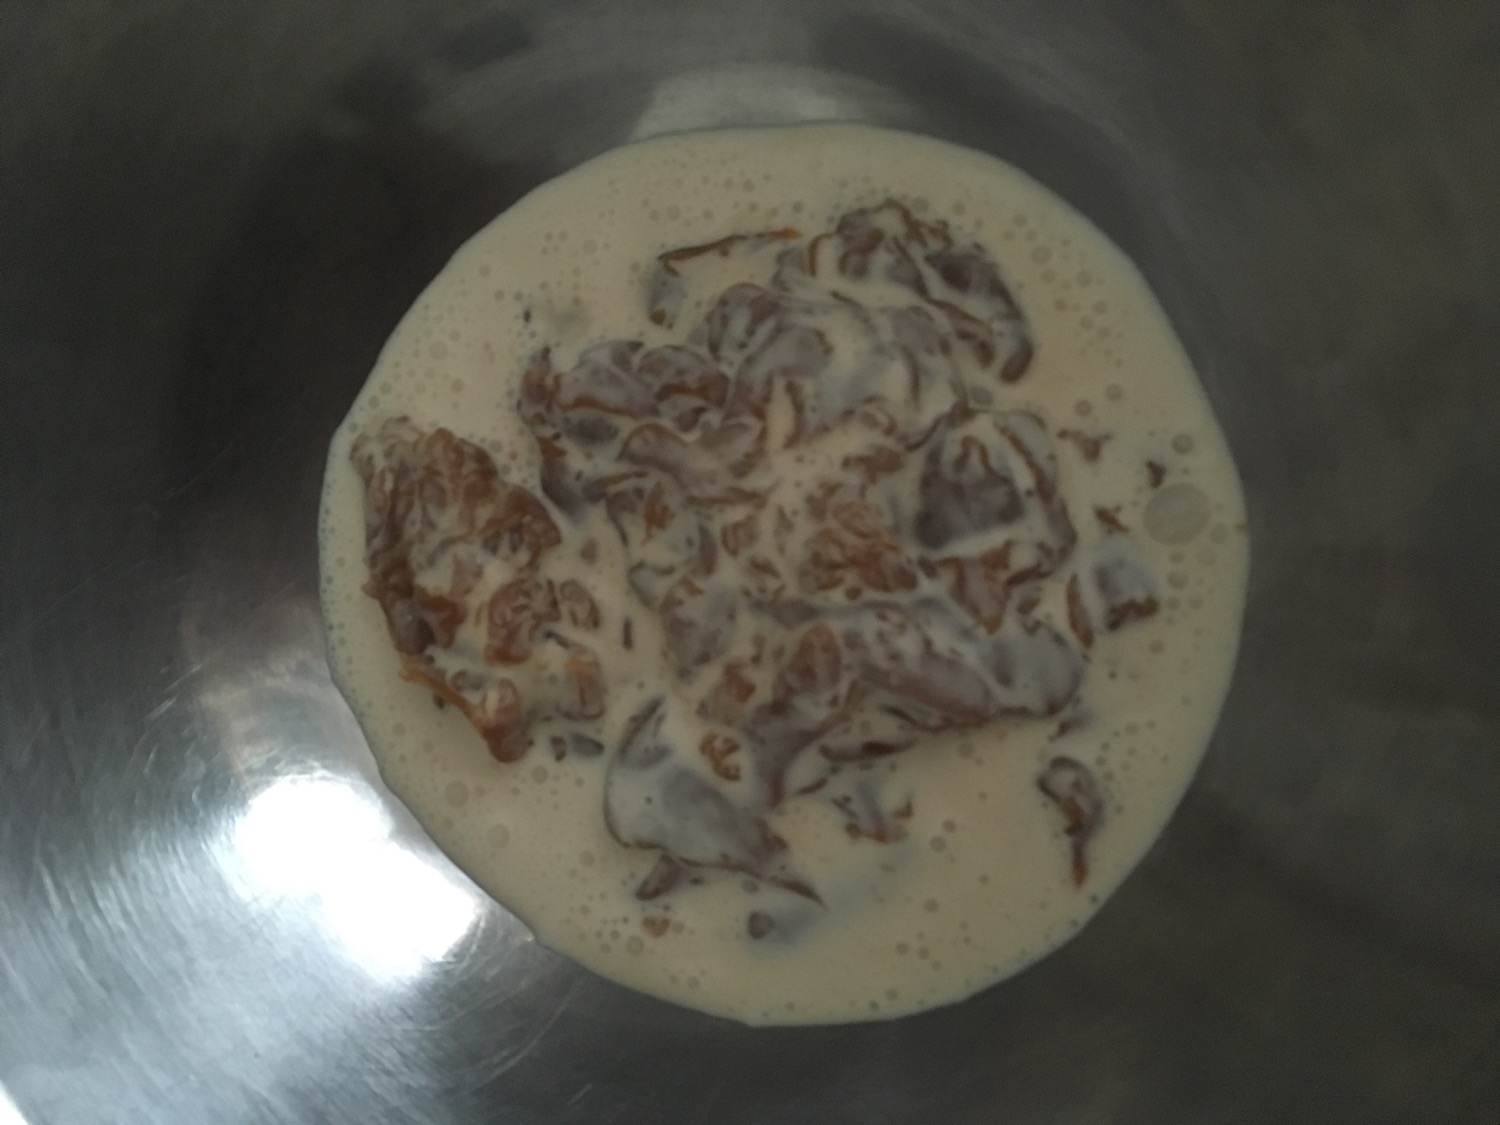
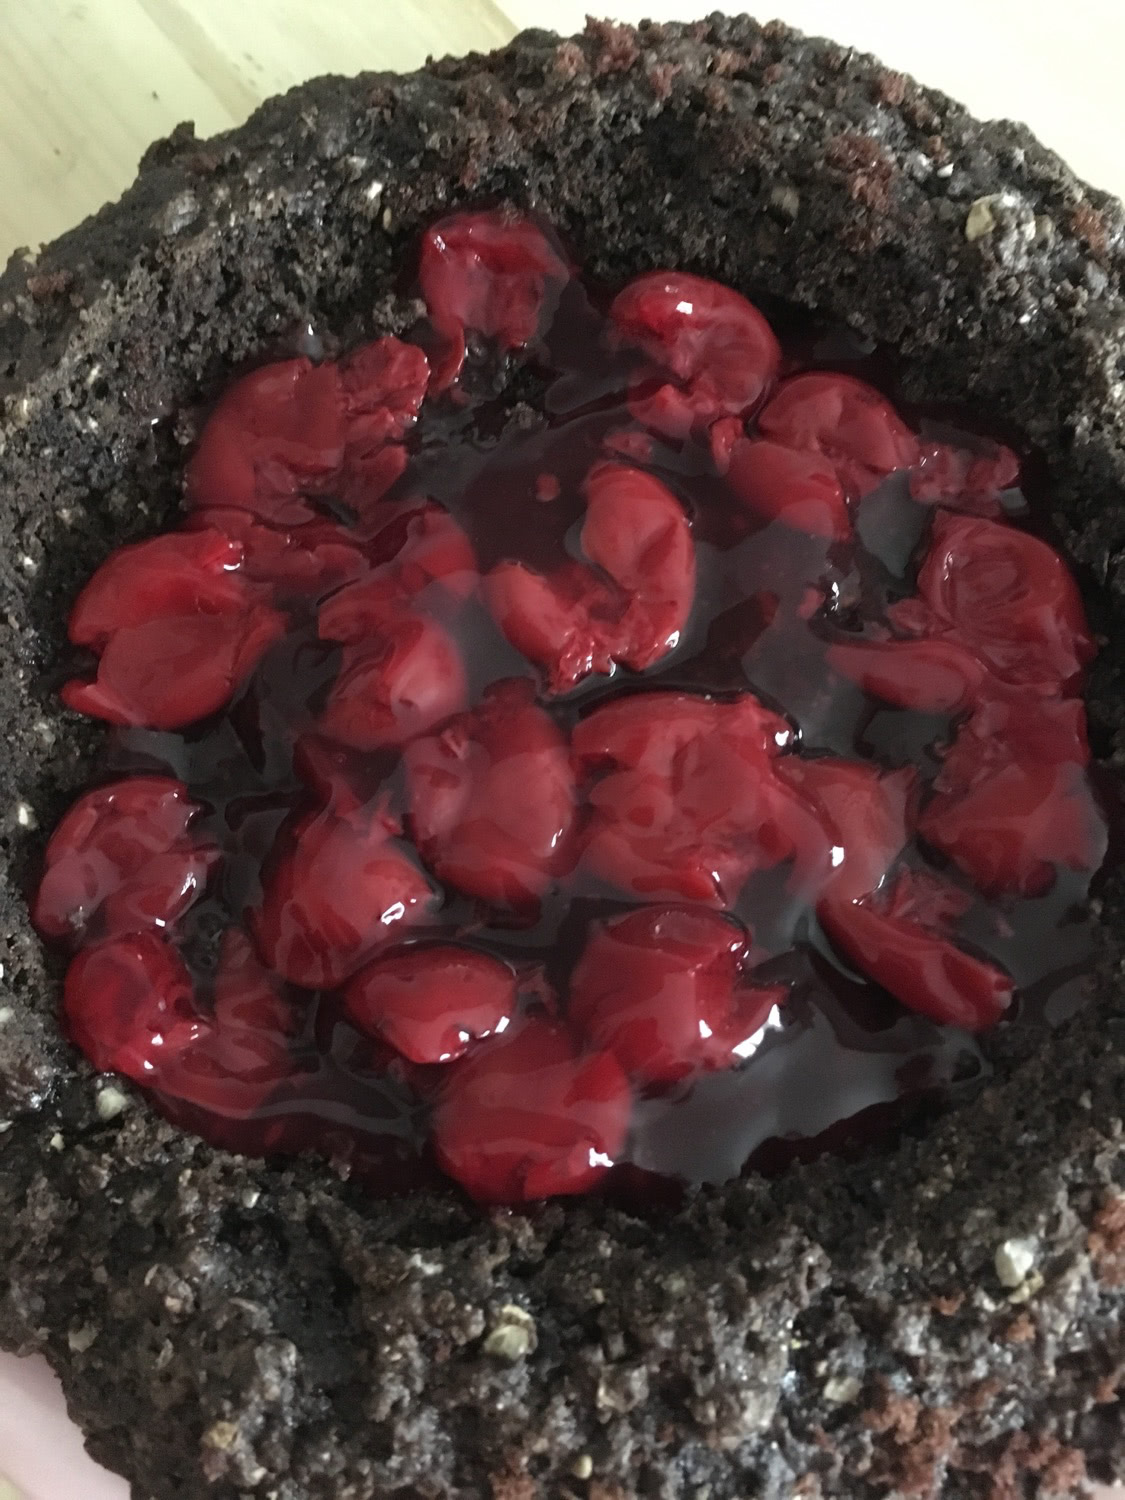
I carved out the centre of the ground layer and saved the circle carefully for later, and filled the nest with some of the cherry pie filing – canned, low sugar, but nothing fancy! As you can see, I smushed the cherries a bit as well…
Base layer with cherry pie filling.First layer of devil’s food cake, is one ot the pie plate layers, nestled into the ground base.I piped a barrier wall of Butter Cream icing on each layer before filling with alternating pie filling and whipped cream.and some levelling was done, of course, to try to keep the layers as even as possible…
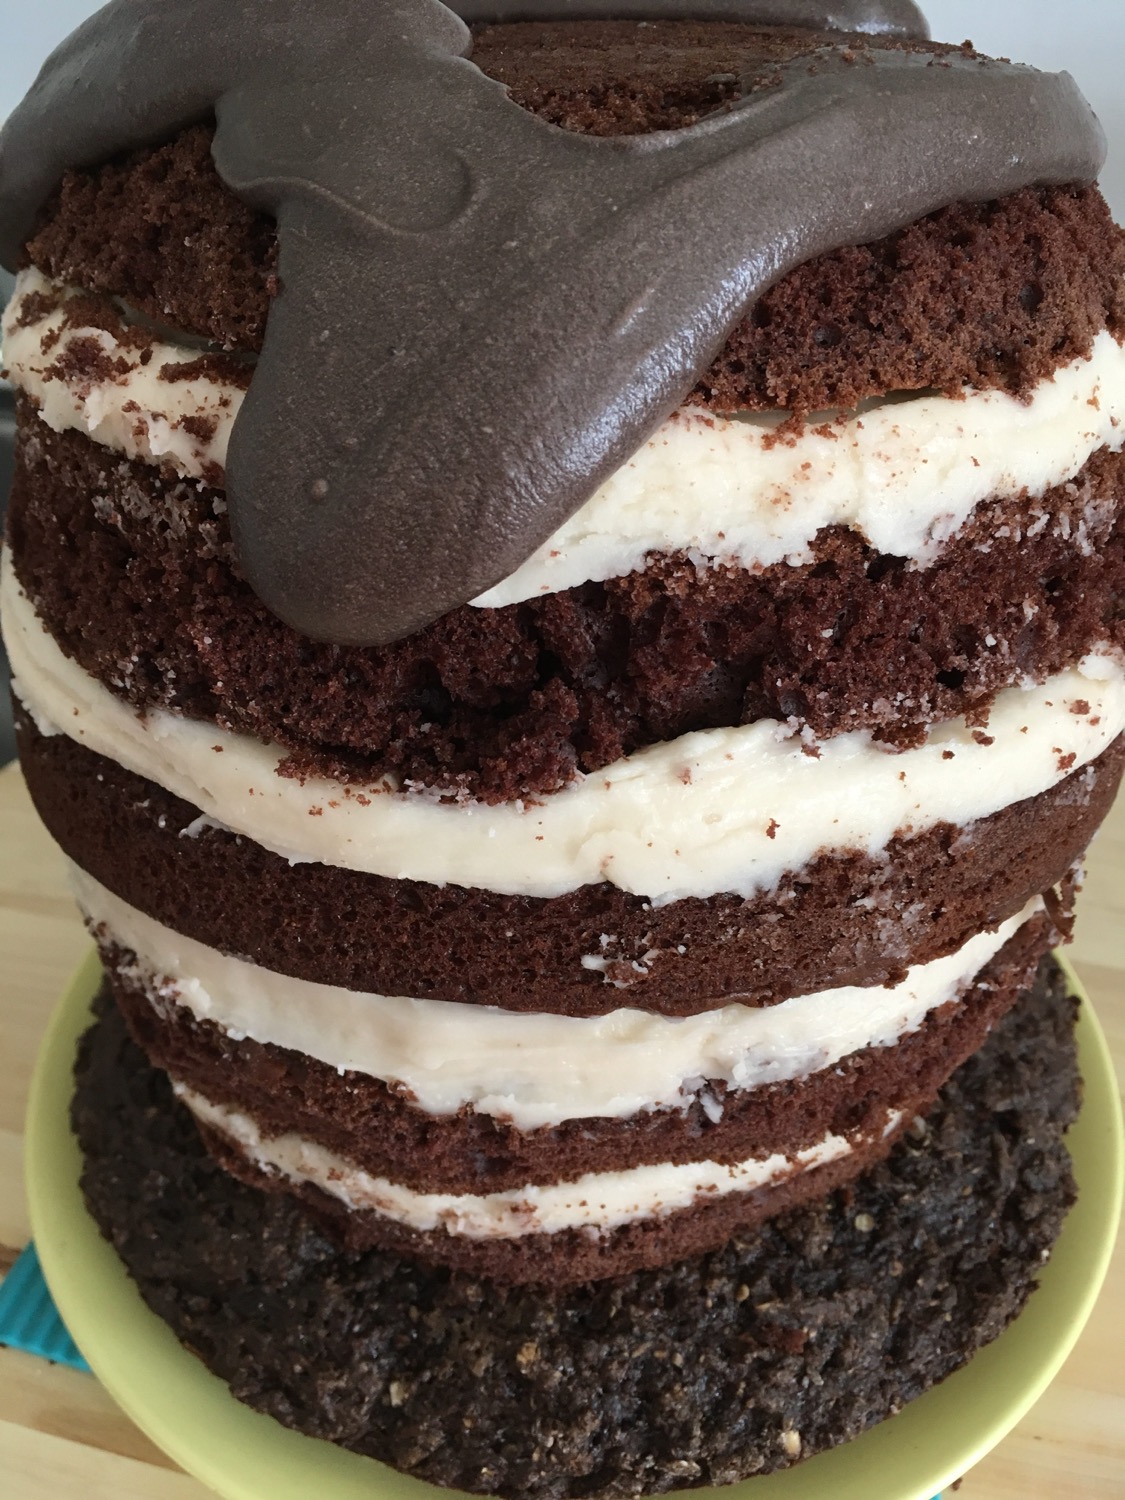
I did not get pics of every single step, including not getting shots of the carving, but the idea is straight forward – stack the layers, alternating the filling between the pie filing and whiping cream, and be sure to create a butter cream wall on each layer to keep the filling contained.
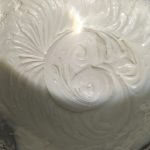
The butter cream recipe I used was again from the Betty Crocker cookbook, and I divided it in 2, adding black cocoa and a tiny bit of spiced rum, along with some green food colouring to half.
After it was all stacked and a bit of extra mortar < buttercream > was applied to fill in any spaces, the cake chilled in the fridge for at least an hour, during which time I worked on the fondant – which comes later in this tale…
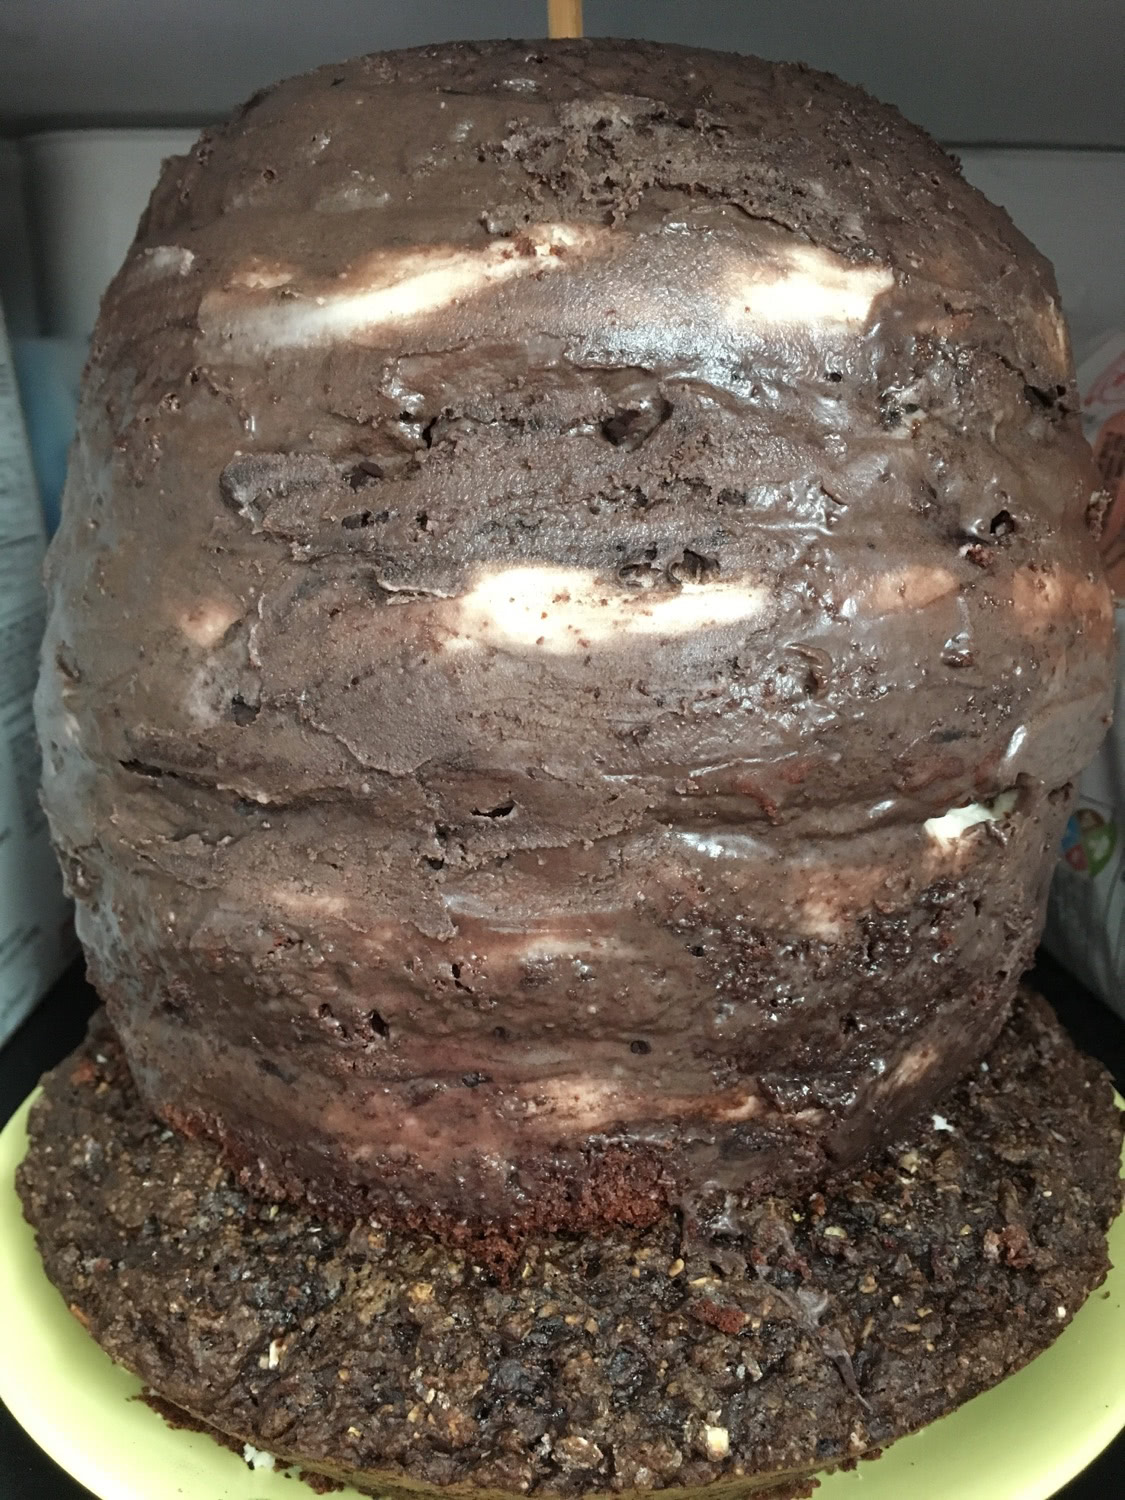
To finish the cake part itself – after it was chilled, I carved the egg shape as best I could, saving the chocolate cake bits for Part 1.5 – which I did not know how I would use the cake bits, but never throw food out if it’s still good!
I learned back in my teen years, when I would voraciously read the Wilton cake decorating cookbooks we had < thanks Mom> that you want to apply a “crumb coat” or base coat of thin icing to hold all of the loose crumbs in place. You let it dry out a bit before applying your outer layer of icing and it keeps the outer icing clean. This is now common knowledge, of course, with all of the baking shows we can watch !
And then the cake went back into the fridge for more chillin’ time.
All carved, filled and ready for the black cocoa butter cream crumb coat.Coated and dowelled – ready to chill again.
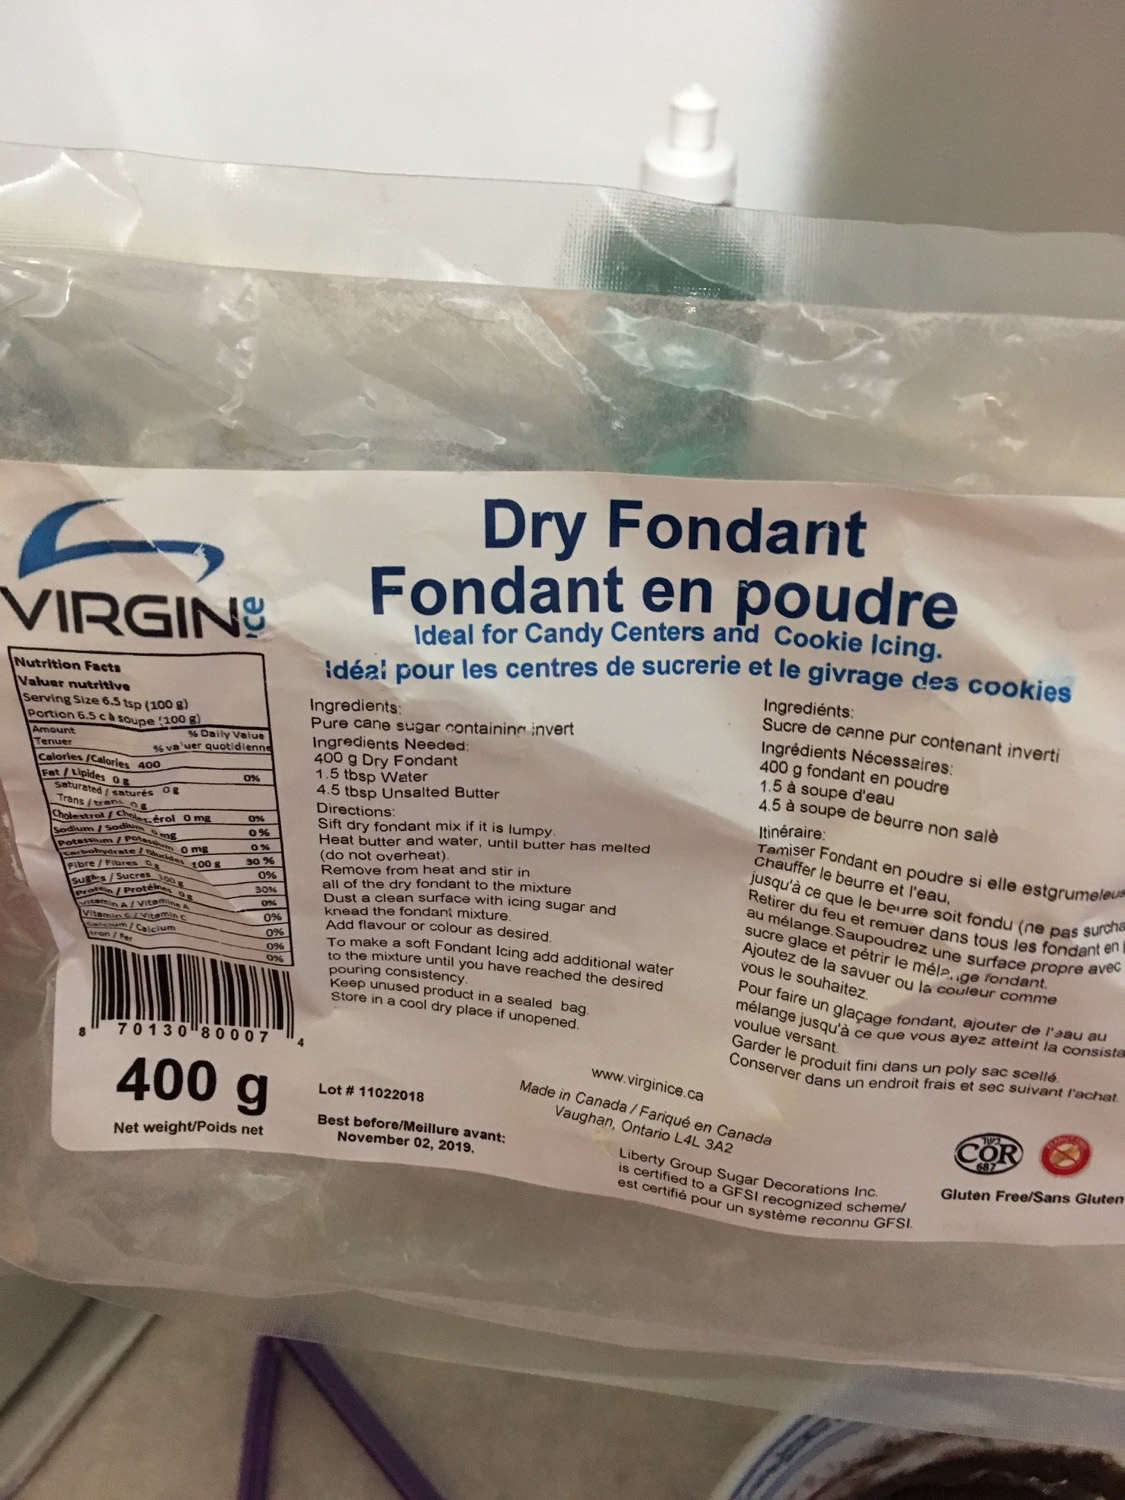
Next up – New adventures – Making fondant!
Again, a purchase from the Bulk Barn – after perusing ALL of the fondant options, I decided to try the dry. I used olive oil< I know it sounds weird – but it worked> instead of the butter called for. To get the colour I wanted, I just added some black cocoa to it and it worked wonderfully!!!!
I had heard that many people don’t like the taste of fondant, so I figured with it now having a cocoa flavour and the olive oil cutting the sugary taste, it might be ok – it seemed to go over well !
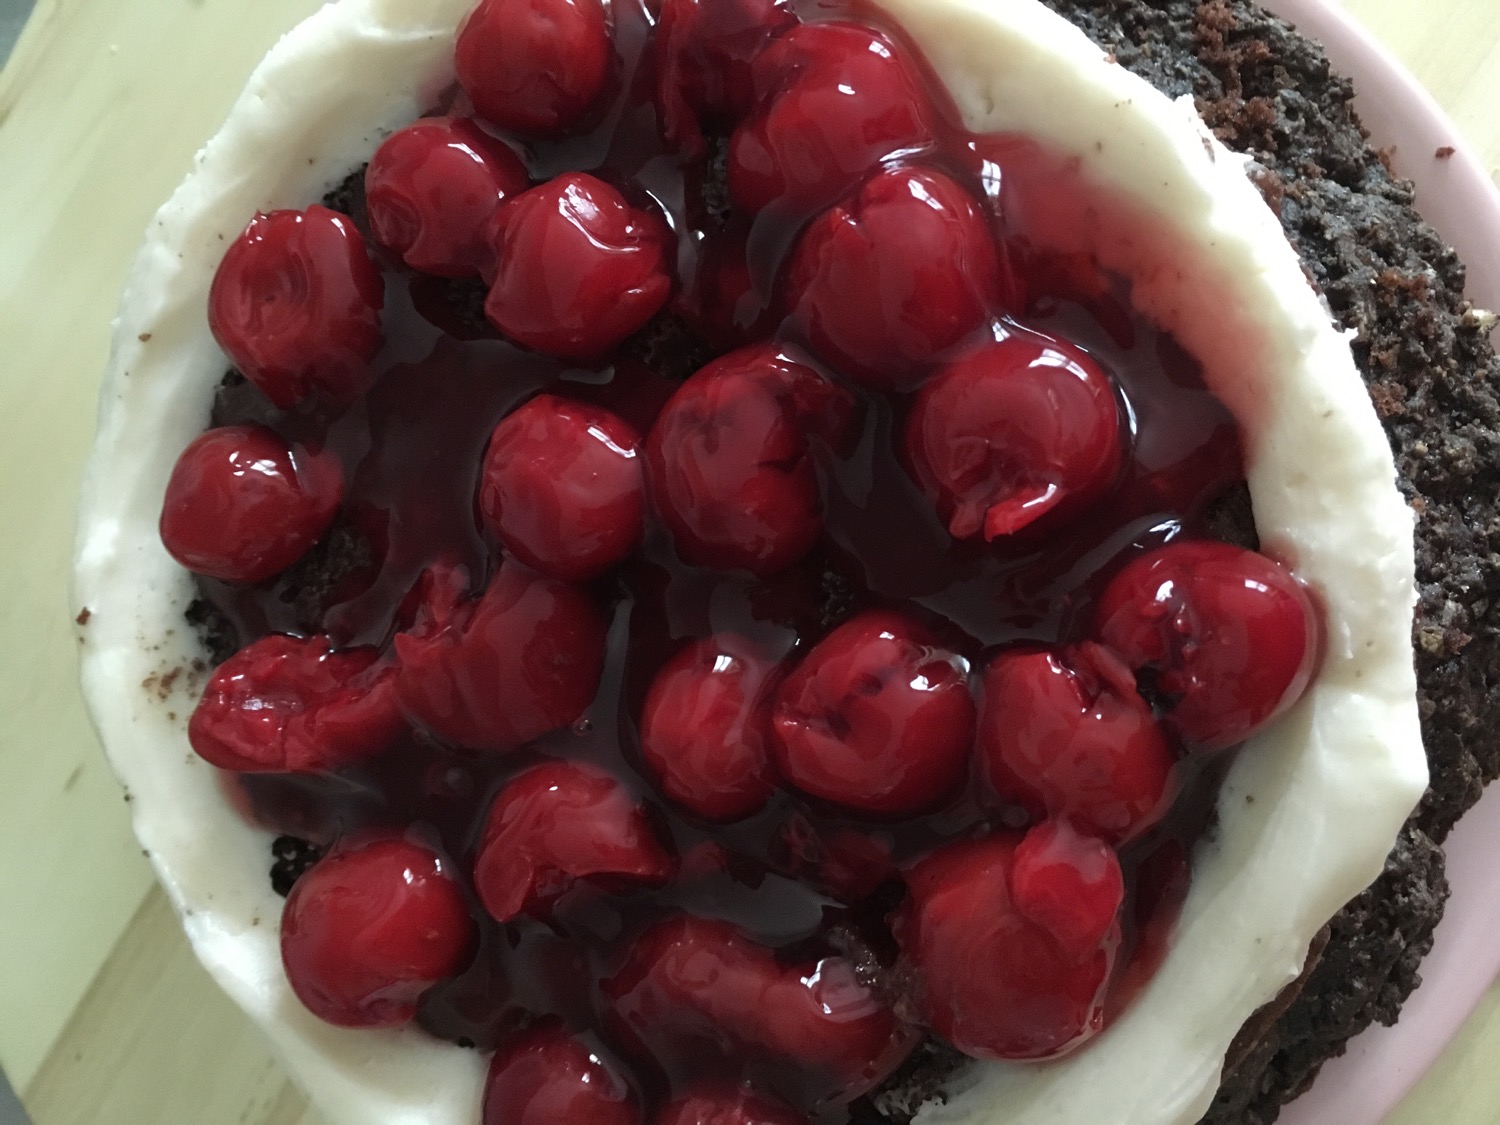
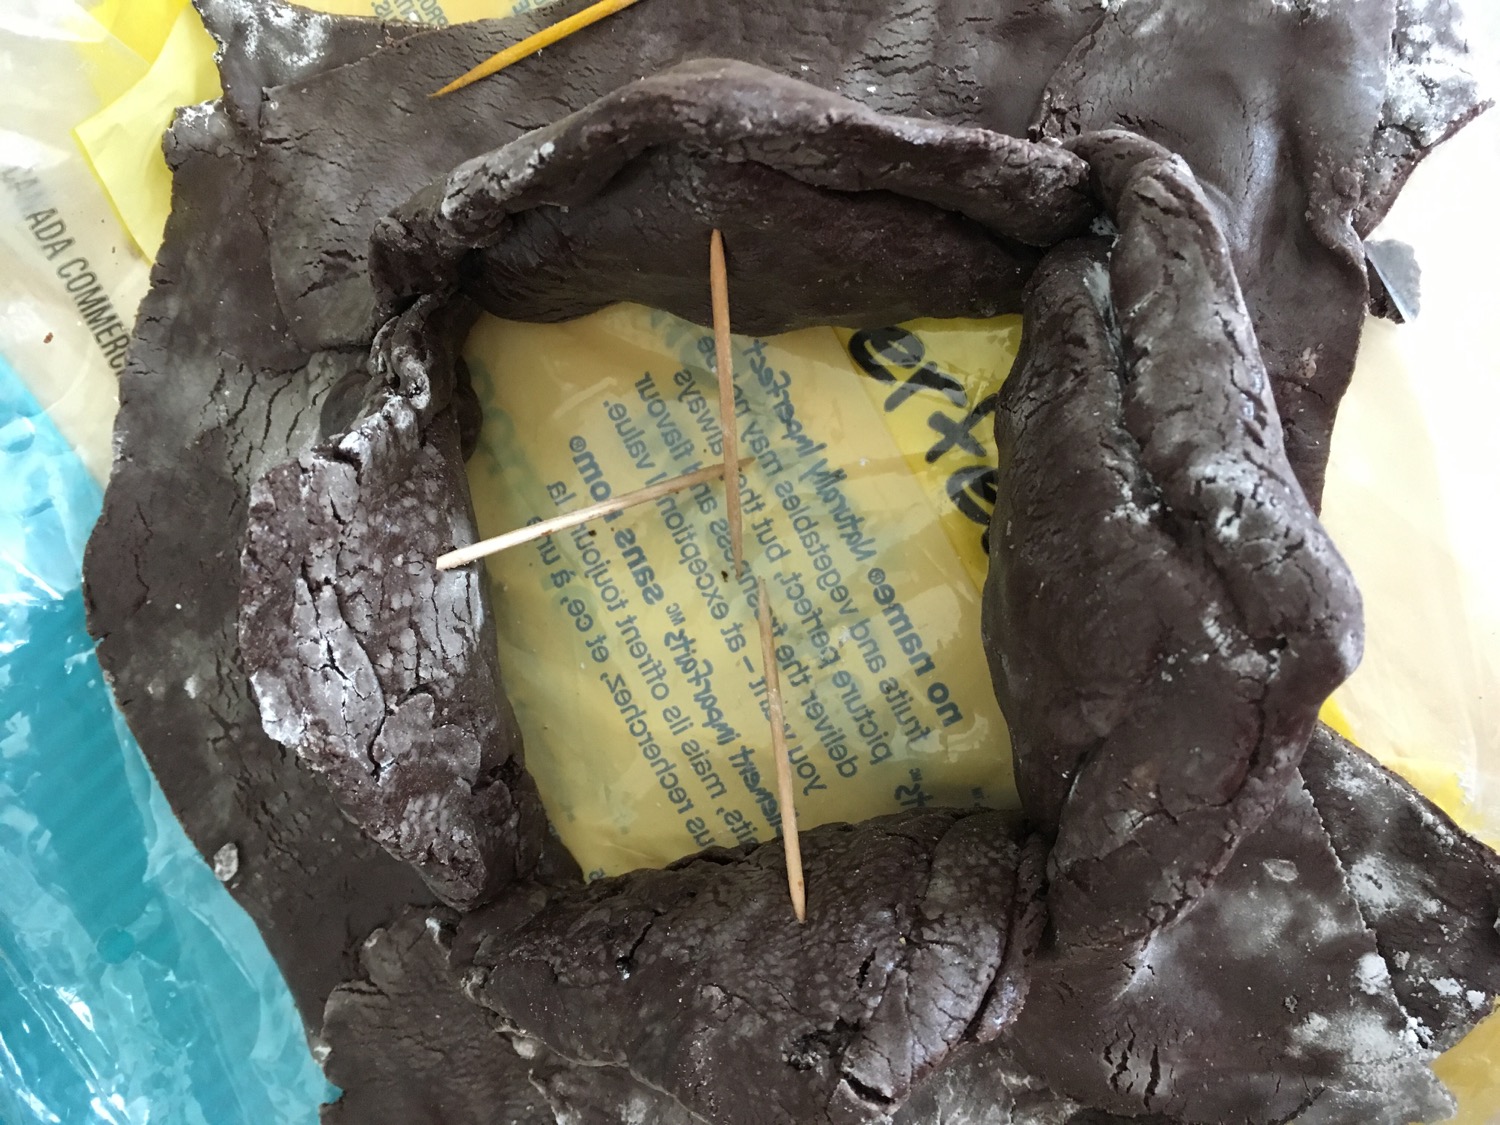
I did not want to cover the entire cake in fondant, but use it to create the opening flaps at the top of the egg and to cover the root system at the base.
I had made the fondant the day before, put it back into it’s original bag as it fit nicely and would keep it moist and let it chill overnight.
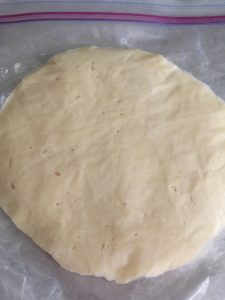
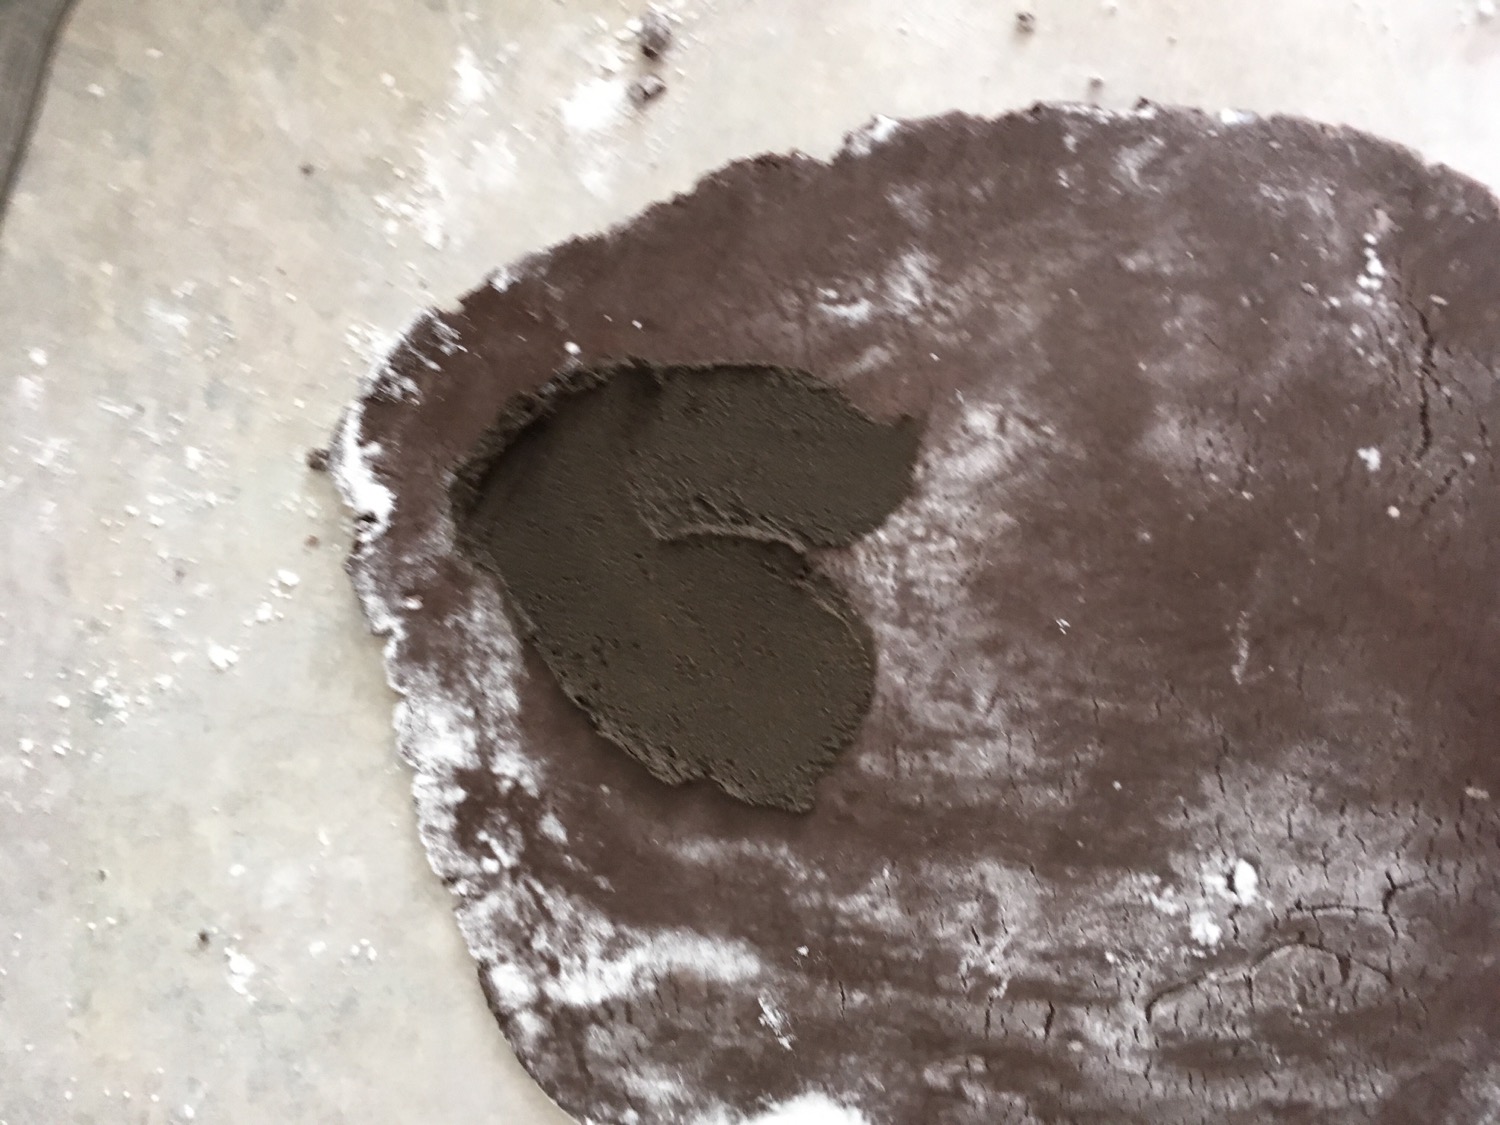
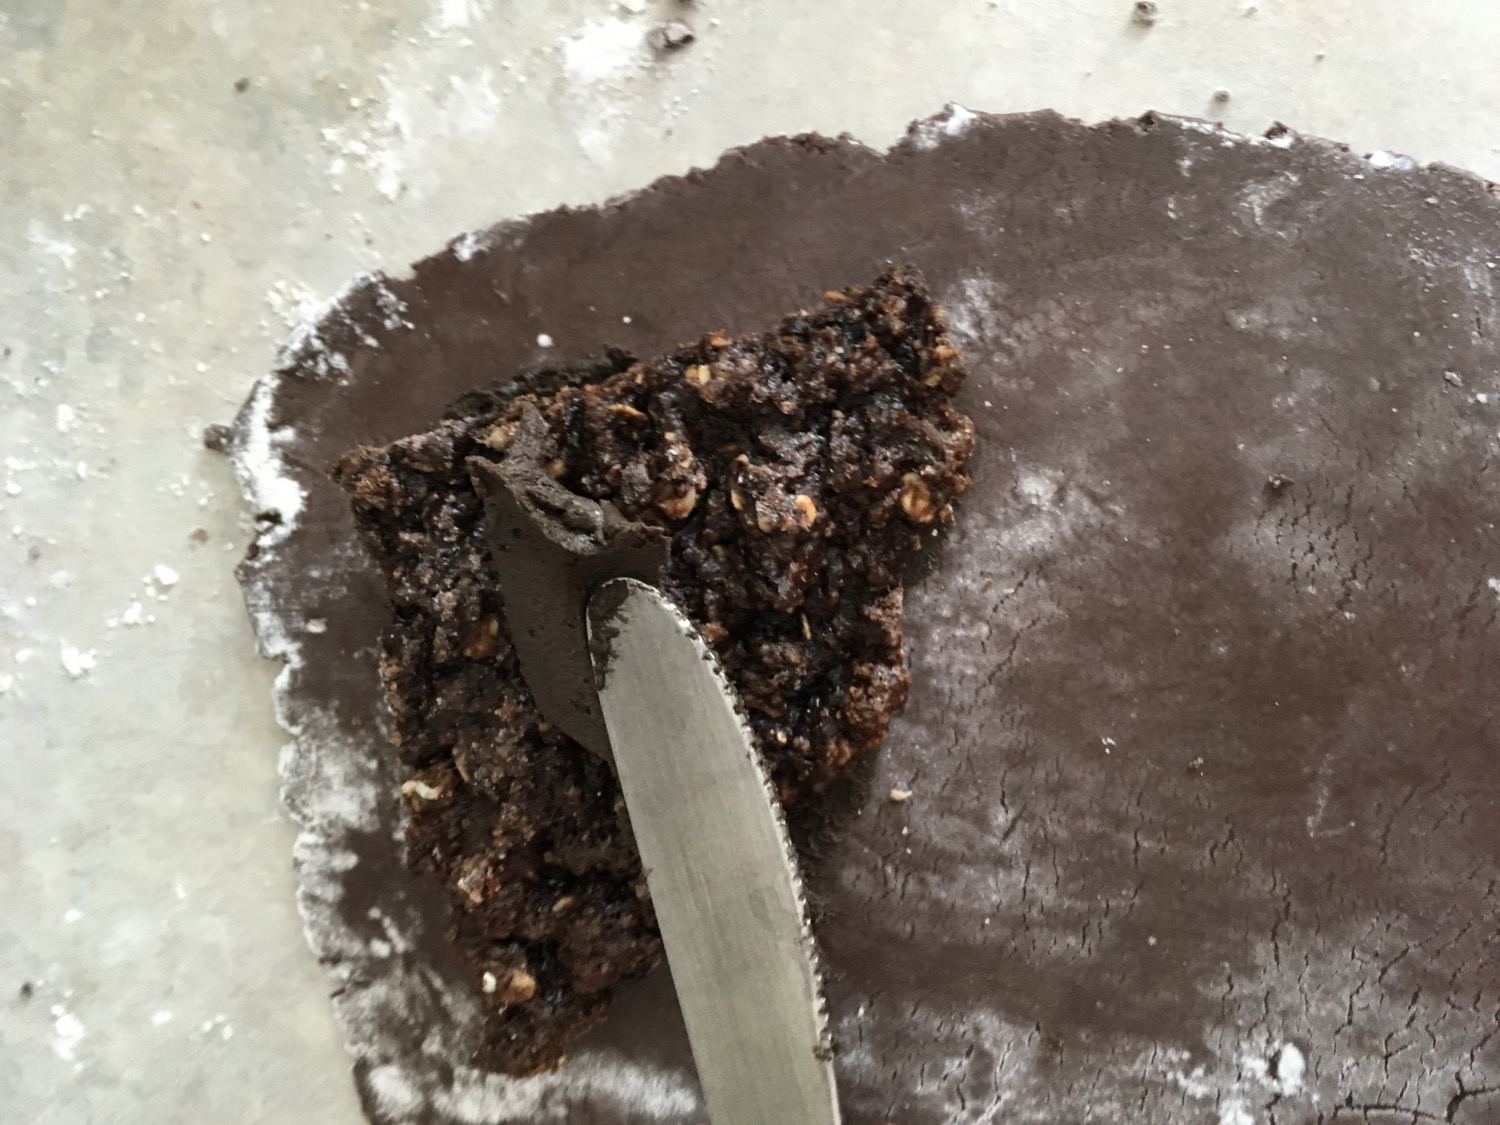
When I took it out, I let it warm to room temperature and it had a great playdough-like consistency. Using icing sugar on the counter, to keep it from sticking, I easily rolled it out. The first use was to wrap the four quarters of the circle from the base cake I had cut out earlier.
Buttercream is used as glue. Necessary and makes the fondant stick well and stay in place.
Fondant rolled out and spread with a bit of buttercreamQuarter circle of cake placed on the fondant and iced Fondant was cut to shape around the cake and the second layer was placed on topThe 4 quarters were placed on plastic and overlapped so that I could place it as a solid piece on top of the egg.
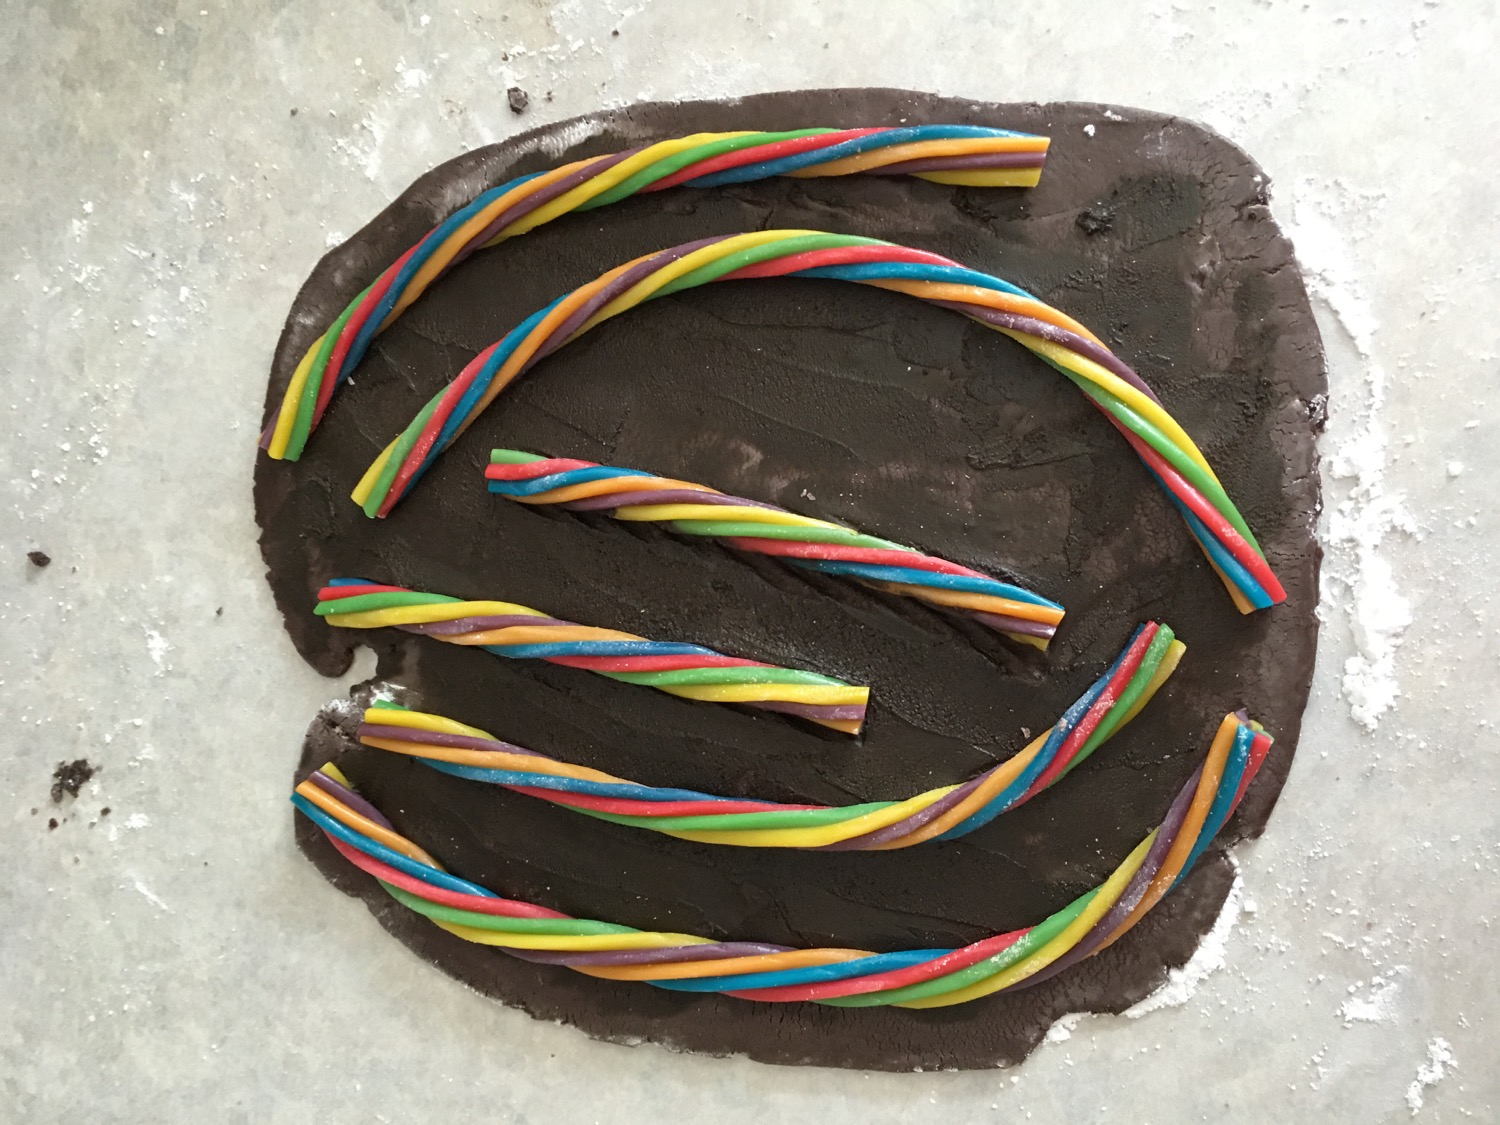
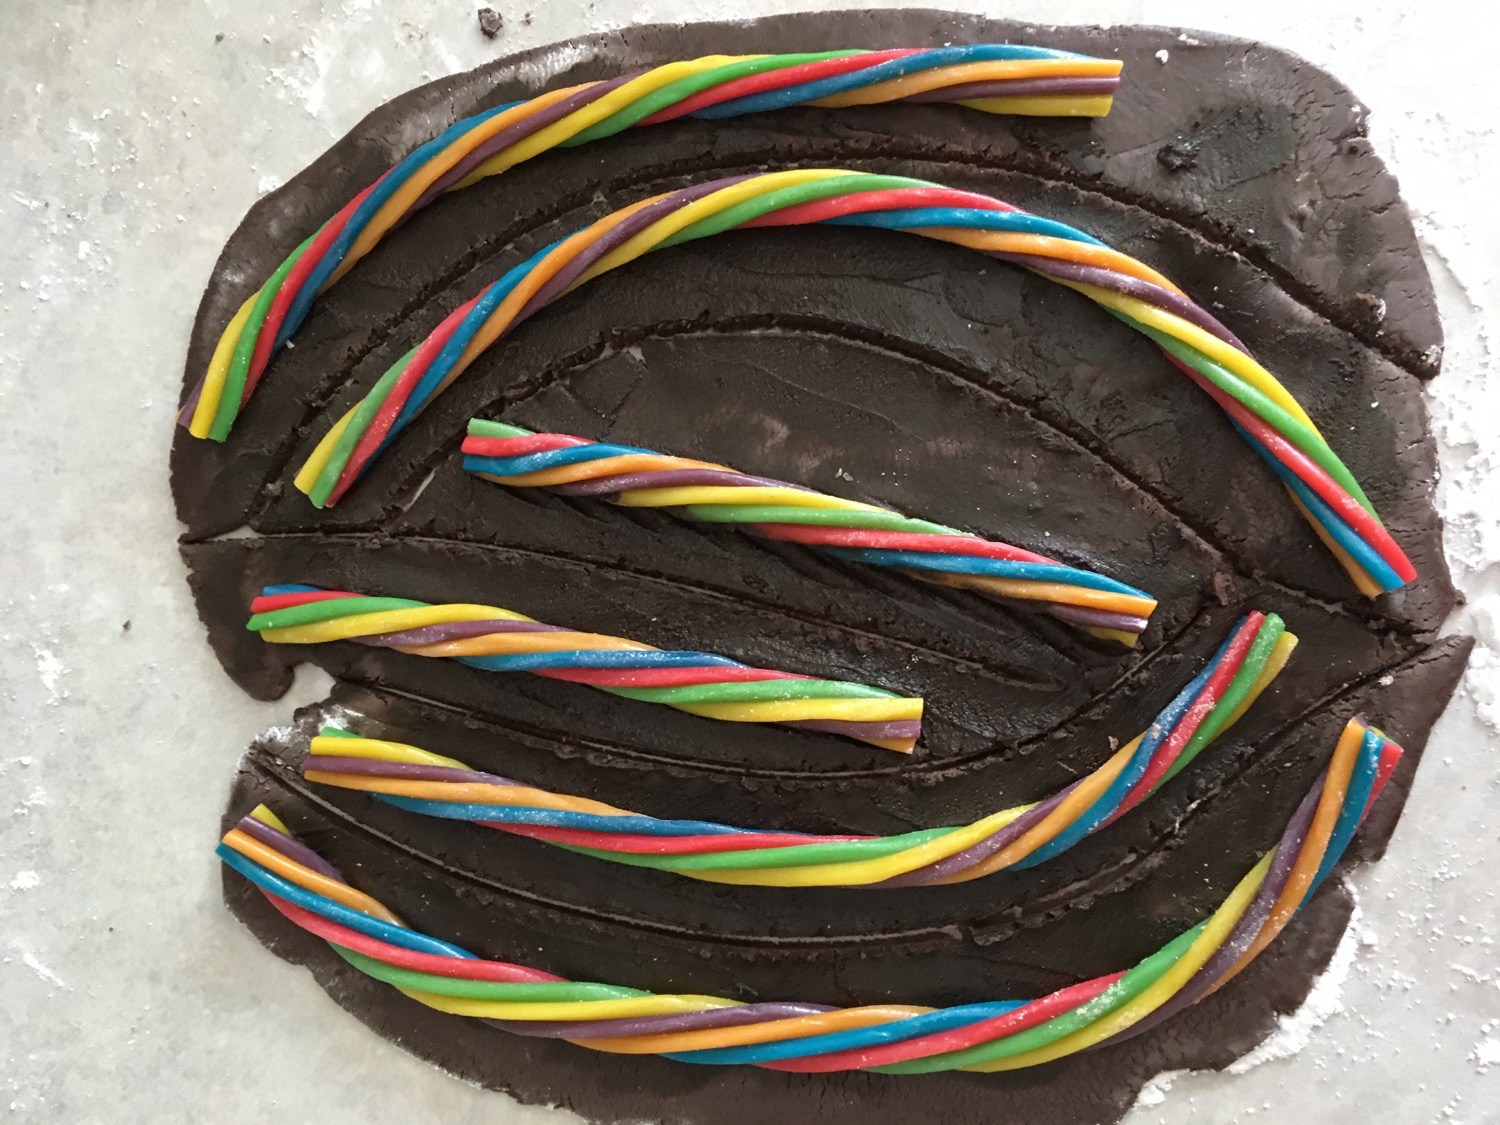
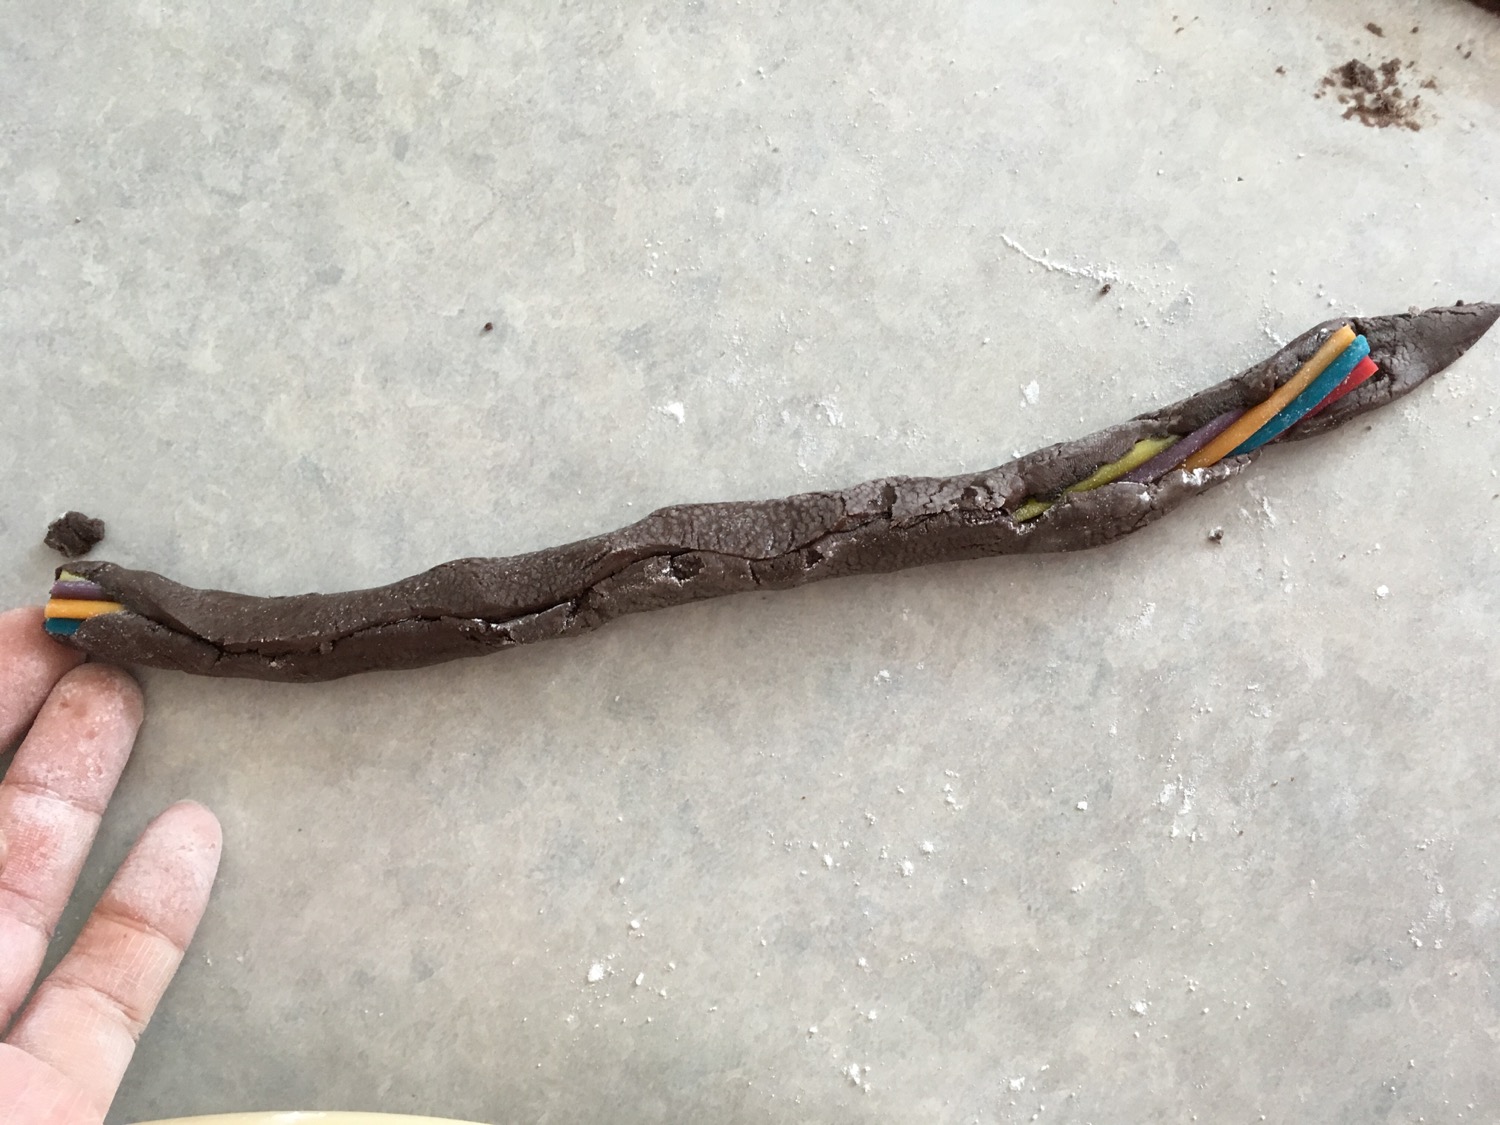
I covered the topper with plastic to keep it moist while I worked on the root system. I had hoped to find black licorice ropees at the Bulk Barn, but instead found these ropes – and they worked great.
I rolled out the last of my fondant, again gave it a coat of buttercream for glue, laid out the licorice ropes that I had pre cut into lengths that I wanted to work with.
Fondant coated with buttercream and spaced out licorice ropes.Cut around each rope, leaving some fondant to wrap around and cover the licorice.It was fine if it didn’t cover it all, I would be putting the seam side down …
I again coverd the fondant roots with plastic to keep them moist and brought out the cake to start final installation!
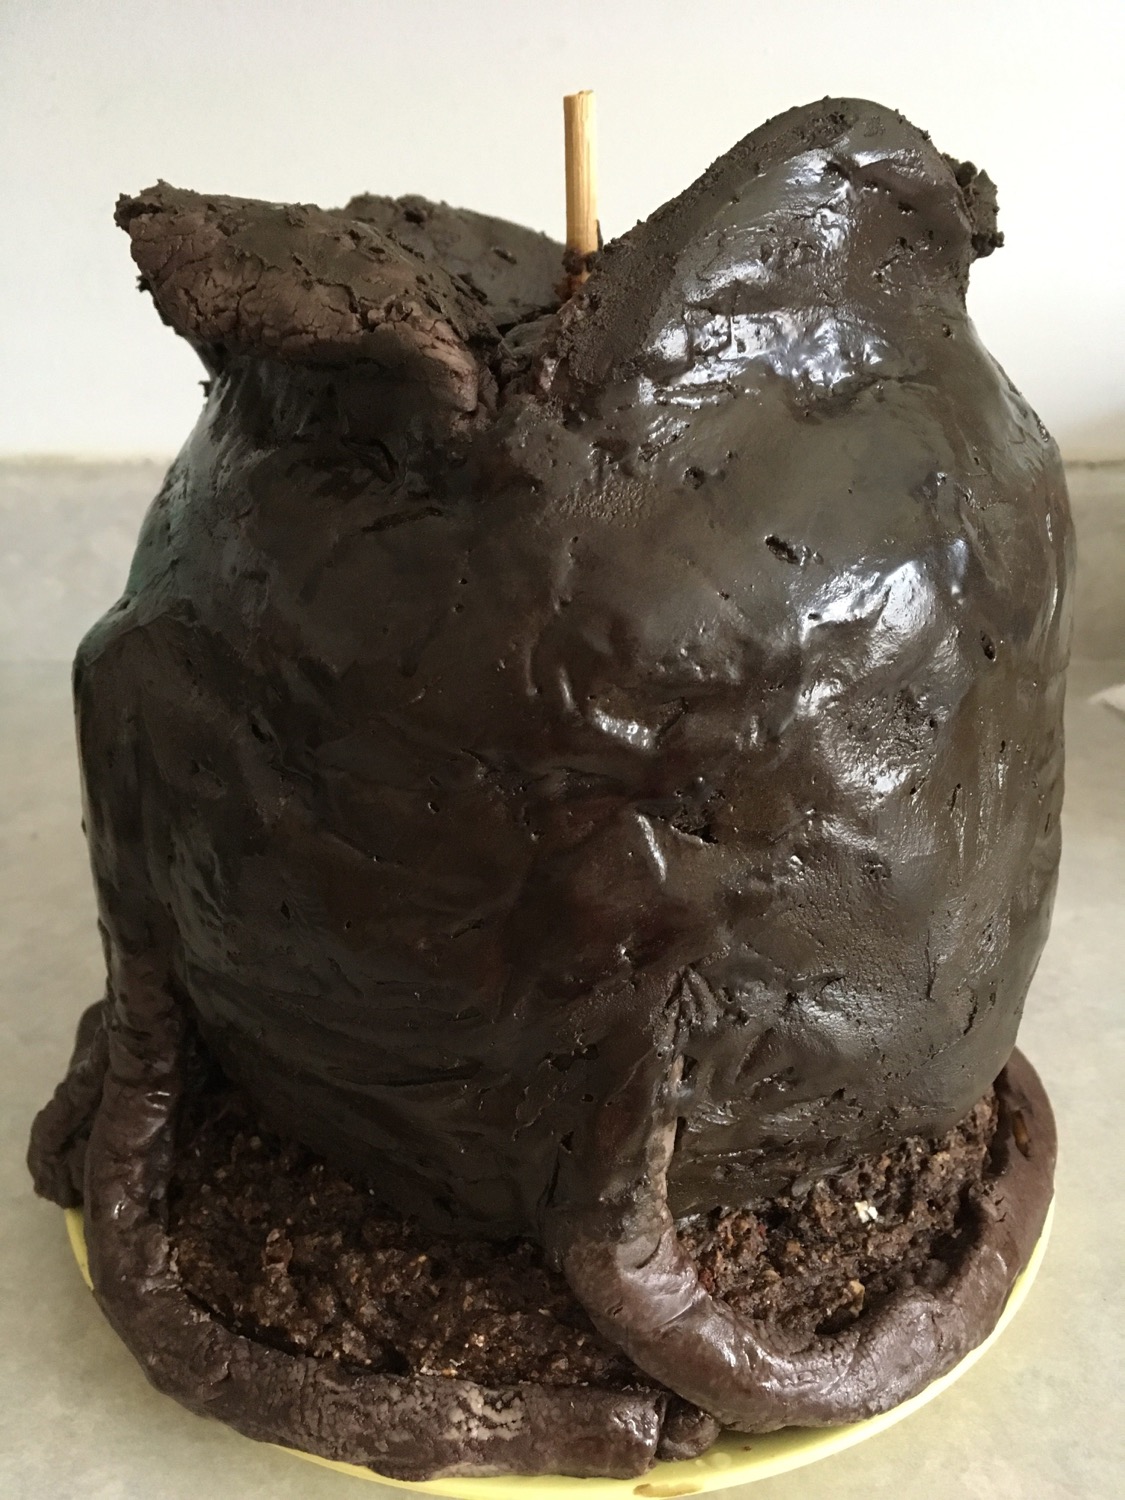
Placing the topper on was an easy, flip it off the plastic onto my hand, then flip it onto the egg, where I had spread a bit more buttercream glue. I did use toothpicks to help hold it in place, esepcially with the curving open of the flaps.
The topper applied.Skipping ahead visually – the roots have been applied and the buttercream outer layeranother view
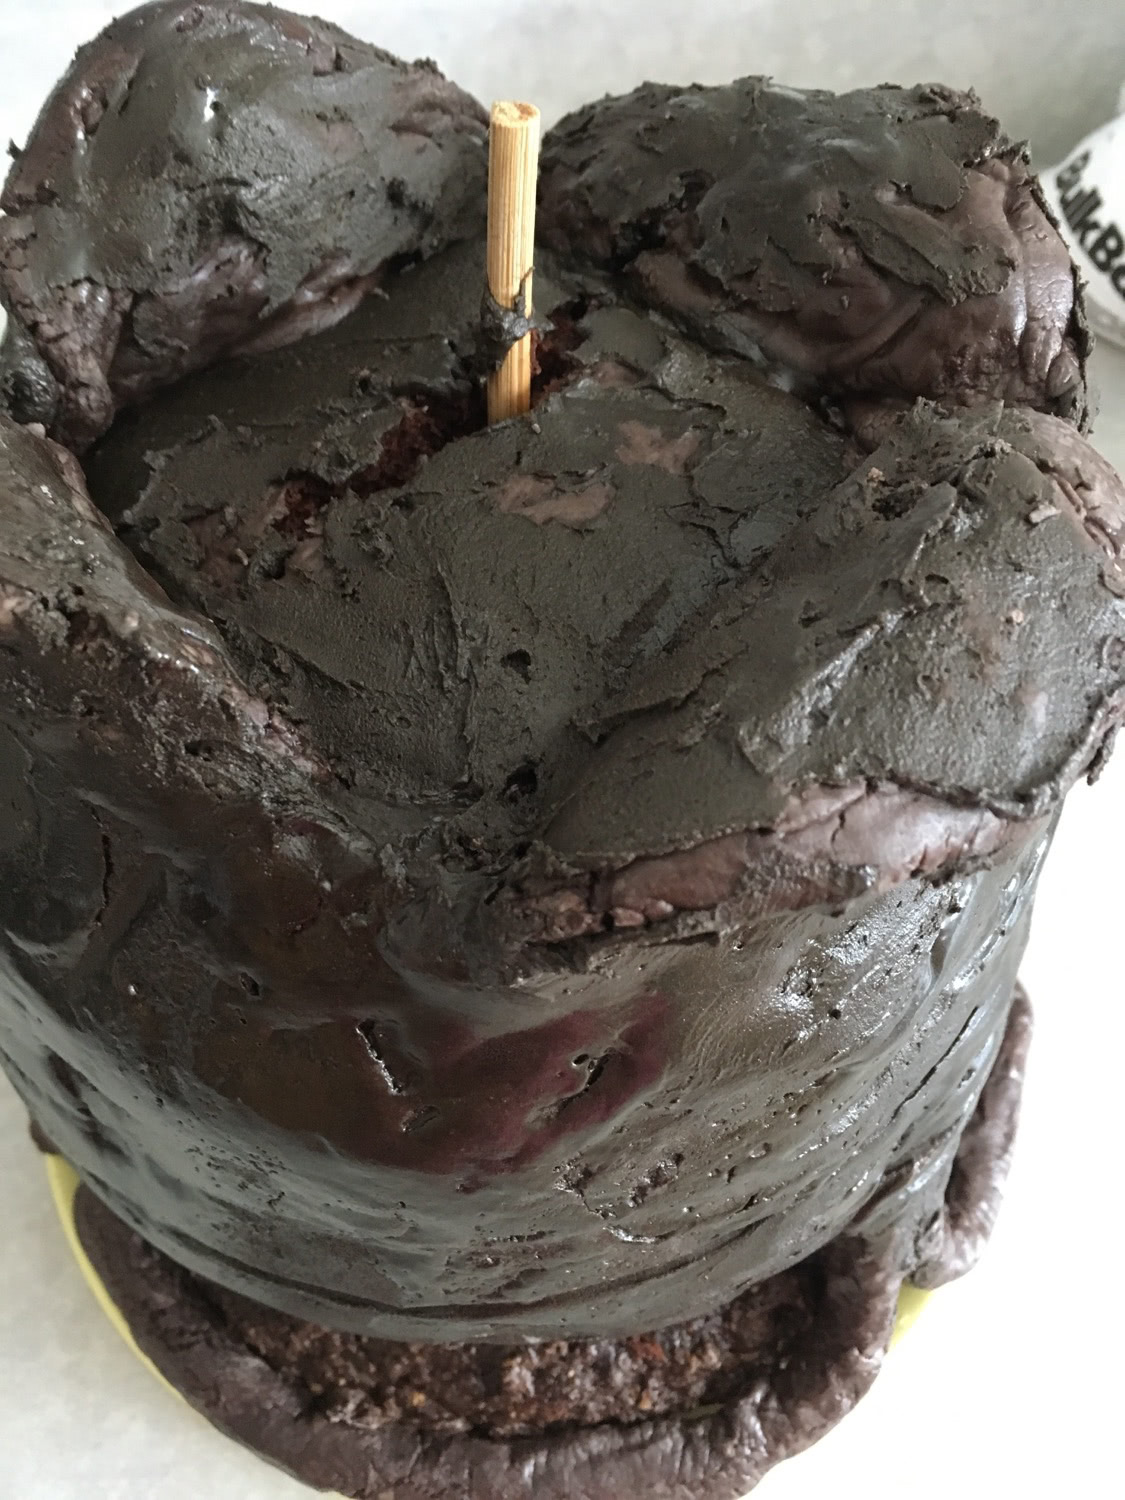
After applying the final coat of buttercream, I was smoothing out the finish by hand, wetting my finger tips and gently polishing the icing , and the cake did start to crack a bit.
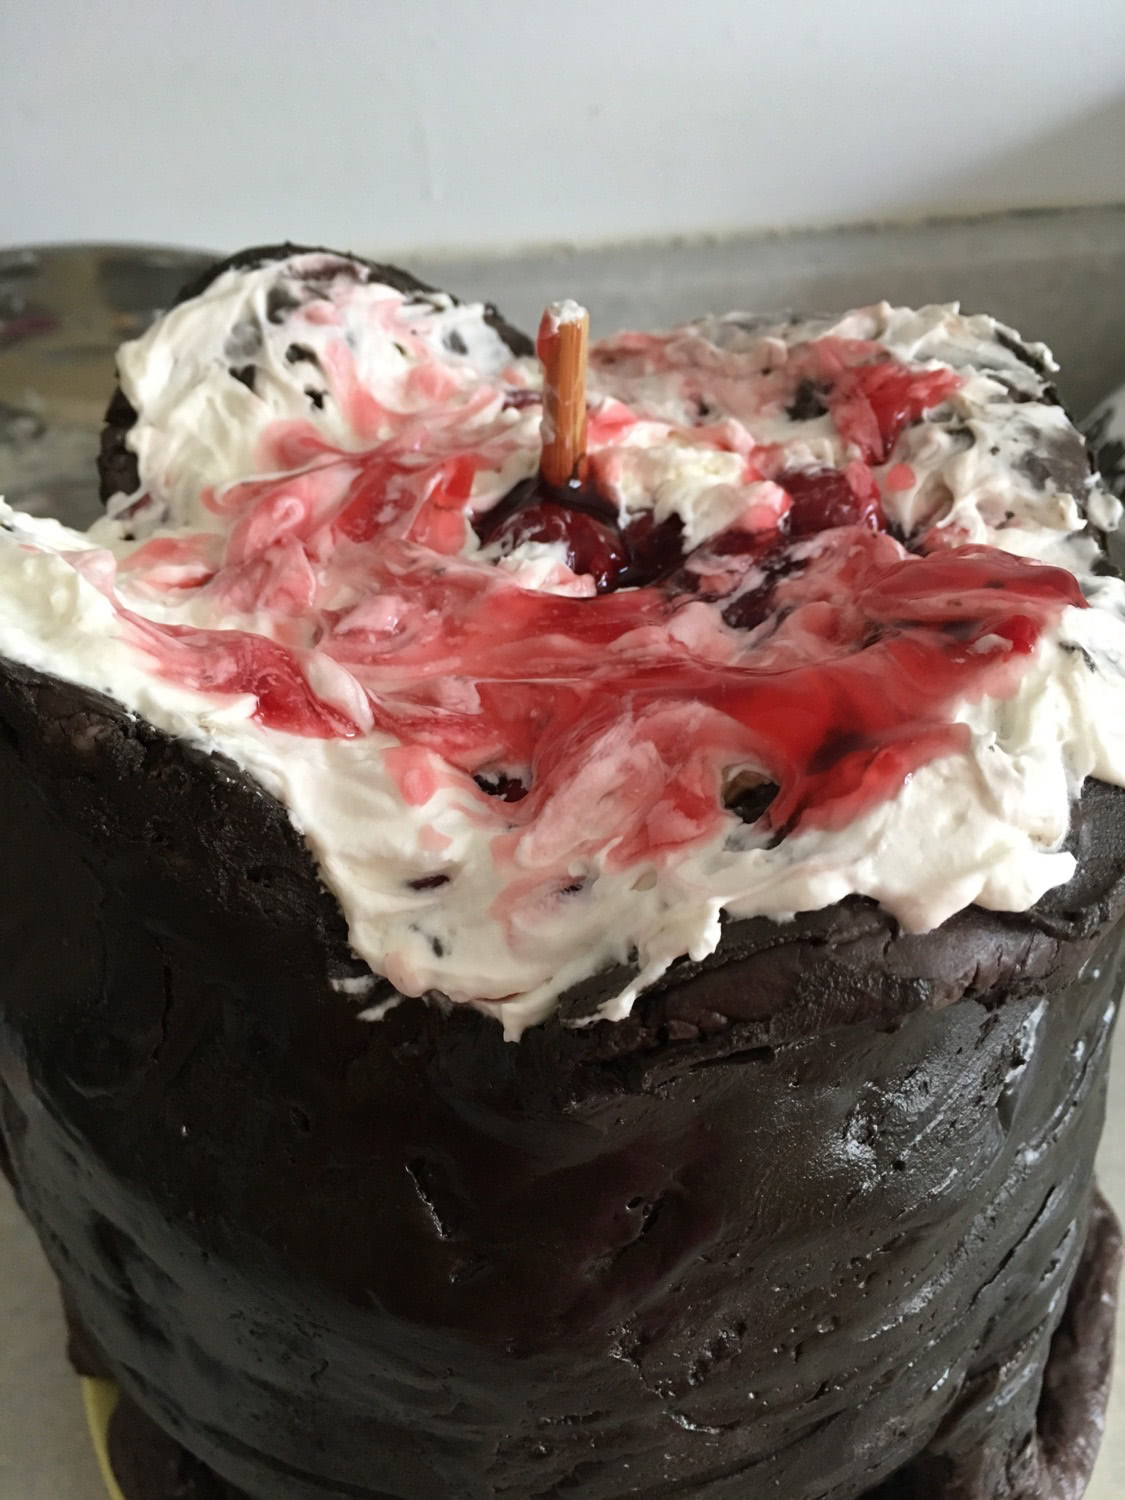
I inserted a chopstick in to anchor the layers a bit, but more importantly, I wrapped it with a plastic bag that I cut lengthwise so that I would be able to compress the cake together – sorry no pics, and I used a second bag to compress and hold the flaps in positioning as well, and then put the cake back in the fridge for a solid 2 hours! It worked!
What – cracking?
Finishing!
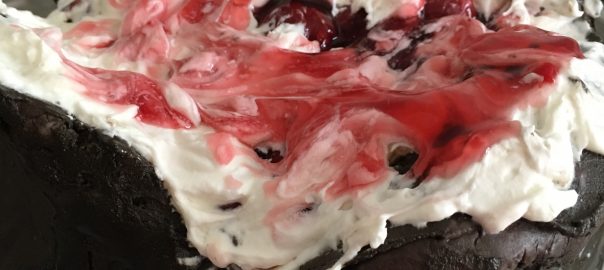
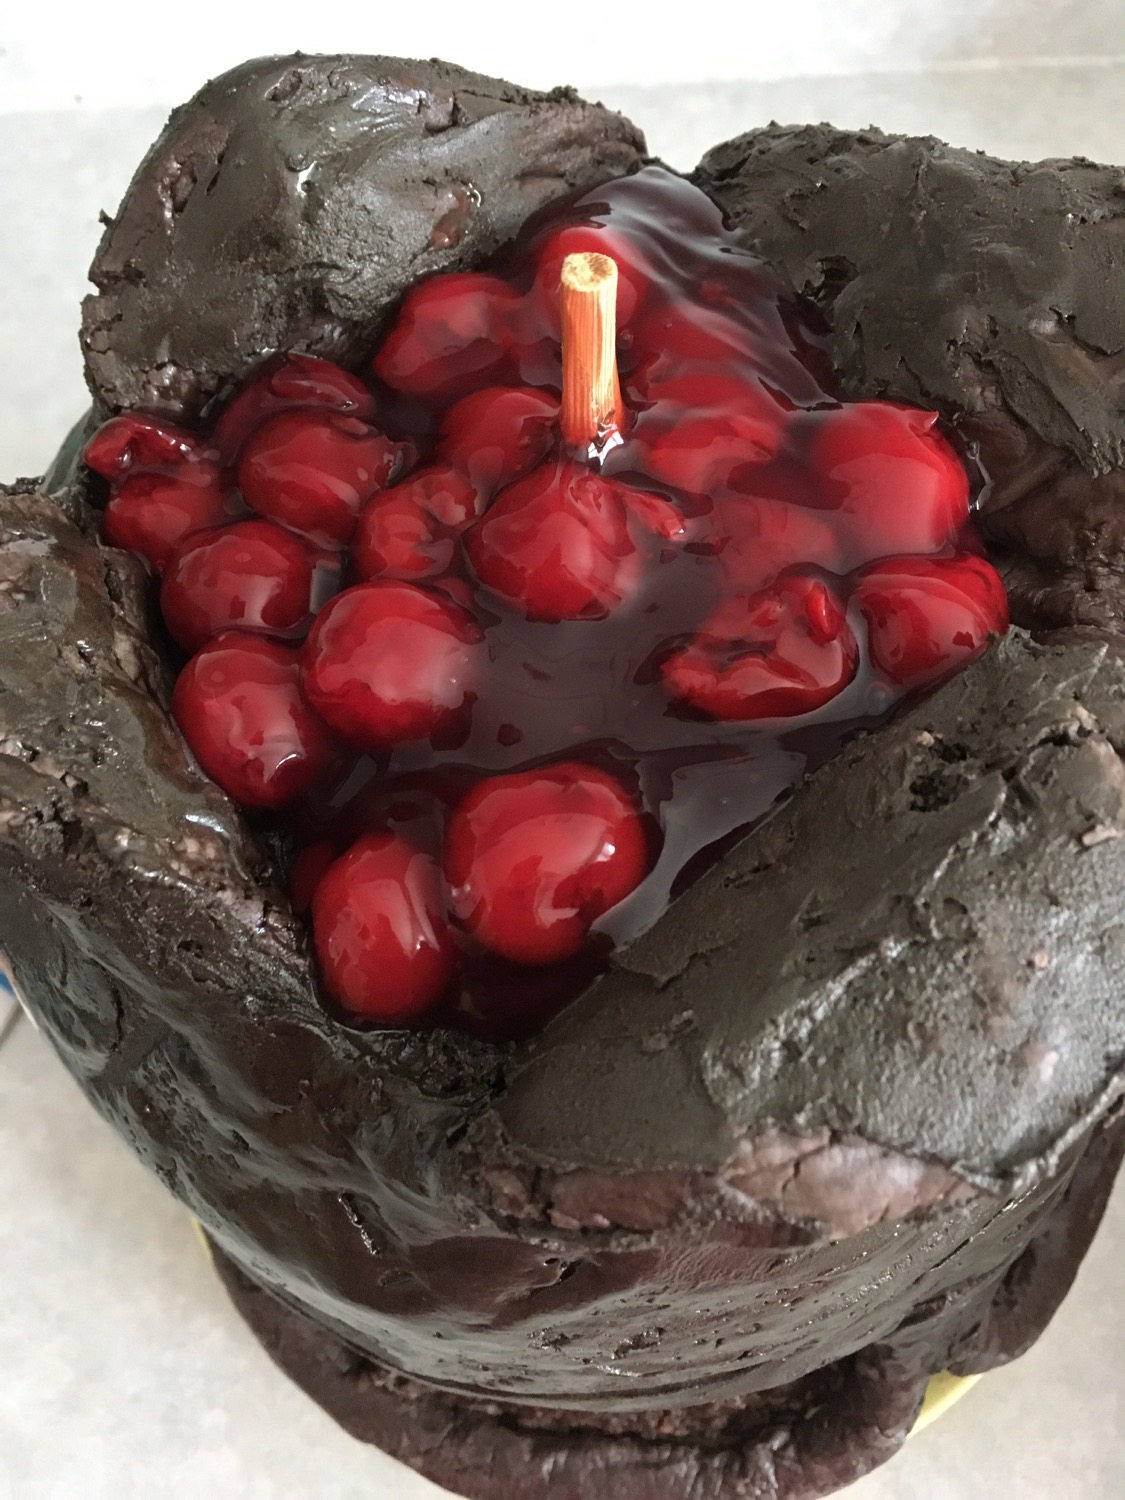
Once the cake was feeling good and solid, I was able to do the final finish to the top – more pie filing and whipped cream together in a messy goo!
Buttercream on the cake, then the pie filing with only a small amount of syrup.Stirring up the whipped cream and the cherry pie filling a bit to make it look gooey – while not green, it’s still awesome!
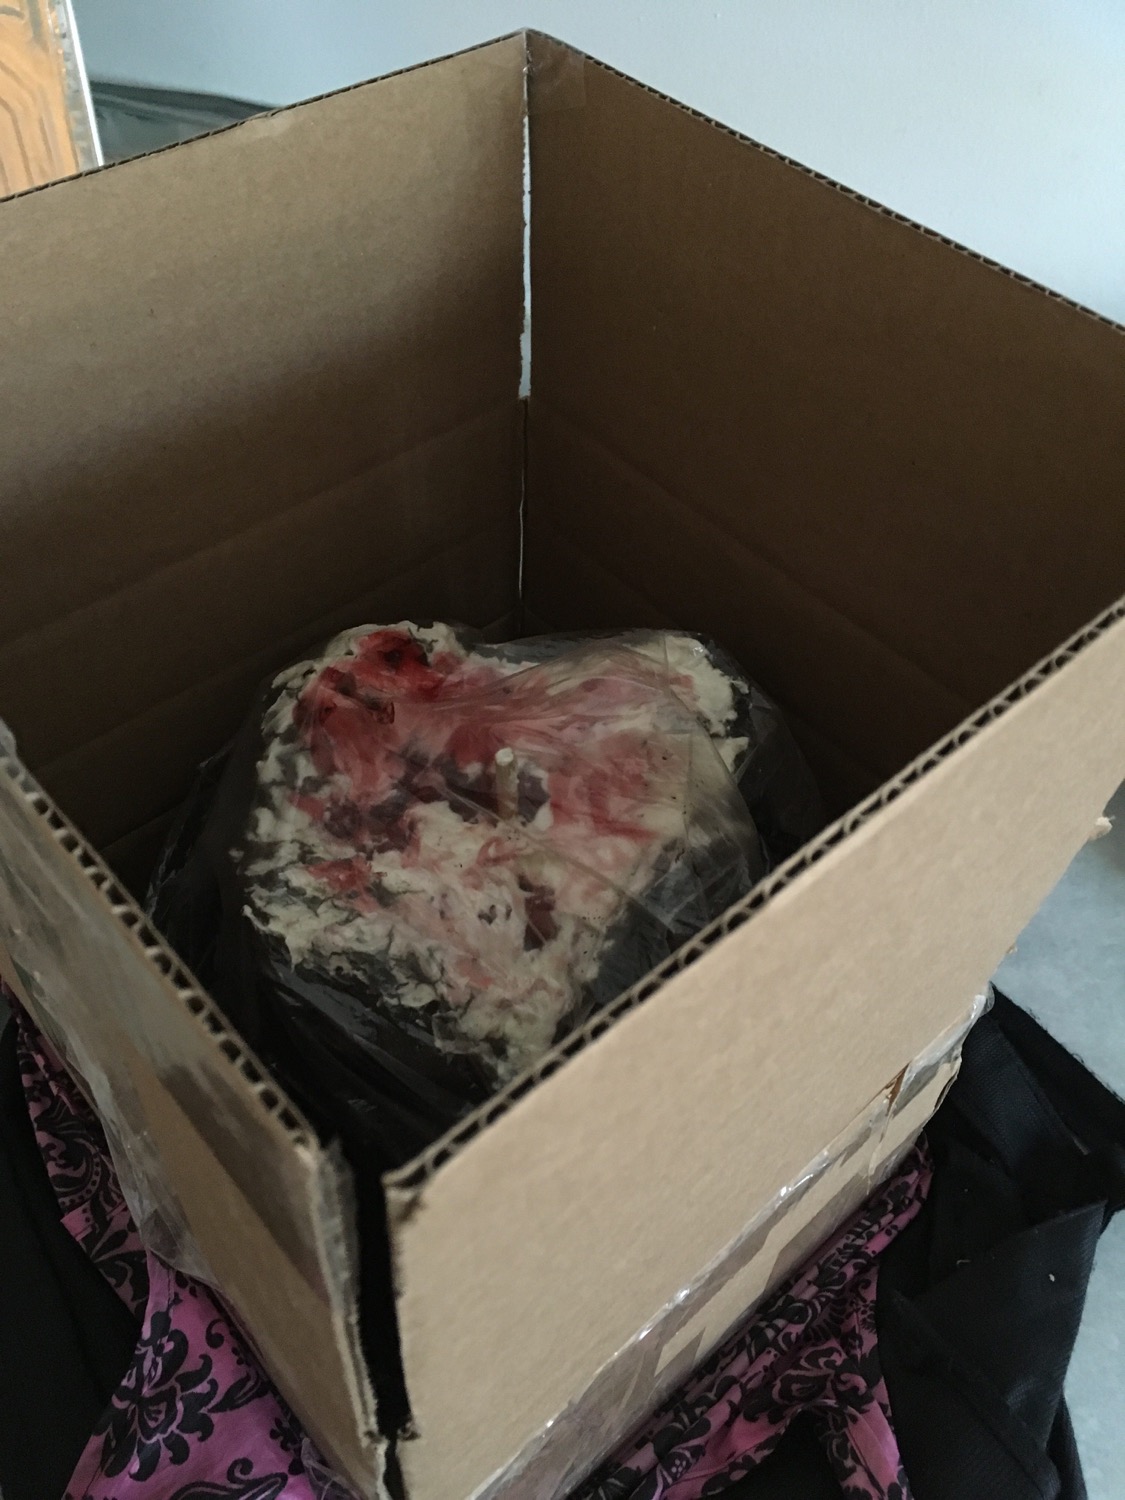
I left the chopstick in while carrying the cake over to the restaurant, and was lucky enough to have received two shipments recently that provided nice boxes that worked for a safe carrying system
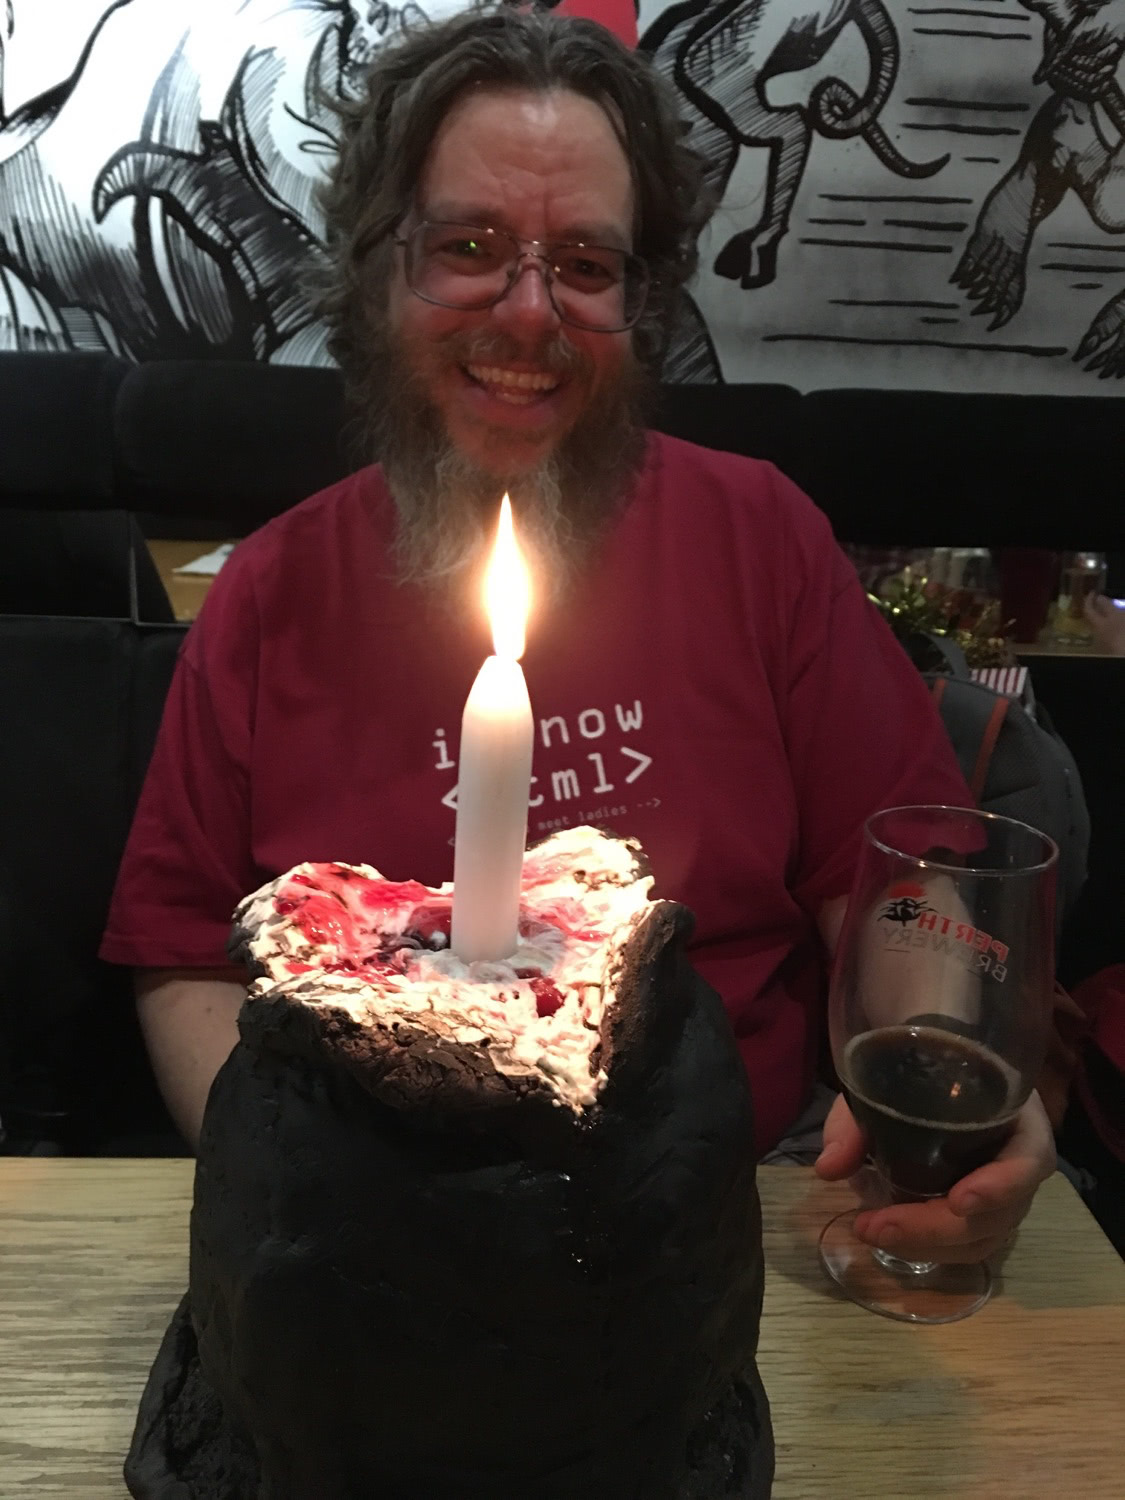
The tall base box was then covered with. slightly larger but shallower lid box. and carried in two tote bags as it was heavy.And someone was very surprised with his cake! Happy birthday, My love!
Next posts < give me a day or two!>:
Part 1.5 – Where is that pesky FaceHugger?
Part 2 – Someone is having a bad day…
Heading out later today in a snow burst ( March in Ottawa!) to hang with the crafty ladies and I felt inspired!
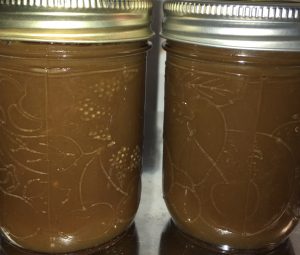
So I am having fun making curd – there’s lots of types of curd- have fun googling your own recipes too!)
I have a bad of “imperfect” mixed berries in the freezer and a load of eggs so I figured I could make a textured fruit curd with some meringues …
Just the facts:
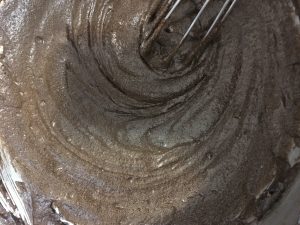
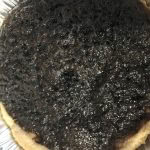
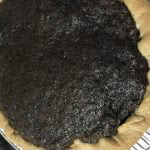
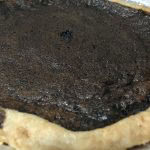
Mixed Berries Curd:
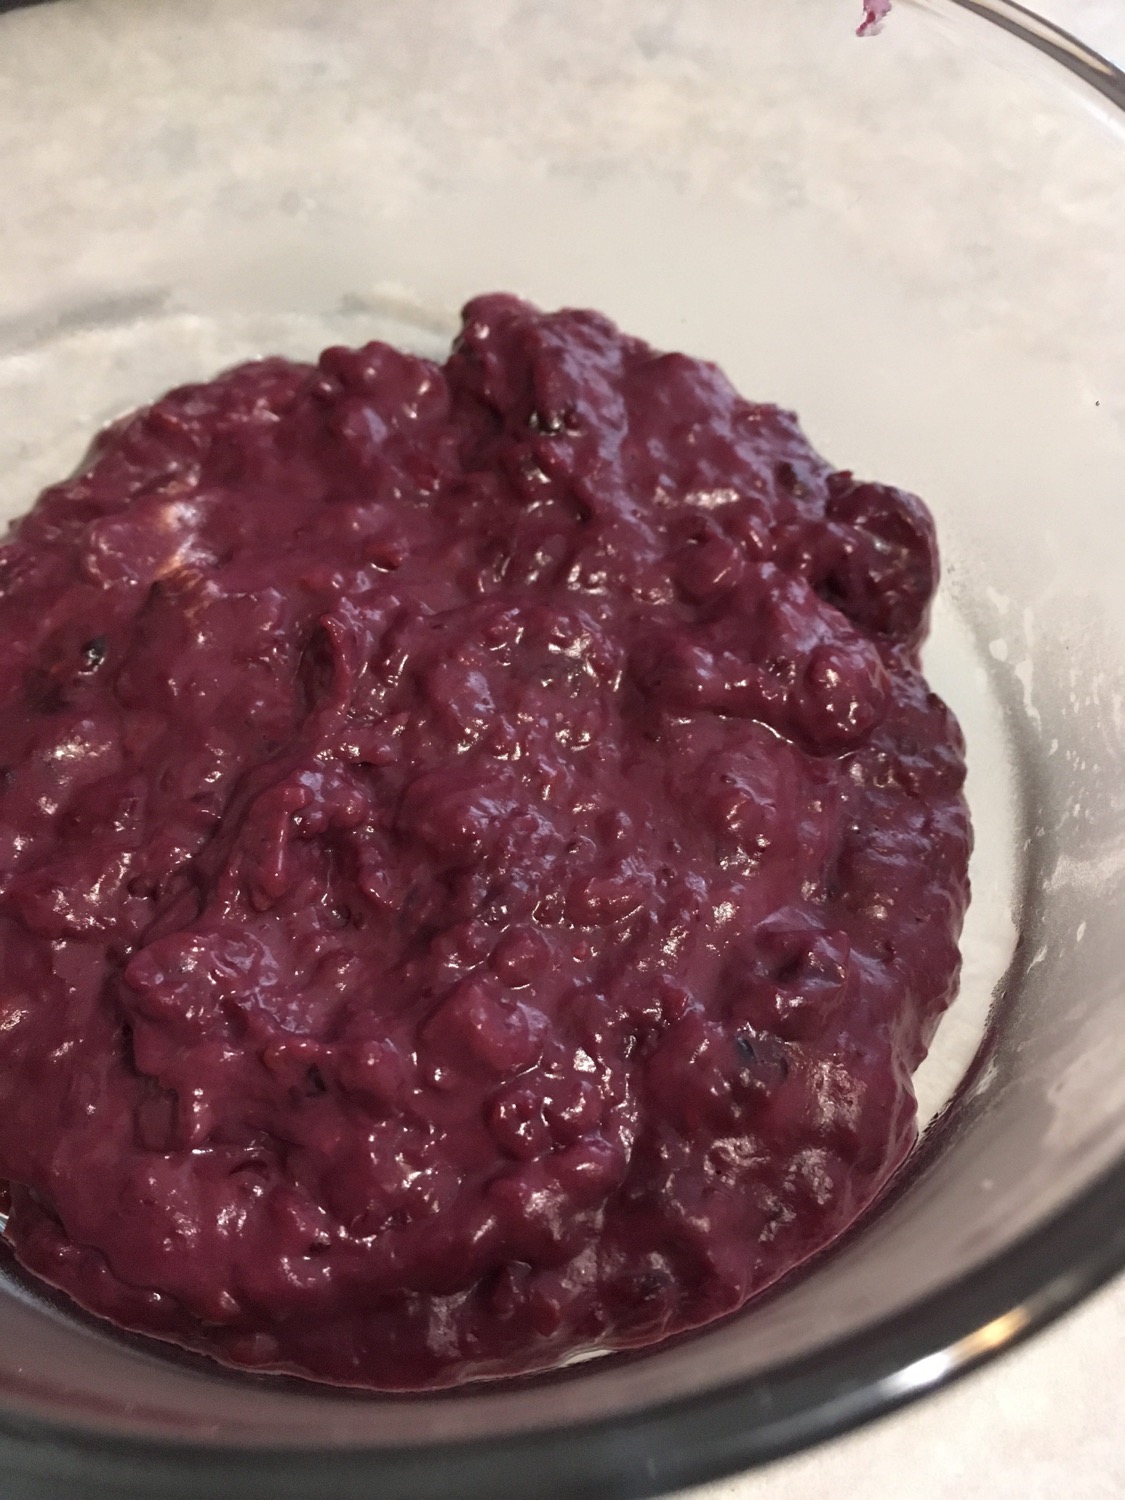
Look at that colour – Mixed Berries Curd
2 cups frozen berries
4 egg yolks
¼ cup brown sugar
1 tablespoon corn starch
¼ cup butter
Heat the berries in a medium saucepan until they are bubbling and melty.
In a heat proof bowl, mix the egg yolks, sugar, constarch until smooth.
Pour some of the berries into the egg mixture, stirring constantly and mixing well, then dump it all back into the larger saucepan, stirring to mix all and ad the butter.
Mix until it all melts and then cook over low heat for 15-20 minutes – you can check with a thermometer to ensure that it reaches 160 degrees so that the eggs are fully morphed into safe food.
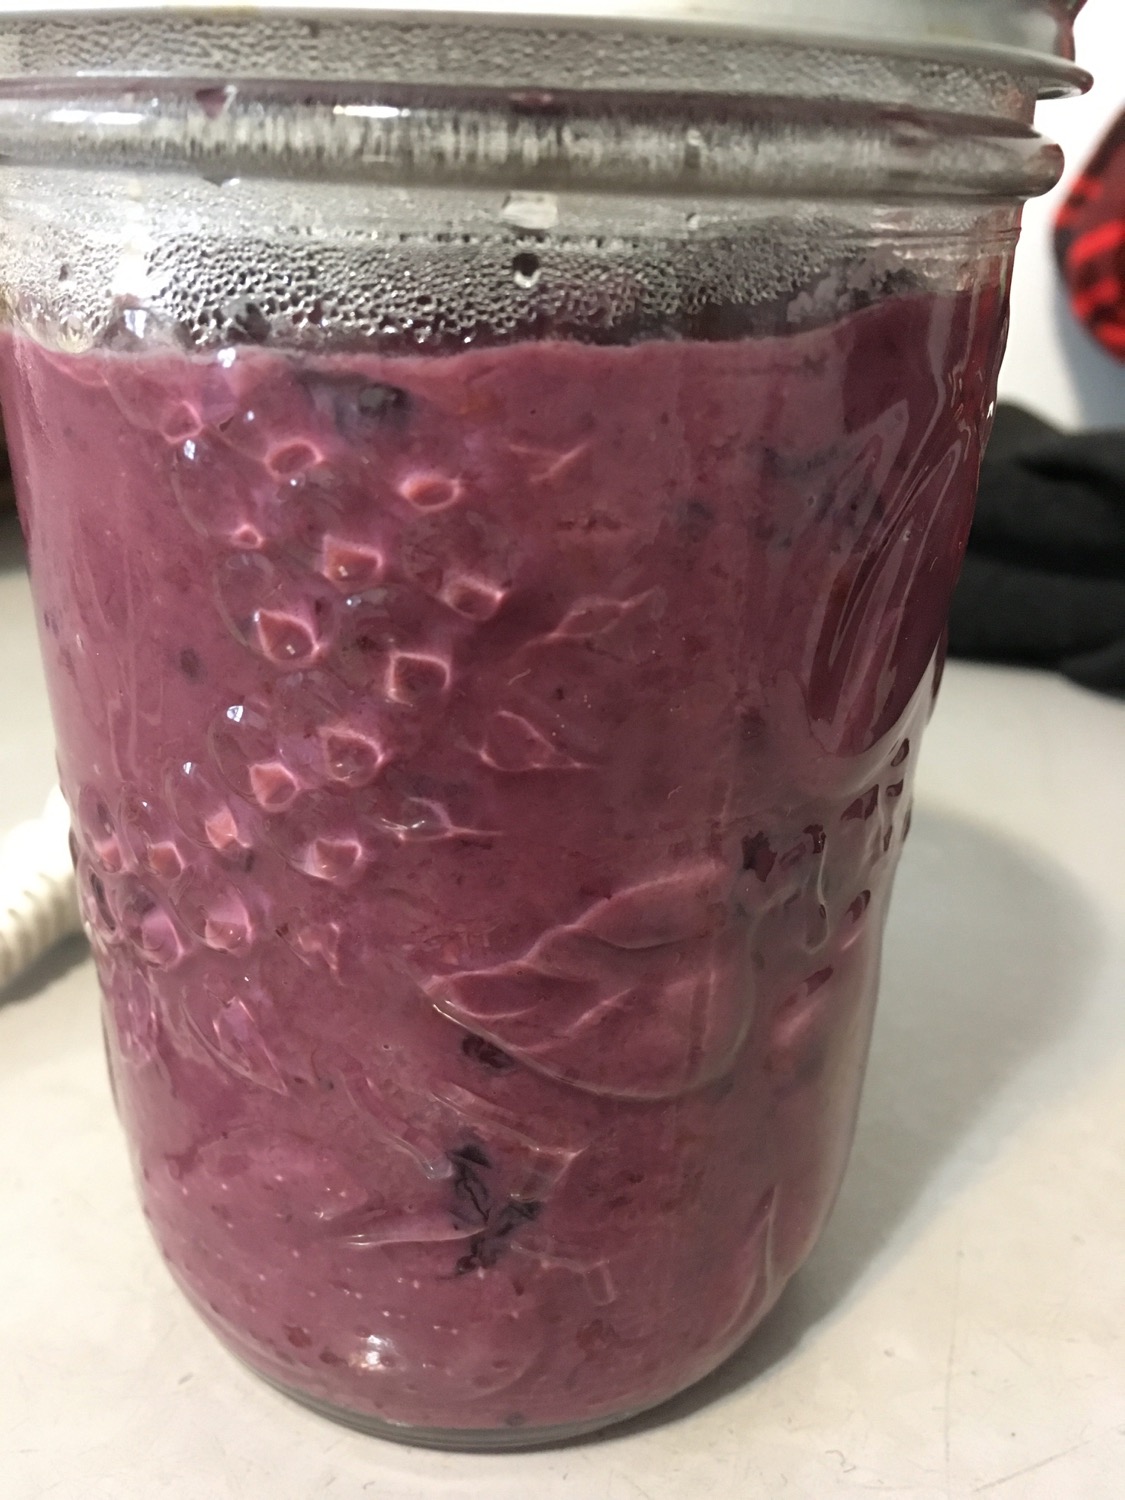
Pour into a mason jar or a bowl – you can use wax paper on the surface to keep that dark film from forming, or just go with it.
Mixed berries Curd
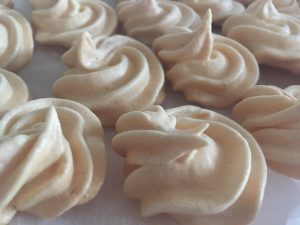
Meringues
4 egg whites
½ cup icing sugar
¼ tsp cream of tartar
½ tsp vanilla
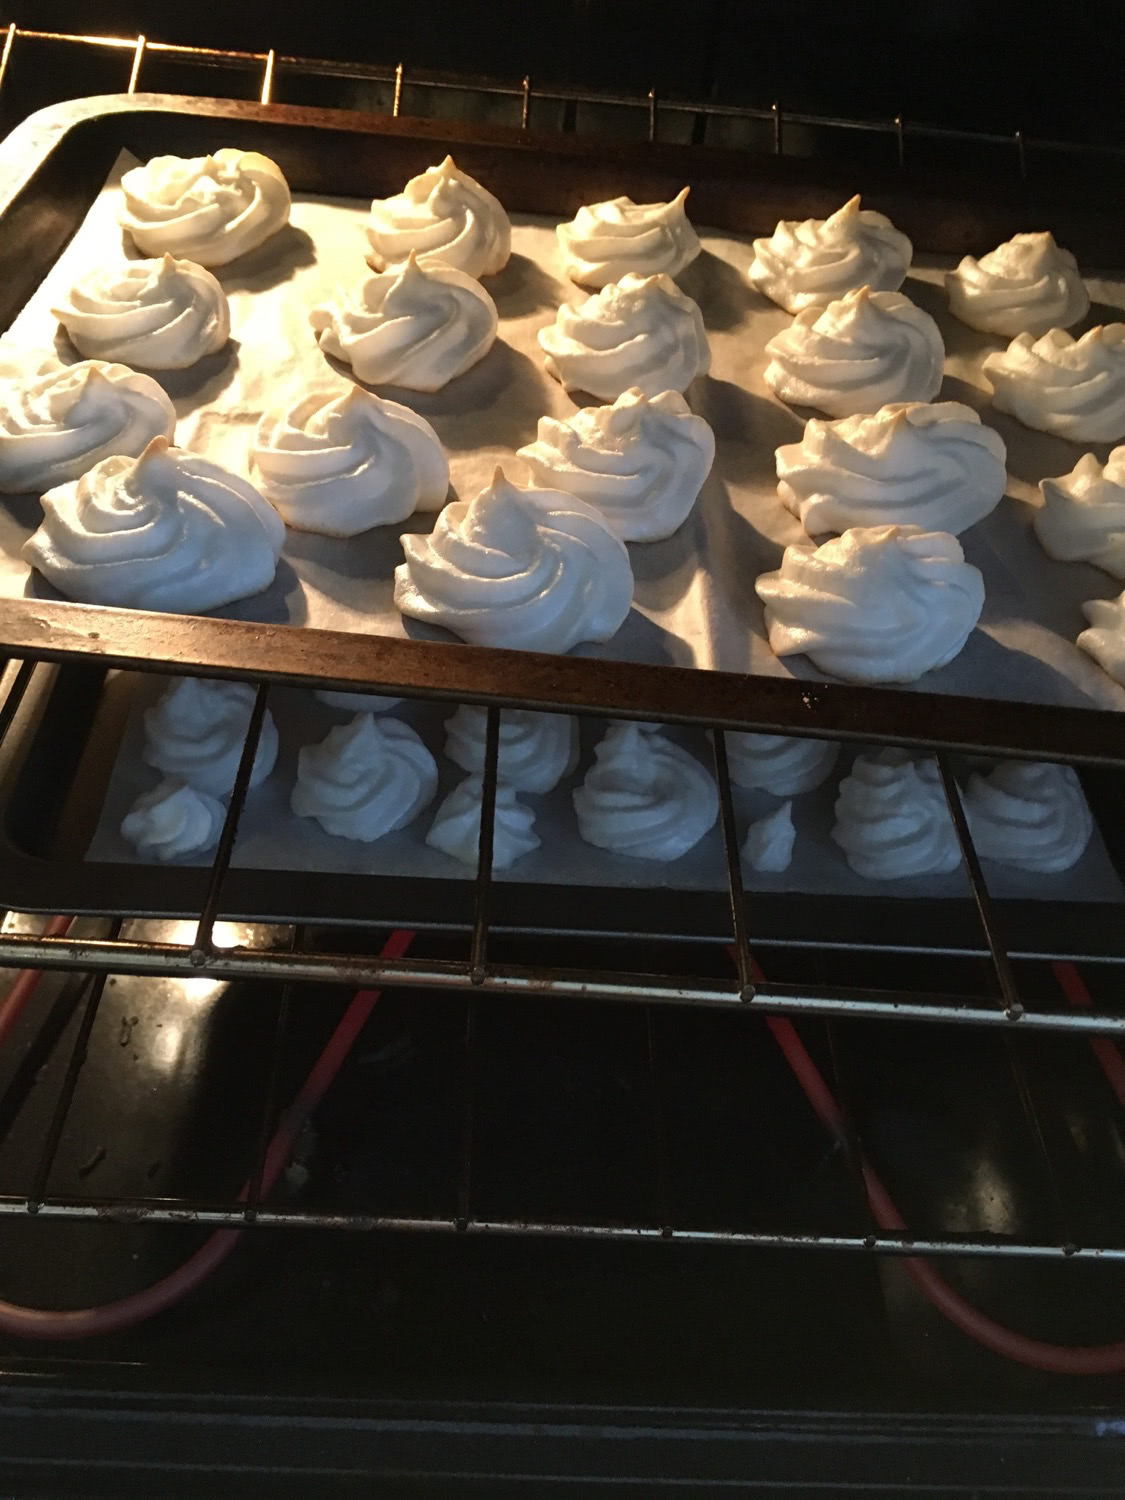
Preheat oven to 275 < the recipe I used said 300, but that felt too hot>. Line a cookie sheet or two with parchment paper.
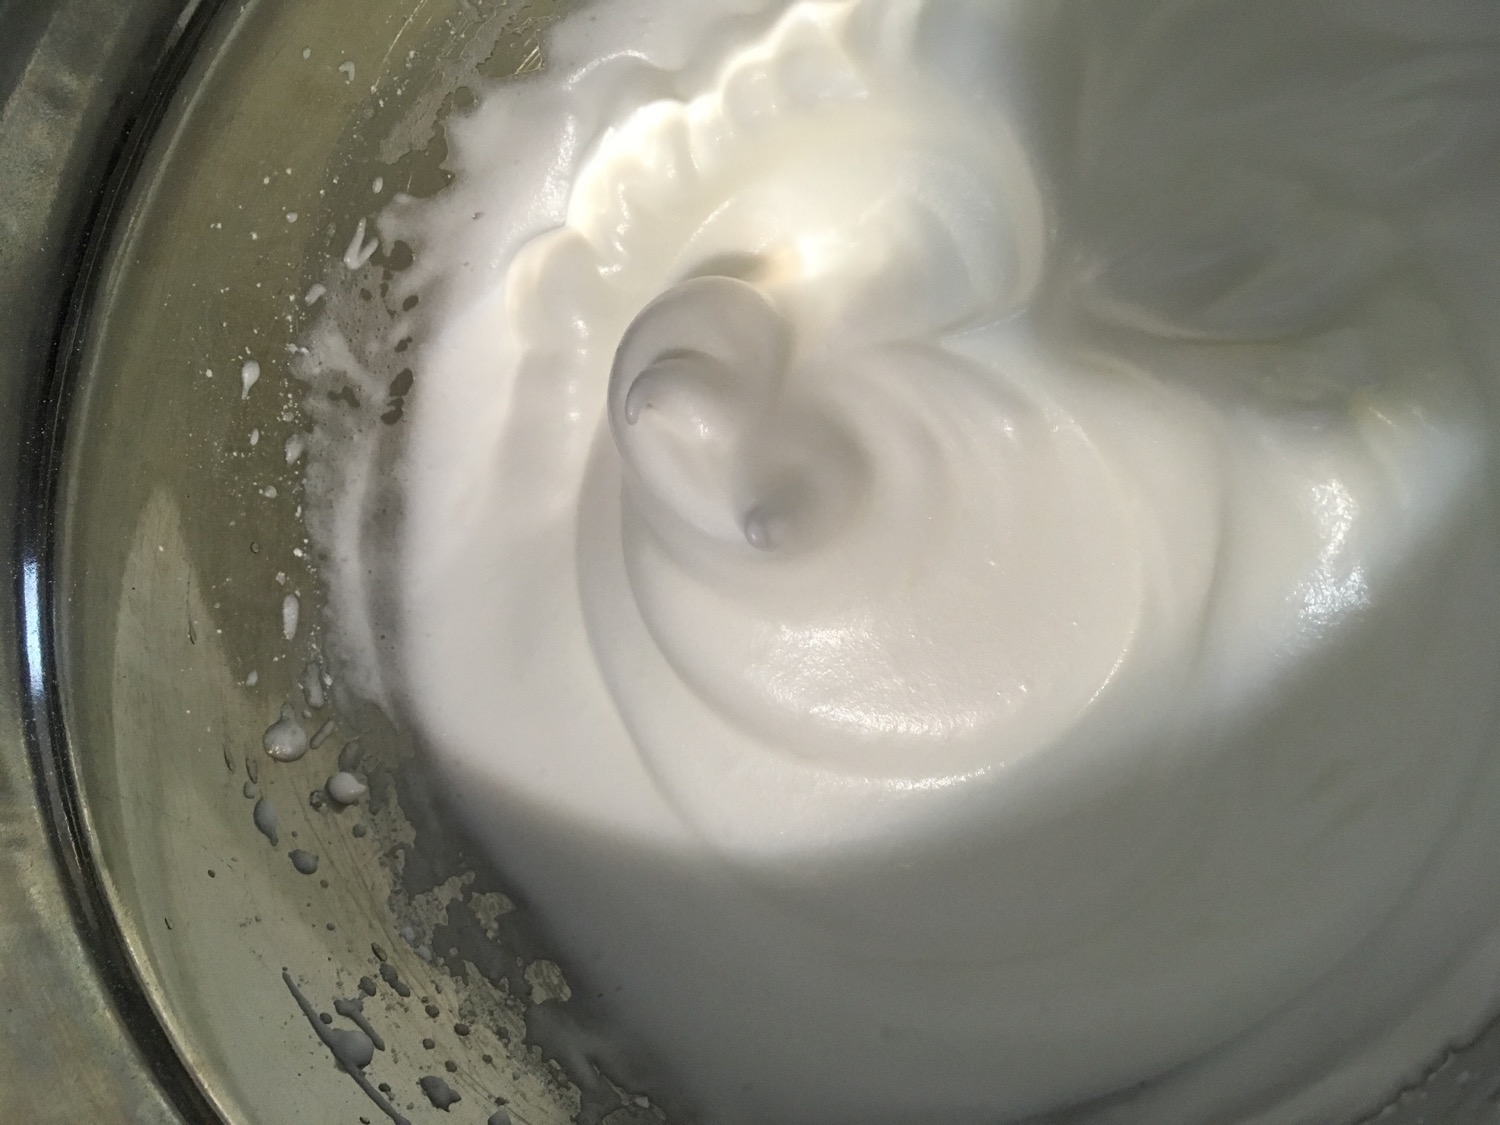
Place the egg whites in a super clean bowl.
Whip the egg whites to soft peaks, using a hand mixer or plan to get a workout if whisking by hand.
Add the sugar gradually, a spoonful at a time, whipping the entire time until all of the sugar is in. Add the cream of tartar and vanilla, still whipping those egg whites.
So pretty – whipped to fluffy yumminess!
Pipe or dollop out the meringues onto the parchment paper in the sizes you want.
Bake for about 30 minutes if bite-size, 45 minutes to an hour for larger ones.
Turn off the oven after that time, and let cool in the oven for 1-2 hours to help dry them out.